Joss & Main Exclusive online private sales for the home

Tuesday, December 31, 2013

How to Replace an Electrical Outlet

I am in the process of installing under-cabinet lighting to show off my new backsplash.  I despise visible wires so I needed to find a way to plug in my under-cabinet lights someplace "invisible".  hehe.  My cousins just did the same thing and they gave me the idea to switch out the single microwave outlet in the cabinet above the microwave for a double one.  Then I just need to drill some holes in the bottom and sides of my cabinets and I can plug the lighting in there.

This was my first experience with electrical work and it was much easier than I anticipated so I figured I would share a how-to.  I did a little research and an electrician would charge anywhere from $100-$200 for this type of work.  The actual outlet only cost about $5 so I think it's totally worth it to DIY this one!

Here's how it's done:

1. Figure out your circuit's current in order to purchase your new outlet.  Most household circuits are 15 amps.  However, some appliances, such as the microwave may need 20 amps, as was the case with mine.  You can tell the difference because a 20 amp outlet has a "T-shaped" prong hole, whereas the normal 15 amp outlet just has straight prong holes.


(source)
New outlet and cover

2. Turn off the electricity to your outlet via the circuit breaker!!!

3. Remove the existing outlet by unscrewing the top and bottom long screws.  Note the colors and how the different wires are attached.  The black wire is the "hot" one, which carries the current, the white one is neutral and the brass/bare one is the ground.

4. Remove the white and black wires from the existing outlet by loosening the screws on either side of the outlet and pulling them out.  Remove the ground wire with pliers.

5. Attach the wires to your new outlet.  Insert the black wire in the hole next to the brass-colored screw (black = brass), then tighten the screw.  Insert the white wire into the hole next to the silver screw.  Use pliers to wrap the ground wire around the green screw on the top (ground = green).

6. Insert the new outlet into the receptacle, screw into place and cover with your new outlet cover.


Now I am hoping that I get the energy on New Years Day tomorrow to install the under-cabinet lighting!  Has anyone else installed under-cabinet lighting themselves?  I'm considering doing some above-cabinet lighting too, but I can't decide... any thoughts?

Until 2014... HAP-py New Year!!

Friday, December 27, 2013

2013 Rewind

As 2013 draws to a close, I am taking a look back at all of the progress we have made on our new-construction home since October of 2012.  Here are some highlights of my favorite projects so far.  We still have a long way to go, but we have definitely seen a lot of progress in one year.

1. The DIY Pantry Spice Shelves were our (my dads) very first project.  Nice little shelves that he whipped up in about an hour to store all of my little spice bottles right in our pantry.


2. My first "all-by-myself" project was my DIY Fabric Nailhead Trim Headboard.  I was thrilled with how it turned out.  We still have a long way to go on the master suite, but at least we have a soft place to lean while reading in bed.  I also made an empty frame gallery wall for the master bedroom from some old frames that I freshened up with spray paint and I made-over an old bench that I took from my dad's house for the foot of the bed.

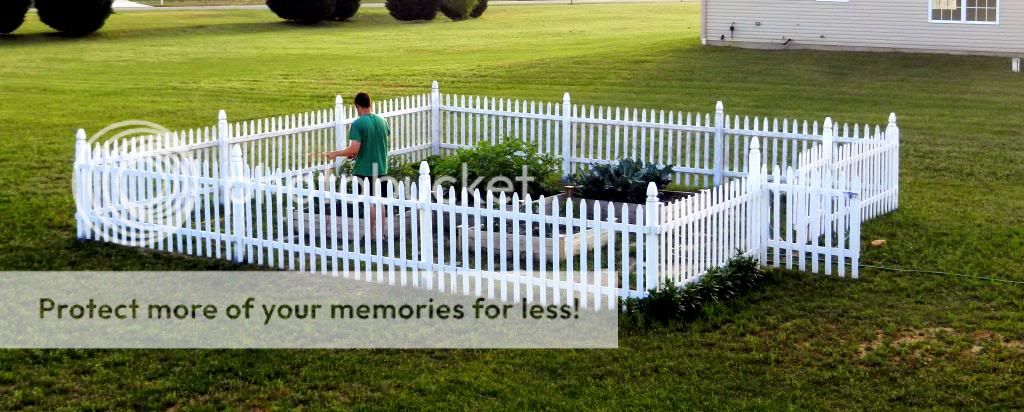
3. Greg built us an awesome fenced-in garden!  We enjoyed peppers, zucchini, broccoli, potatoes, tomatoes, basil, and carrots all summer!  Next year we're going to expand and try some new crops like corn.

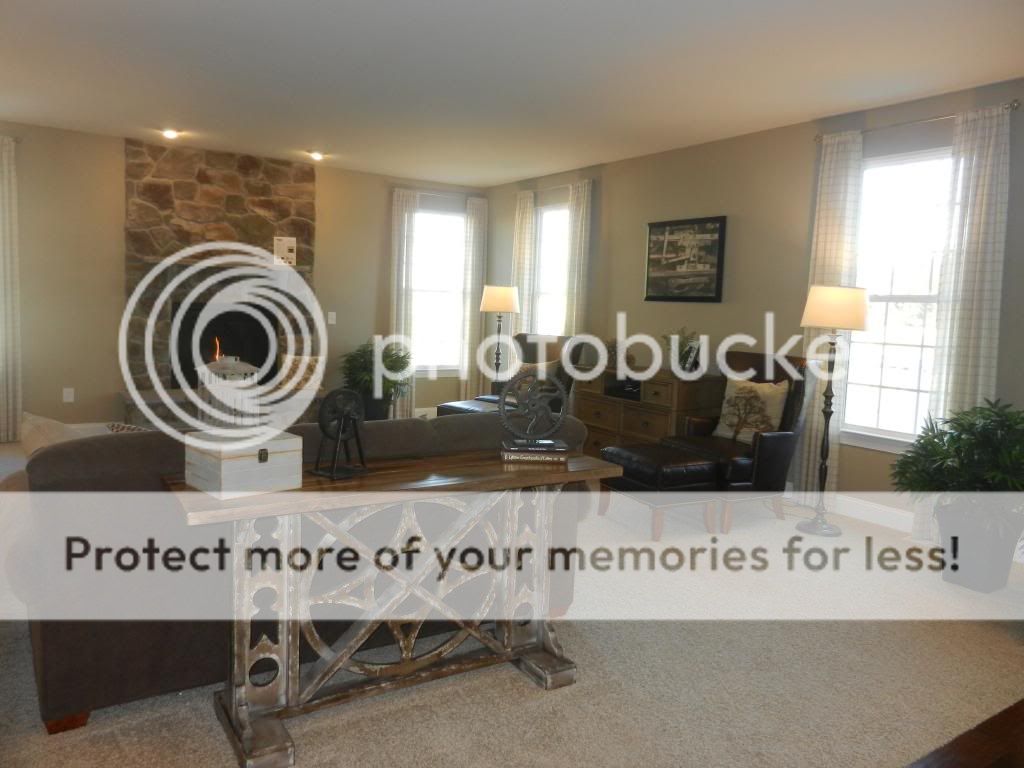
4.  After receiving a bunch of awesome wedding canvas prints from my sis-in-law for Christmas last year, I created a Gallary Wall in the family room to display the canvases and some other memorabilia from our wedding and honeymoon.  That spot looks awesome now that I finally got my chairs!

5.  Another major addition to the family room were my No-Sew Burlap Curtains and Galvanized Steel Pipe Rods.  These were so easy to make and only cost about $20 per set (including the rods).  You can check out the complete family room transformation here.

6. My DIY Coasters from Flooring and Paint Samples were a little 15 minute project.  These are completely free (just need samples from Home Depot and some sort of clear sealant). 


7.  I built some shelves for the powder room.  That room is just about complete.  I want to add some trim work, then it will be done!
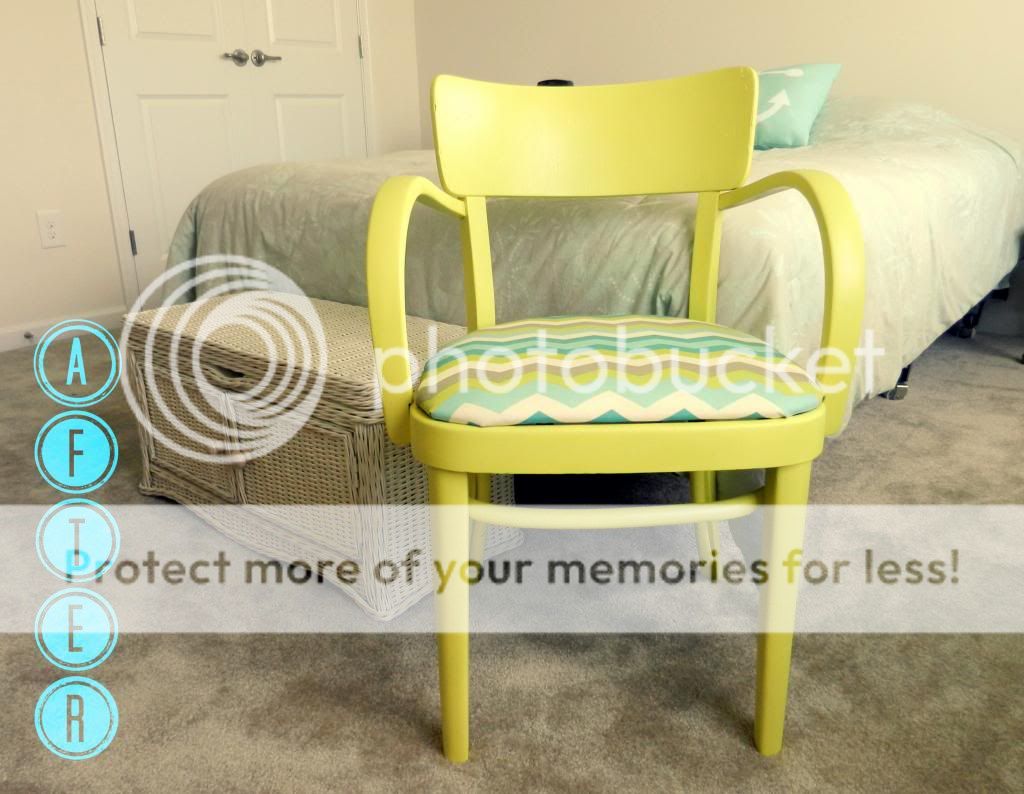

8. I made-over an old chair that I inherited from my grandmother with some fabric and spray paint for our guest room.

9. I recently jazzed up the kitchen with my DIY Painted Backsplash.  It makes me smile looking at those bright and cheery colors every morning :).

And the DIY project I am most proud of is...
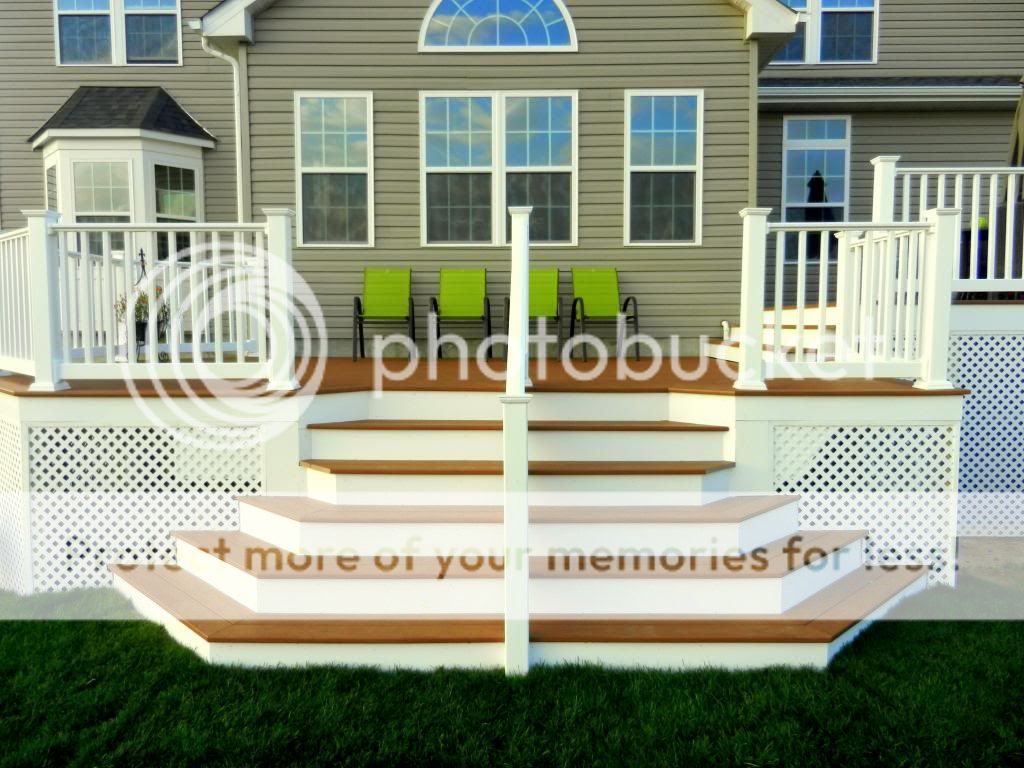
10. The Deck!  After a 6 month wait and 3 months of hard work (we took off over the winter), we finally completed our bi-level, TimberTech XML deck with waterproofed storage underneath.  The deck has become my favorite part of the house.  I can't wait for spring so we can use it again!


Even though we still have a long way to go with the house, it makes me happy looking back to see that we have actually made a good bit of progress.  Now I need to make a plan for what I hope to accomplish in 2014.  Stay tuned!!

I hope everyone had a Merry Christmas!!

Sunday, December 1, 2013

Another Courtland Gate

The Courtland Gate model home in a development near us will probably be closing soon so I hopped over there the other day to get some pictures to share with you all.  I love getting decorating ideas from the model homes.  This house has particularly nice trim work.  I love the extra tall baseboards... wonder if that is a Ryan option?

Here you go!

Family Room...
I love that "window-mirror"
Kitchen/Morning Room...
In my opinion, this is the best change from the Courtland to the Courtland Gate. 
We just have the fridge and a giant wall in this spot instead of the counter and extra cabinets.
Study...
Foyer...
Living Room and Dining Room...
Upstairs...
Master Suite...
Basement...