Joss & Main Exclusive online private sales for the home

Friday, March 28, 2014

DIY Friday {#2} - Hanging Rope Shelves

I recently started my DIY Friday series to try to motivate myself to complete some of the hundreds of projects I have pinned.  My goal is to complete one pinterest project a month and I am happy to report that my first month has been a success.

If you follow me on Instagram you probably saw that I decided to try the hanging rope shelves I had pinned from Casa Cullen. I thought they would be perfect for the space above the toilet in our master bedroom water closet and the nautical vibe from the ropes is the perfect compliment to my beach theme. (I still need to share my finished master bathroom with you guys!)


The complete tutorial is on Casa Cullen's site, so I won't give a detailed how-to, but here's the general idea:  I cut a 1"x10" board to my desired shelf width, then drilled big holes near each corner for the rope to go through.  Then I lightly sanded, primed and painted the shelves.  I mounted a regular old hook to the wall with small plastic anchors.  Then I threaded the manila rope through the holes in my shelves, hung it on the hook, and messed with the height/angle of the shelves until it looked just right.  I cut down a hardwood floor tongue piece that we had left over from the study to slide through the rope below the top shelf to hold it in place.  I just tied knots below the bottom shelf, trimmed the excess and then frayed the edges.  I recommend making sure you are happy with how your shelves are hanging before you trim your excess rope though as it is would be very difficult to re-tie your knot with not enough rope to work with.   

The only things I needed to buy were the wood and rope, so this project only cost me about $20!


Linking up here:

Wednesday, March 19, 2014

Study Wall Art {Opinions Please!}

Hey guys and gals!  I am in need of your opinion!  I know that I want to hang an oversized map on the large wall in our study, but I can't decide on which one.  I have three options below and a poll at the bottom.  If you would be so kind as to vote for your favorite (and leave a comment as to why it's your favorite if you can!), I would appreciate it sooo much!  Keep in mind that the rug in the photos below may not be staying... the curtains are a sure thing though!  Click on the link in the caption for each picture if you want to see the actual map.  And click here for a reminder of the idea board I put together for this room.

Option 1
Option 2
Option 3
Thanks so much for your opinion!


Which map option do you like best?

Friday, March 14, 2014

DIY Friday {#1}

I don't know if anyone else has this problem, but I pin soooo much stuff and then never look at it again.  I especially love pinning DIY projects, but I can never seem to actually complete any of the projects I pin.  So I am going to start my first series and feature my favorite DIY and home decor pins every Friday in hopes that forcing myself to go back and look at my pins will inspire me to attempt some of them.

My goal will be to complete at least one of my pins each month.  Not a very ambitious goal, I know, but I'm trying to be realistic here!  By the way, if you don't already, please follow me on Pinterest!

Here are my picks for my first "DIY Friday"!

Hanging Rope Shelves
Source: Casa Cullen
I want to make these for behind the toilet in my master bathroom.  It looks so easy and the nautical-type ropes would go perfect with my beach theme.

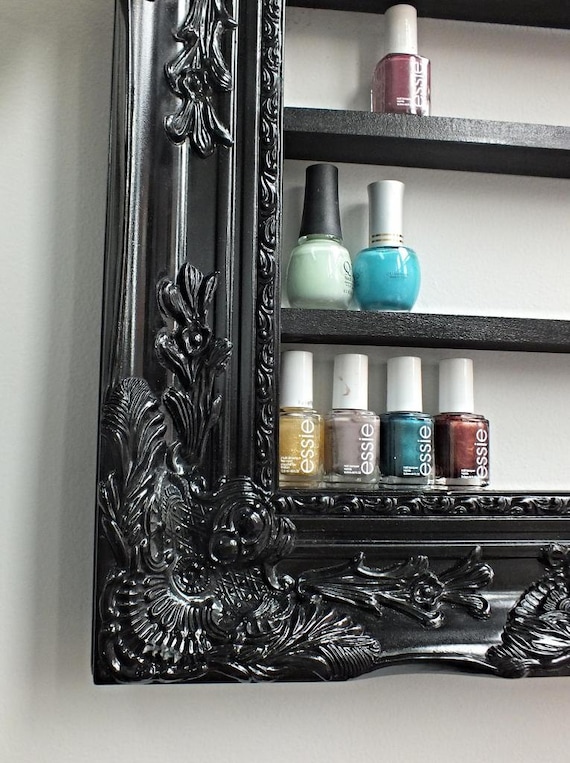
Black Glam Nail Polish Display
Source: Etsy
I can't think of a spot to put this at the moment, but I'm picturing my dozens of nail polish bottles that are currently thrown into random drawers and how cute they would look all lined up on the wall like at a salon.

DIY Canvas Art

Source: Cutting Edge Stencils Blog
I don't necessarily love this pattern, but I have been dying to try some DIY wall art.  I feel like the geometric stenciled kind would be a good place to start.  Have any of you tried your hand at painting?

What's your track record for following through with things you pin?

Wednesday, March 12, 2014

DIY Built-in Desk

The desk portion of our home office built-in unit is complete!  I am thrilled with how it turned out.  I will warn you that this post is a long one!  If you have no interest in how we built it, feel free to skip to the pretty pictures at the end :).

For the base units we used unfinished wood kitchen base cabinets from Lowes.  First, we cut the bottom "toe kicks" off of the cabinets using a circular saw to make them "desk height".  A typical desk is about 30" high and our cabinets wound up being a little less than 31"... close enough.  Then I applied three coats of Kiltz Primer and two coats of white semi-gloss paint.  We removed the baseboard in the areas where the built-ins will go so they sit flush to the wall.  Then we screwed them into the studs in the wall.  The one wall corner has a 135 degree angle, so we decided to cut one of the cabinets diagonally to make a right triangle-shaped cabinet so we can make use of the entire length of the space.  We basically just cut the back and right sides off, removed the shelf and then cut the bottom diagonally.  Obviously we couldn't get the drawer back in then, so I removed the front face and attached it using tip out hinges and attached a plastic plastic tray to the back of the drawer front for some extra storage.  Leave no space un-storable... that's my motto!

Base units installed! (Sorry about the photo quality... this was a nighttime phone shot).
For the desk top, we used 4 6"x5/4" boards plus one 4"x5/4" board of select pine.  I choose 5/4" wood because I wanted it a little thicker than the standard 1".  The select pine was a compromise between butcher block (which looks really good, but is very expensive) and regular pine or other wood (which is cheap, but doesn't look as good).  I love how the select pine turned out after we stained it... very "multi-dimensional".  (You'll have to wait until the end of the post to see it).

To attach the boards together we cut holes in the sides of each board (the end boards only got holes in one side) using a biscuit cutter.  Then we used wood glue and biscuits to bind the boards together. We put the glue in each hole and along one side of each board.  Then we used several clamps to squeeze them together.

This is what we started with for the desk top.
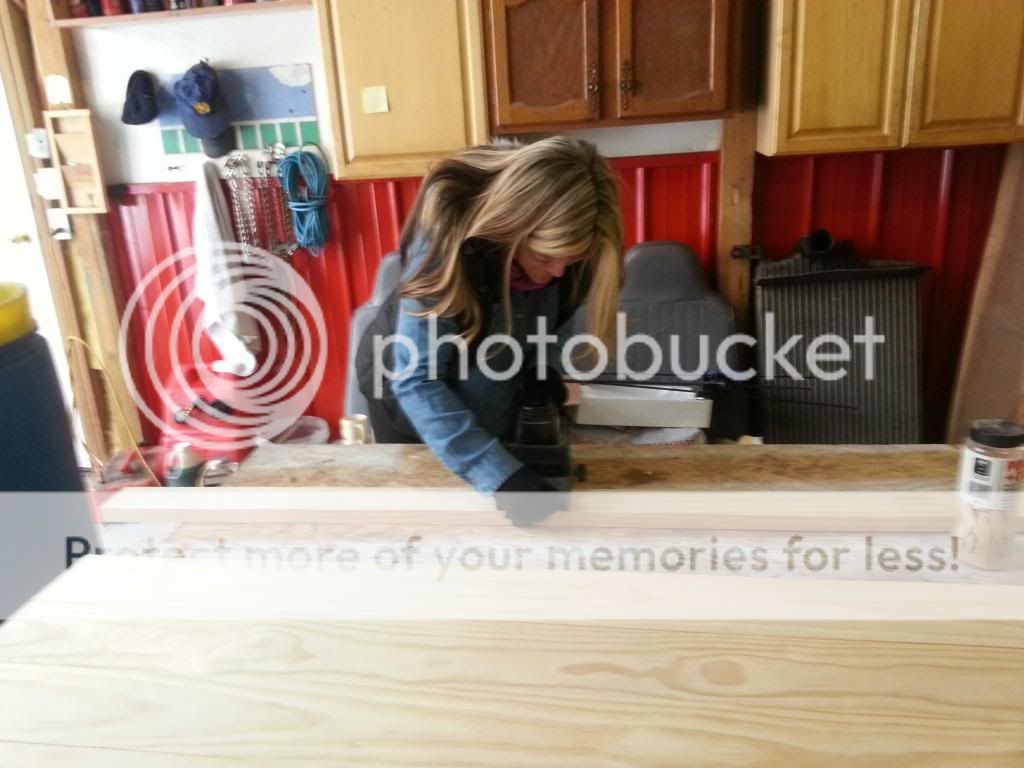
That's me cutting my biscuits!
Preparing to glue them together using wood glue and biscuits.
AND THEN, since my dad and brother were helping and are both super-perfectionists, they decided that the 0.0001 cm gap between two of the boards was too big so they used a Kreg Pocket Hole Jig to drill pocket holes and screw the boards together.

Dad and brother reinforcing with their new Kreg Jig
And a shot of my brother's workshop/barn just for fun.  
After we let the assembled desk top dry for a few days, I sanded it, stained it with two coats of dark walnut and sealed it with a few coats of satin finish polyurethane.  I also sanded down the edges to round off the corners a bit along the front face.  {I HATE SANDING!}  Finally, we cut the right side on an angle to fit in our odd-angled corner.  This wound up being a bit of a bear because the dimensions of the wood were slightly off and the other "90 degree" corner was not quite square, but I won't bore you with the details of how we fixed it.  It worked out in the end and that's all that matters! 
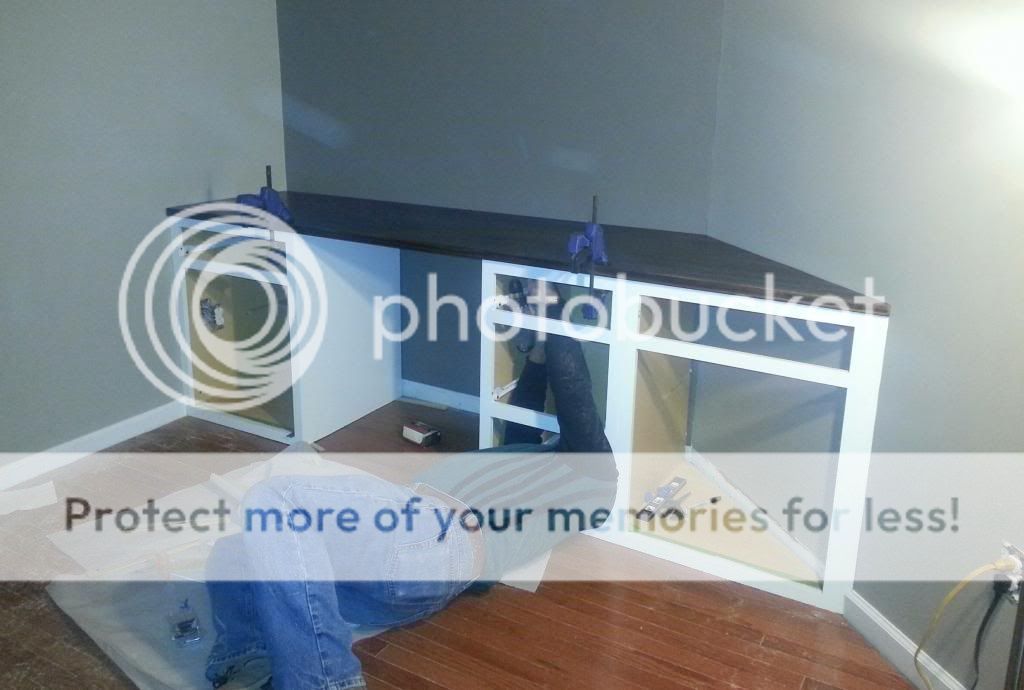
Dad attaching the top to the base units.
Then we put the doors and drawers back on and added some pretty hardware.  We used this for the drawers and this for cabinet doors.  I really love how the bronze contrasts with the white cabinets and complements the dark wood top.

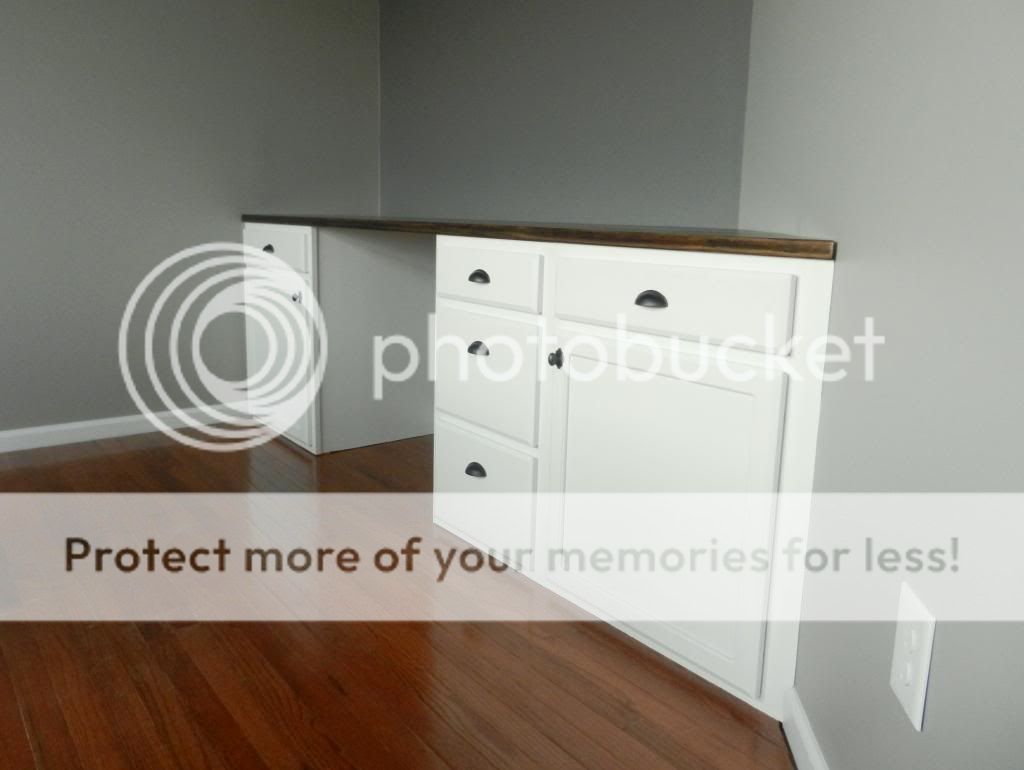
And finally, for the finished product!  Here is our shiny new built-in desk:
I'm in love!

Look how gorgeous that wood is!!  I can't stop looking at it!
Next up are the bookshelves that will go above the desk.  I'm thinking something like this or this, but I want to live with the desk for a little while first to see what kind of spaces we will need.

Linking up at these sweet link parties... go check them out!


This post contains affiliate links.

Friday, March 7, 2014

How to Make REAL Irish Potatoes {Recipe}

A lot of the Irish Potato recipes you will find on the internet use cream cheese, but REAL Irish Potatoes do actually have potatoes in them!  Here is my recipe for authentic Irish Potatoes:
REAL Irish Potatoes


Ingredients:
1 baking potato
1.5-3 lbs confectioners sugar (the amount you need depends on the size of your potato.  I usually wind up needing a little more than 2 lbs for a large potato)
1 (7 oz) bag of coconut
1 tbsp butter
2 tsp vanilla
1 pinch salt
Cinnamon
1. Bake potato at 350 degrees for about 45 minutes until soft.  Then peel the potato and place in a bowl.  (Note: The potato needs to still be hot when you start mixing).
2. Mash the potato with salt, butter, and vanilla.
3. Slowly add the confectioners sugar.  (You will be amazed what happens when you start mixing in the sugar... the potato mixture turns watery... crazy chemical reaction!)
4. Keep adding confectioners sugar until the mixture is very firm.  You really need to add a lot... it should be the consistency of cookie dough or even a little firmer.  If you don't add enough sugar, you will have wet IPs.
5. Mix in coconut.
6. Roll into balls and coat with cinnamon.
7. Let sit overnight and ENJOY!
TIPS:
1. I usually make half of the batch without coconut so I'll roll the first half then just add a 1/2 bag of coconut to the rest.
2. They actually get better after sitting for a few days, so you can make them well ahead of time.  I just store mine at room tempature in a cookie tin.

3. Make sure you have enough sugar!  The first few times I make these on my own I didn't have enough sugar and wound up with soggy IPs.


Authentic Irish Soda Bread {Recipe}

St. Patrick's Day is a big deal in my family.  My dad's side of the family is 100% Irish and my grandmother was a great cook.  Every St. Patrick's Day my brother and I would go to my grandmom's and help her make Irish potatoes and soda bread.  Now my brother and I host a St. Paddy's Day party every year for our friends and family.  I was starting to get my menu together for this year's party and I figured I would share some of my recipes with you!

Soda bread is the easiest thing to make and I can almost guarantee that you already have all of the ingredients in your pantry.  Here's the recipe:

Irish Soda Bread


Ingredients:
4 cups all purpose flour
1 tsp baking soda
3 1/2 tsp baking powder
3/4 tsp salt
1 tbsp sugar
2 tbsp butter - slightly softened
1 3/4 c milk
3/4 c raisins (optional... I don't usually include them)

1. Mix all ingredients.  I usually use a spoon until the milk is mixed in then knead it with my hands until mixed well.
2. Form into a ball and place on a slightly greased or floured cookie sheet.  I like to cut a cross in the top too... tradition says it's supposed to keep the devil away and protect the household. :)
3. Bake at 375 degrees for 30 minutes, then reduce heat to 350 degrees and bake for about 20 more minutes.
4. Enjoy warm with a slab of butter or dip into a nice beef stew!