

 |
| DIY Burlap Curtains |

I really wanted these curtain rods from West Elm but at $100 per rod, I could not justify spending $400 on curtain rods for one room. So of course I decided to try to make them! I took my measurements and then brought my dad along to Home Depot since I had never been down the plumbing isle before. (I'm glad I did because I got some flack from the pipe-cutting-guy and some other random guy... the two of them and my dad had a 10-minute conversation about how Martha Stewert is the devil. lol). They cut the pipes to size and thredded them right there. I also needed some flanges and some street elbow joints:
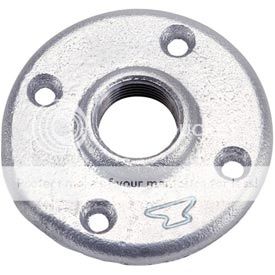


...it was the hanging part that got a little tricky. The galvanized steel pipes are quite heavy, so we tried several different types of hardware before we got it right. In the end these are the products that worked the best:

Some tips if you are interested in making these yourself:
1. Burlap kind of smells funny. I cut the panels and left them outside for a day or two to air out. Then I ironed each one on the steam setting. It really helped lessen the smell. Leaving it outside also helped get rid of some of the little dusty pieces that come with burlap.
2. Pay close attention to how they cut it at the store when you buy the burlap. There's a technique to cutting it straight and making sure it doesn't fray.
3. You definitely need the steam setting for ironing on the stitch-witchery. My iron setting wasn't working at first and it didn't work at all without the steam.
4. DO NOT try washing burlap! I tried this with the first panel to try to get the smell out and I wound up with a piece completely frayed with wrinkles that would not budge (and it didn't help the smell).
5. I'm not sure how I'm going to wash the curtains when the time comes. I guess I'll cross that bridge when I come to it :).
What do you think??