Joss & Main Exclusive online private sales for the home
Showing posts with label DIY. Show all posts

Monday, November 10, 2014

Industrial Paper Towel Holder {Tutorial}

You may have seen the industrial pipe paper towel holder I made a few weeks ago if you checked out my new etsy shop. Today I’m going to show you how I made them. (Not sure why I am showing you how to make something I am selling, but I can’t help myself from sharing! Hopefully you just won’t feel like making one yourself and will buy one from my anyway :)).


Here’s what you need:

Materials:
1x8 wood
1- 12" length of ¾” diameter black pipe (affiliate link) 
1- ¾” floor flange (affiliate link) 
1- 3/4" black pipe cap (affiliate link)
4 – ¾” #10 screws
Stain
Polyurethane
Gold spraypaint (affiliate link) 
Oil rubbed bronze spraypaint (affiliate link)

Tools:
Saw
Router (optional)
Drill
Screwdriver
Paint brush/rags for stain

1. Cut your wood into a 6” x 6” square, then cut each corner to make a 6” diameter octagon

2. Route the edges of your base to make them fancy (optional).

3. Sand, stain and polyurethane your base. I used a dark walnut stain and two coats of spray polyurethane.  Sand lightly between coats of poly with ~220 grit sandpaper.


4. While your stain/poly is drying, clean your pipes and fittings.  This is especially important if you are using black pipe (as opposed to galvanized). I first scrubbed the pipe with cooking oil to get the sticky stuff from the price tag off, using the rough side of a sponge.  Then I scrubbed it with just regular dish soap and water to get all of the grease and dirt off. 


5. Next, I assembled my pipe, cap and floor flange and lightly screwed it into my work table (which consists of a piece of plywood on two saw horses… this is a serious workshop folks!). I gave the whole thing a generous coat of gold spraypaint, let that dry overnight, then followed up with a coat of oil rubbed bronze spray paint and let that dry overnight.  Once it was completely dry I lightly sanded in random places with course sandpaper to make the gold show through.

Unpainted >> Gold Spraypaint >> ORB Spraypaint
6. Finally, I attached my pipe to my base by drilling pilot holes and screwing the floor flange into my base with my spray painted #10 screws.


And there you have it...  A handmade rustic paper towel holder in six easy steps!


It can also double as a toilet paper holder for spare rolls in the powder room.  The 12” length holds like 2.5 rolls of TP, so you could always just use a longer pipe if you want to hold more.


If you like this rustic/industrial paper towel holder and don’t feel like making it yourself, I would love to make one for you!  You can place an order on my esty shop here or email me if you would like to purchase one!  This could be a cute Christmas gift for that friend or relative that you never know what to buy for!  Guys seem to love these too… at my craft show last weekend, they were a big hit with the few male craft show patrons we had :).

Speaking of Christmas… how many people have started shopping??  Usually I at least have my list put together by this time, but am behind schedule!


I am linking up at these great parties... go check them out!

Thursday, September 4, 2014

Fabric-Covered Nailhead Trim Cork Board

It was so nice having a few days off from work to get some crafting done last weekend!  I showed you the easy “instagram photo frames” I made the other day.  I also made a “built-in” fabric-covered, nailhead trim, cork board for our built-in bookshelves in the office.  I struggle with using different patterns in my decorating and I thought this would be a good way to introduce a fun pattern in a somewhat non-committal way, since I can fairly easily change out the fabric if I want to down the road.


This was a very quick, easy and cheap project.  It took me about an hour from start to finish, only cost about $35 and doesn’t require any power tools.  Here’s what you need:

Piece of thin plywood underlayment cut to your desired size
1” x 2” wood cut to fit the 4 sides of your underlayment
Screws or nails + a drill or hammer
Fabric
Nailhead Trim
Staple gun and staples
Cork Tiles
Spray glue
Box cutter or scissors

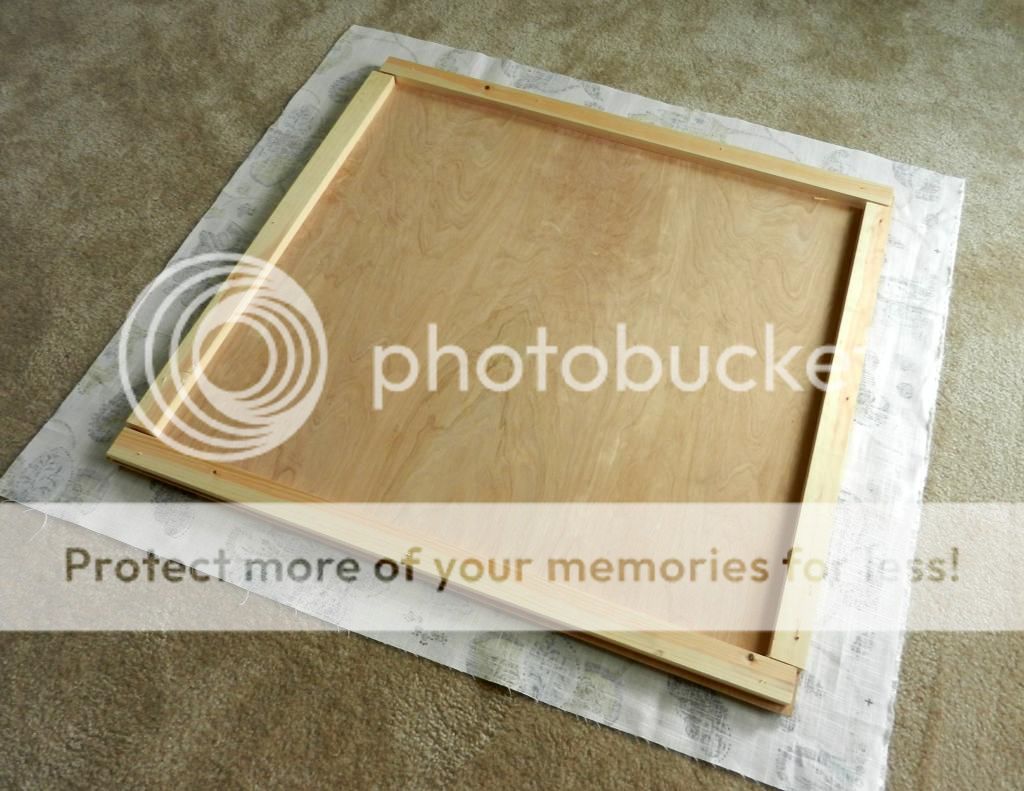
You can get all of your wood cut to size at Home Depot or Lowes.  I had my underlayment cut to fit the center section of our built-in bookshelves, where my computer will go.  Then I cut my 1x2 pieces and screwed them to the underlayment.  I added these mostly for stability and to give me a little thicker surface to staple into, but you really don’t absolutely need those pieces.


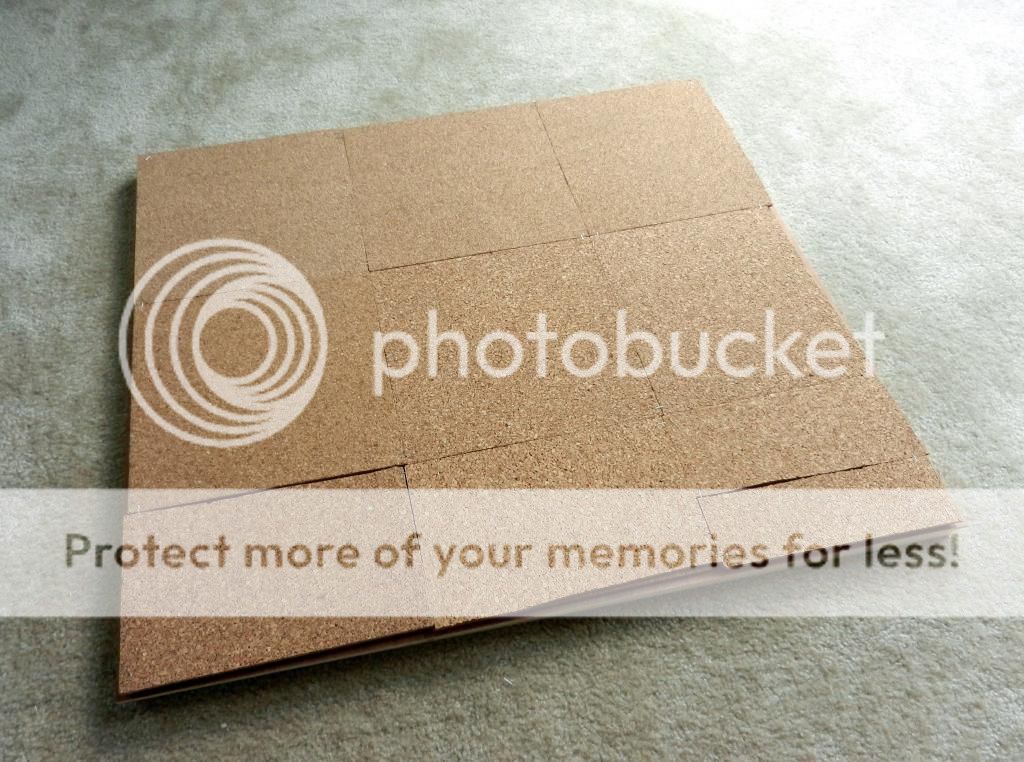
Once you have your base the way you want it, glue the cork tiles on, cutting them as needed.  My tiles were very thin so I did two layers so my thumbtacks would hold better.  I also added some staples in the corners of each square for extra adhesive power.  Again, probably not necessary, but I love reinforcement.


Next, iron your fabric then lay it pattern side down and flip your cork board over on top of it (see photo above).  I used this fabric from Tonicliving.com.  They are not cheap, but have an amazing selection.  Pull the fabric tight and staple it around the back edges of the board.

Then flip it back over and add your nailhead trim.  I like to use the kits that are just a long string instead of using individual nails… saves a lot of time and aggravation!  Measure from the edge of the cork board as you go to make sure you are staying straight.  I kept mine 1 inch from the edges.  

And there you go…  Four easy steps to a super cute new cork board!


Note: Mine fit snuggly in my space so I didn’t need to attach it to the wall at all (I was planning on using command velcro strips if it didn't wind up fitting so nicely.  But if you plan on hanging it on a wall I recommend using a hanging system like this so it doesn’t get crooked every time you pin something.


This project brings me one step closer to finishing the office!  It’s all annoying work that we have left like caulking the crown molding, touching up the painted desk, putting a protective coat on my file cabinet makeover (more on that to come), and cleaning (yuck!).  I always drag my feet with these last “finishing touches” because they always take longer than you expect and you don’t see much difference when they are done.  I like instant gratification!!

This post was featured @ Designs by Miss Mandie and the Lovely Wren!

Create and Share
Lovely Wren


Linking up at these great parties.  Go check them out!


*This post contains affiliate links*

Wednesday, August 13, 2014

DIY Chalkboard Calendar

Hi friends!  I hope everyone's summer is going well.  I really can't believe it is August already!  I always look forward to fall, but I am not quite ready for the hot weather and long days to be over just yet.

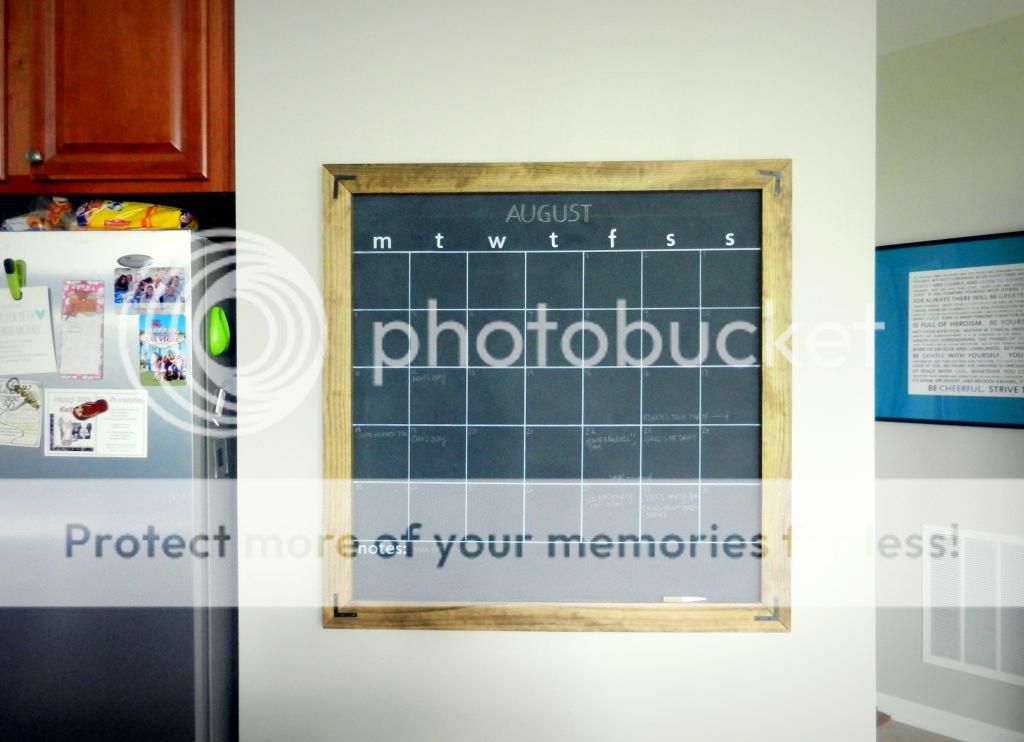
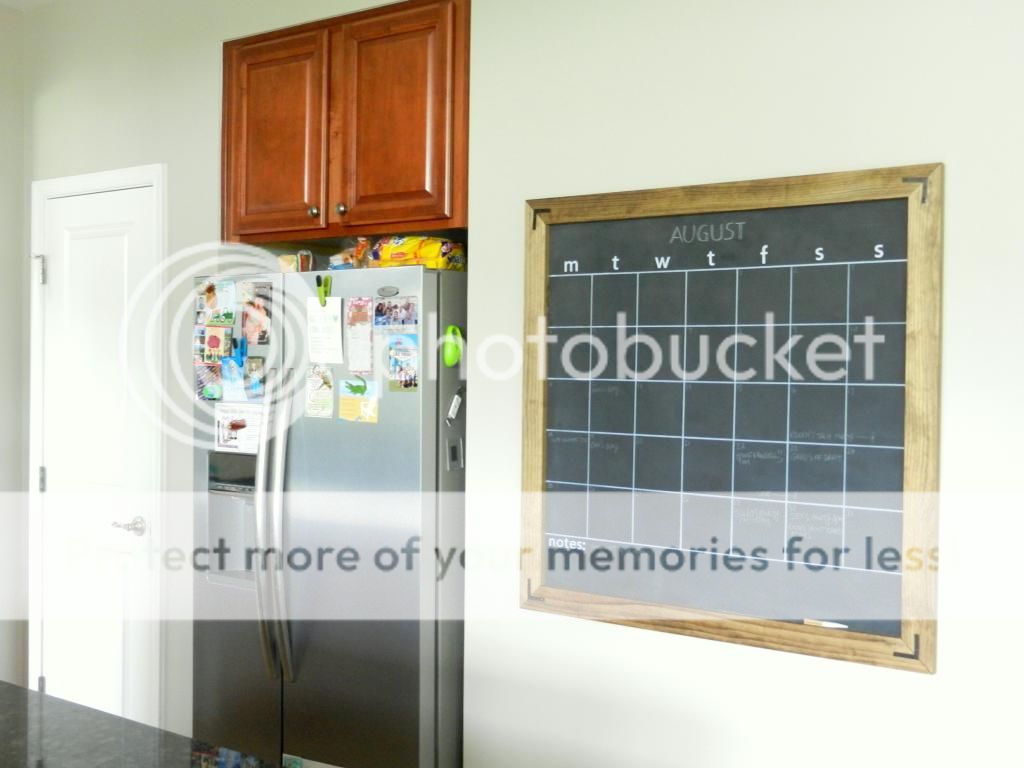
In our Ryan Homes model, the Courtland, there is a large blank wall next to the refrigerator in the kitchen (in the modified Courtland Gate, this area is now a small counter, which I am quite jealous of because it would make a perfect coffee station).  I have gone back and forth on what I wanted to put in this space.  I was originally thinking oversized art or some sort of gallery wall, but I ultimately decided I wanted it to be something functional.  I couldn't find a good way to incorporate a calendar into our "drop zone" area, and I've been itching to try my hand at a framed chalkboard, so I decided to put the two together and make a chalkboard calendar.  I feel like the pictures don't do the size justice, but it is quite large (40" wide).


This was actually one of the easiest projects I have done.  It didn't require any crazy tools or difficult measurements.  Here's what you need for this project:

-1/4"-thick plywood
-4 pieces of 1" x 3" select pine
-Miter saw (or just have your frame pieces cut to size at the store)
-Stain (I used Minwax Special Walnut)
-3/4" screws
-Drill/Screwdriver
-2-Inch Flat Corner Braces (I spray-painted mine ORB)
-Sharpie Medium Paint Marker in White
-Chalkboard Paint
-Silhouette Craft Cutting Machine (optional)
-Chalk (Crate and Barrel sells this soapstone chalk that I love).
-Picture Hangers (Since my chalkboard is pretty big/heavy I wanted something a little more stable than normal picture hangers so I tried out this new French Cleat Picture Hanger and I'm really happy with how it worked out).

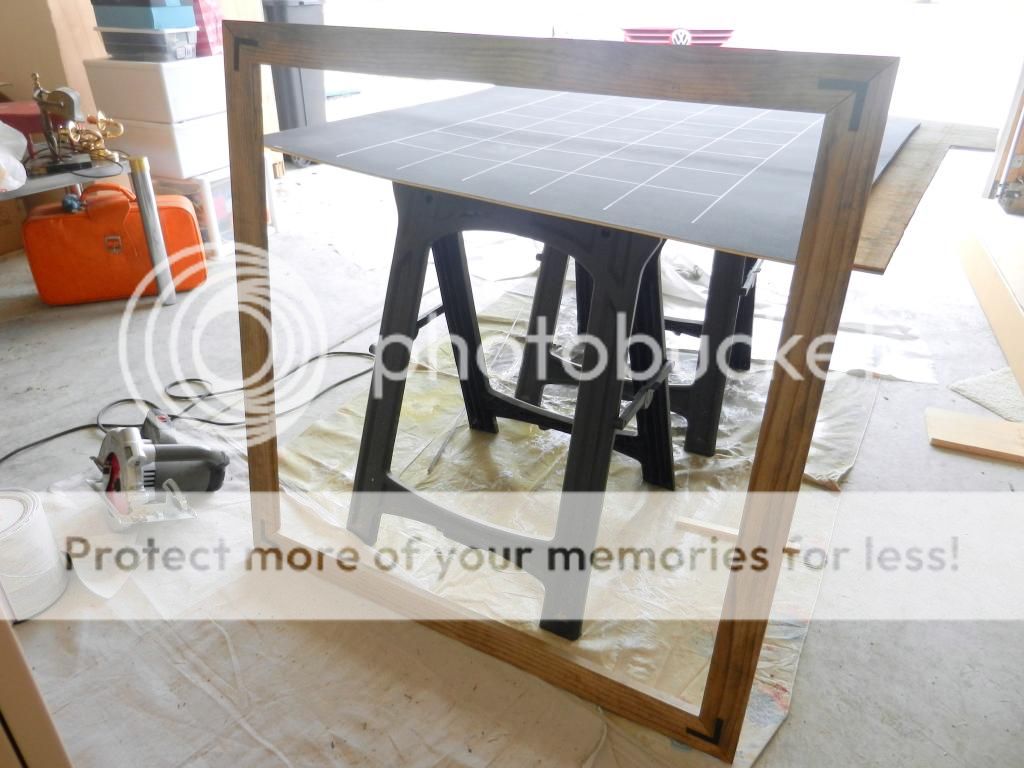
First I cut the select pine to size (at 45 degrees), stained it then assembled the frame using the L brackets.  I had the plywood cut to size at Home Depot.  I had them cut it about 1/2 inch smaller than the size of my frame to make sure it wouldn't overhang the frame. I painted the plywood with chalkboard paint using a roller and let it dry overnight.  Then I placed the frame on top of the chalkboard and traced the inside of the frame onto the chalkboard with a pencil.  Then I removed the frame and measured and marked my calendar lines using a yardstick and a pencil.  (I conveniently made my chalkboard width a multiple of 7 (35") so that each of my squares is exactly 5" wide).  I then traced the pencil lines and used my yardstick to draw the lines with my sharpie paint pen.  (Tip: pencil erases pretty easily from chalkboard, so I highly suggest sketching your lines with pencil so you can easily correct any mistakes before using the paint pen).    


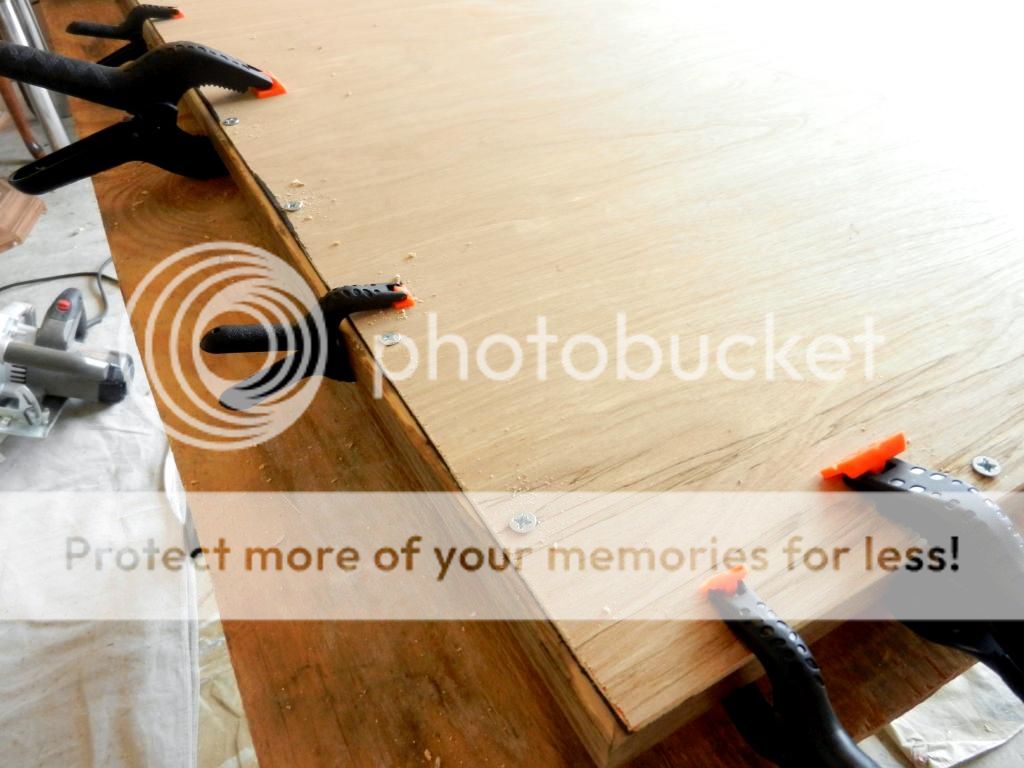
Once my calendar lines were drawn I squeezed some wood glue onto the area outside of the frame line I had traced with my pencil, then place my frame on top and clamped it, making sure the edges were lined up correctly as I went.


I then flipped the whole thing over, drilled pilot holes, and added 3/4" screws every 6-10".  You could use nails for this step too, I'm just a bigger fan of screws for stability.  By the way, don't worry if your plywood is not perfectly flat when you buy it... it will flatten out as your attach it to the frame.


I used my Silhouette Craft Cutting Machine to cut out stencils for my week letters, but you could just use regular stencils or just hand draw them with either chalk or your paint pen. Finally, I attached my French Cleat Picture Hanger (which I forgot to take a picture of) to the back of the chalkboard and to the wall and hug it!  I really liked this type of hanger because it comes with an attached level for easy leveling, and you can slide your picture back and forth a few inches once it's hung in case you didn't hang it perfectly centered on the wall.  It is also really stable and doesn't move around at all when I write on the chalkboard.  (I added felt furniture pads to the back corners just in case too).


So now we have a central place to keep track of all of our events... and now Greg has no excuse for not knowing what we are doing all the time :).

I am considering opening an etsy shop to sell some of my DIY creations... what do you guys think?  I don't know the slightest thing about sales so I'm a bit nervous, but I really love making this stuff and would love to share it with other people and make some extra money.  Please let me know your thoughts, positive or negative... I really want to get realistic opinions!

As always, thanks for reading... you guys and your feedback always make me smile!  This blog is my happy place :).

*This post contains affiliate links*


I am linking up at these great parties... go check them out!

Saturday, July 5, 2014

DIY Industrial Jewelry Holder

Lately I have been on a kick of giving people home made things for gifts.  Two of my friends recently moved into new houses, so I wanted to make them something special for a house warming gift.  I saw this DIY jewelry organizer on Making Home Base and I thought it would be perfect!  I had already worked with this type of pipe for my curtain rods in the family room and I love the industrial look they create.


I knew I wanted the color to be a sort of distressed oil rubbed bronze so I bought the black steel pipes from home depot.  They actually have all different short sizes already cut (they are called "nippes"... hehe) so I didn't even have to ask someone to cut them down for me.  Everything you need (besides the wood base) can be found in the plumbing isle.  I bought the following pipes and fittings (they are all 1/2"):
  • 1 - 8" pipe (for the top vertical piece)
  • 2 - 5" pipes (for the bottom vertical piece and the bottom horizontal piece)
  • 2- 6" pipes (for the top horizontal pieces)
  • 2 - tees
  • 1 - floor flange
I assembled all of the pipes and screwed the whole thing to a piece of scrap wood.  Then I gave it a coat of gold spray paint, let that dry for a day, then followed up with a coat of ORB spray paint.  Then after the second coat dried, I lightly sanded it in random places to make the gold come through.  For the base I just cut a piece of scrap pine to an 8"x"8 square, sanded down the edges a bit, and stained it dark walnut.  Then I spray painted the tops of 4 3/4" screws and attached my pipes to the base.  And there you have it!

The great thing about this is you can easily customize it for the sizes/colors you want.  Spray paint is a wonderful thing!

Linking up at these great parties... go check them out!
Friday, April 25, 2014

DIY Monogram Stained Wood Wall Art {DIY Friday #5}

I made a modified version of the stained wood wall art inspiration that I posted last week.  One of my good friends from high school just turned 30 and he happens to be married to another one of my good friends, so I wanted to make him (them) something special for his birthday.  I get so many compliments on our "Montague's est. 2010" sign that's part of the gallery wall in our family room, so I wanted to do something along those lines.  Here is what I came up with:


I forgot to take pictures of each step, but here's a quick rundown on what I did:

Supplies:
8' 1"x4" select pine board
Sandpaper
Wood glue
Pocket-Hole Jig Kit & screws
Chop saw
Circular Saw
Stain (I used Miniwax Dark Walnut)
Stencils (I cut my own using my Silhouette Cameo Cutter)
Paint
Sawtooth picture hanger

Directions:
1. Cut your board into 4 equal lengths, about 22" long.
2. Glue the boards together and secure with clamps.  Let dry for an hour or two.
3. Use your pocket hole jig to screw the boards together in the back.
4. Sand the whole thing down, making sure to get rid of any glue that squeezed out of the seams.
5. Stain, then let dry for about a day.
6. Apply your stencil and paint.  I cut my stencils on adhesive-backed paper to make it easier).
7. Let the paint dry overnight then remove your stencil.
8. Lightly sand over the painted words and corners to give it a rustic look.
9. Add something on the back for hanging, and you're done!

I think there's something special about a home-made gift... and it's much cheaper than buying something custom made, so it's a win-win!

*This post contains affiliate links*

I'm linking up at these great parties... go check them out:

Friday, April 11, 2014

DIY Friday {#4}

It's Friday again!  Woohoo!!  You know what that means... time for some more DIY eye candy.  If you follow me on Pinterest, you've probably noticed that my "Study" board has been getting a lot of action lately.  I have (contrary to my normal M.O.) been pretty good about focusing on the task at hand (finishing the study) and not getting distracted by other projects around the house.  Although now that the weather is getting nice, I'm really itching to do some projects outside, so this new-found focus may not last much longer. 
But in keeping with the home office theme, all of my DIY pinterest features this week are things I hope to make for the study:
Source: Menstyle
I love this quote.  I have been going through a bit of a 1/3 life crisis lately, and I've been reflecting on how work time can really creep into your personal time and, if you're not careful, completely take over your life.  I don't think I am quite there yet, but I'm definitely finding that the longer I work the harder it becomes to disconnect at 5:00 (both physically and mentally).  I am actually starting a new job soon and taking a few weeks off between jobs, so hopefully I will be able to get a few of these projects done during that time!

DIY Decorative Spheres
Source: Hill Country Homebody
I have been seeing all different kinds of decorative spheres lately (both DIY and store bought).  Hill Country's Homebody's DIY version using embroidery hoops is my favorite that I have seen so far.  I am so bad with shelf/table styling, but I feel like you can't go wrong with these guys.  I am picturing them on the free-standing desk in our study.  

 Fabric Covered Corkboard 
Source: Carolina Charm
This one is a must-do for the study.  I recently designed the built-in bookshelves for above our desk (see below) and I want to do a fabric-covered cork board for the middle space behind where our computer will be.  I don't happen to have a giant cork board laying around like the one in Carolina Charm's tutorial, and mine needs to be a specific size so I'll have to get a little creative, but I don't think it's anything I can't handle.


In study update news, I actually already have 2/3 of the bookshelves for our built-ins assembled.  Now I just need to prime and paint this weekend and then figure out how we're going to handle the angled wall.  We also have lots of landscaping plans ahead!!

What's everyone else working on now that the weather is getting nicer?

Friday, April 4, 2014

DIY Friday {#3}

Here is the next round of my DIY Pinterest ideas!  I'm not sure which of these I'm going to try next.  Right now it's a tie between #1 and #3.  Have you completed any Pinterest projects lately?

Office Chair Makeover from the Crafting Chicks
Source: The Crafting Chicks
I reeeeeally want to buy one of these awesome customizable desk chairs from Ballard, but I'm not sure if I can bring myself to spend $500+ on a desk chair.  I saw this desk chair makeover on Pinterest and thought it might be a good option, at least temporarily, for our study.  We already have a plain chair like this, so I could do it for almost free.  Might be worth a try!

Vinyl Record Mail Holders from Hearts and Sharts
Source: Hearts and Sharts
This is seriously one of the coolest, most creative DIY projects I have ever seen.  She basically just heats up a vinyl record then bends it, lets it cool and paints it.  Ever since I saw this post, I have been searching for the perfect spot in my house to put some.

Easy Decorative Wood Crates
Source: My Home Lookbook
So cheap and easy and so functional!  Greg is always making fun of how many baskets and bins I have around the house.  I love them because it's so easy to just throw things in there when you need to straighten up quickly.  You can get unfinished crates like this from any craft store for cheap.  Then all you need to do is stain and throw some handles on there.  My MIL recently starting working at Michael's so I'm hoping to score some of these babies with her discount (I hope she's reading ;)).  This could be really cute for a shower present or something too... throw some shredded paper in the bottom and fill with gifts!

Friday, March 28, 2014

DIY Friday {#2} - Hanging Rope Shelves

I recently started my DIY Friday series to try to motivate myself to complete some of the hundreds of projects I have pinned.  My goal is to complete one pinterest project a month and I am happy to report that my first month has been a success.

If you follow me on Instagram you probably saw that I decided to try the hanging rope shelves I had pinned from Casa Cullen. I thought they would be perfect for the space above the toilet in our master bedroom water closet and the nautical vibe from the ropes is the perfect compliment to my beach theme. (I still need to share my finished master bathroom with you guys!)


The complete tutorial is on Casa Cullen's site, so I won't give a detailed how-to, but here's the general idea:  I cut a 1"x10" board to my desired shelf width, then drilled big holes near each corner for the rope to go through.  Then I lightly sanded, primed and painted the shelves.  I mounted a regular old hook to the wall with small plastic anchors.  Then I threaded the manila rope through the holes in my shelves, hung it on the hook, and messed with the height/angle of the shelves until it looked just right.  I cut down a hardwood floor tongue piece that we had left over from the study to slide through the rope below the top shelf to hold it in place.  I just tied knots below the bottom shelf, trimmed the excess and then frayed the edges.  I recommend making sure you are happy with how your shelves are hanging before you trim your excess rope though as it is would be very difficult to re-tie your knot with not enough rope to work with.   

The only things I needed to buy were the wood and rope, so this project only cost me about $20!


Linking up here:

Friday, March 14, 2014

DIY Friday {#1}

I don't know if anyone else has this problem, but I pin soooo much stuff and then never look at it again.  I especially love pinning DIY projects, but I can never seem to actually complete any of the projects I pin.  So I am going to start my first series and feature my favorite DIY and home decor pins every Friday in hopes that forcing myself to go back and look at my pins will inspire me to attempt some of them.

My goal will be to complete at least one of my pins each month.  Not a very ambitious goal, I know, but I'm trying to be realistic here!  By the way, if you don't already, please follow me on Pinterest!

Here are my picks for my first "DIY Friday"!

Hanging Rope Shelves
Source: Casa Cullen
I want to make these for behind the toilet in my master bathroom.  It looks so easy and the nautical-type ropes would go perfect with my beach theme.

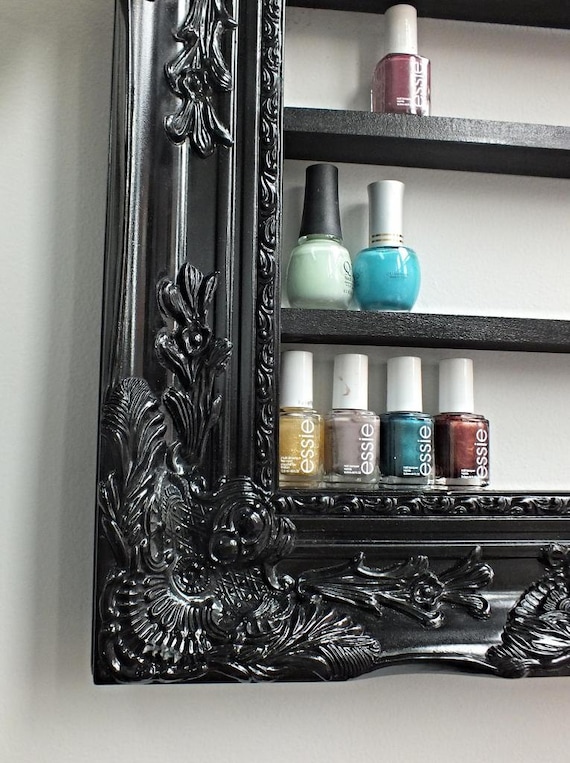
Black Glam Nail Polish Display
Source: Etsy
I can't think of a spot to put this at the moment, but I'm picturing my dozens of nail polish bottles that are currently thrown into random drawers and how cute they would look all lined up on the wall like at a salon.

DIY Canvas Art

Source: Cutting Edge Stencils Blog
I don't necessarily love this pattern, but I have been dying to try some DIY wall art.  I feel like the geometric stenciled kind would be a good place to start.  Have any of you tried your hand at painting?

What's your track record for following through with things you pin?

Wednesday, March 12, 2014

DIY Built-in Desk

The desk portion of our home office built-in unit is complete!  I am thrilled with how it turned out.  I will warn you that this post is a long one!  If you have no interest in how we built it, feel free to skip to the pretty pictures at the end :).

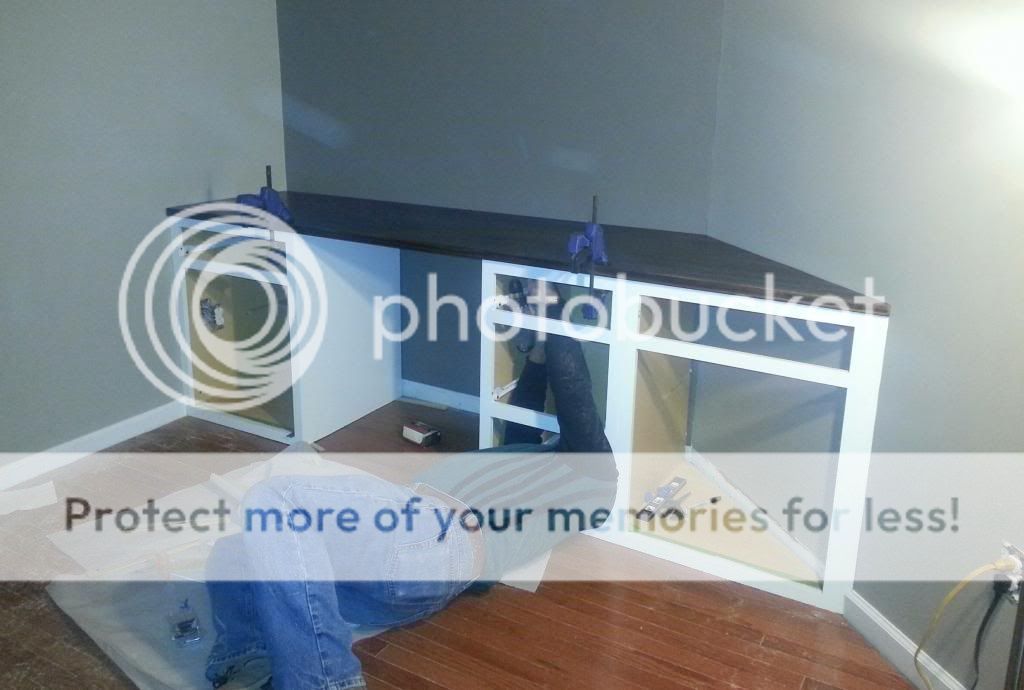
For the base units we used unfinished wood kitchen base cabinets from Lowes.  First, we cut the bottom "toe kicks" off of the cabinets using a circular saw to make them "desk height".  A typical desk is about 30" high and our cabinets wound up being a little less than 31"... close enough.  Then I applied three coats of Kiltz Primer and two coats of white semi-gloss paint.  We removed the baseboard in the areas where the built-ins will go so they sit flush to the wall.  Then we screwed them into the studs in the wall.  The one wall corner has a 135 degree angle, so we decided to cut one of the cabinets diagonally to make a right triangle-shaped cabinet so we can make use of the entire length of the space.  We basically just cut the back and right sides off, removed the shelf and then cut the bottom diagonally.  Obviously we couldn't get the drawer back in then, so I removed the front face and attached it using tip out hinges and attached a plastic plastic tray to the back of the drawer front for some extra storage.  Leave no space un-storable... that's my motto!

Base units installed! (Sorry about the photo quality... this was a nighttime phone shot).
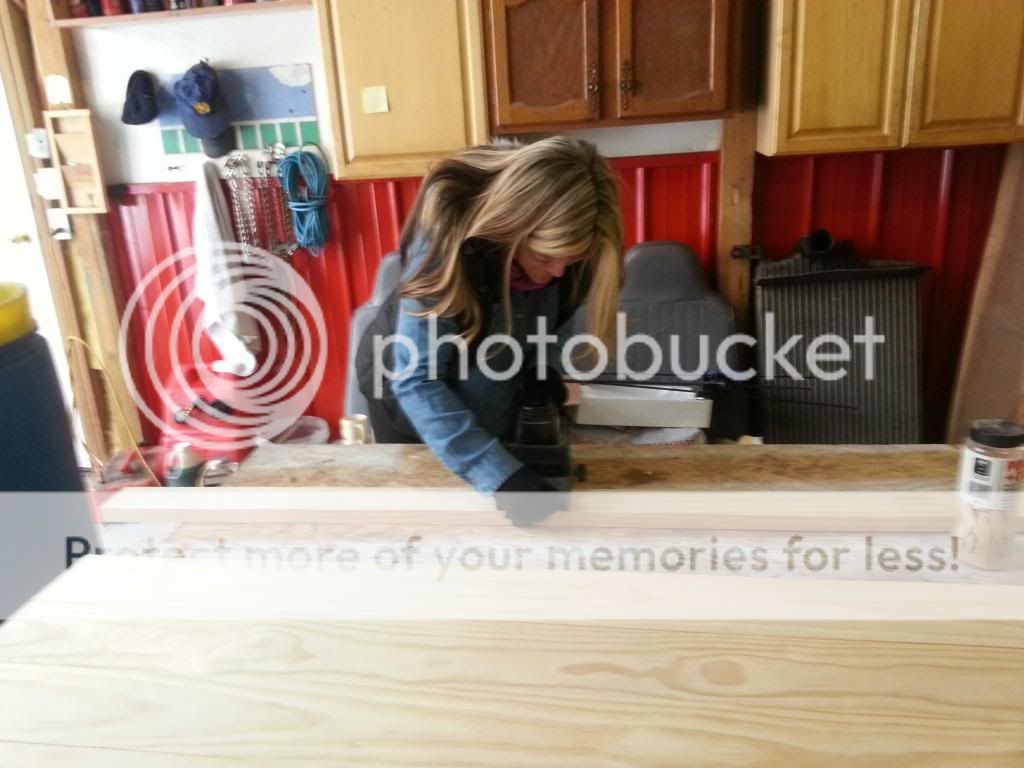
For the desk top, we used 4 6"x5/4" boards plus one 4"x5/4" board of select pine.  I choose 5/4" wood because I wanted it a little thicker than the standard 1".  The select pine was a compromise between butcher block (which looks really good, but is very expensive) and regular pine or other wood (which is cheap, but doesn't look as good).  I love how the select pine turned out after we stained it... very "multi-dimensional".  (You'll have to wait until the end of the post to see it).

To attach the boards together we cut holes in the sides of each board (the end boards only got holes in one side) using a biscuit cutter.  Then we used wood glue and biscuits to bind the boards together. We put the glue in each hole and along one side of each board.  Then we used several clamps to squeeze them together.

This is what we started with for the desk top.
That's me cutting my biscuits!
Preparing to glue them together using wood glue and biscuits.
AND THEN, since my dad and brother were helping and are both super-perfectionists, they decided that the 0.0001 cm gap between two of the boards was too big so they used a Kreg Pocket Hole Jig to drill pocket holes and screw the boards together.

Dad and brother reinforcing with their new Kreg Jig
And a shot of my brother's workshop/barn just for fun.  
After we let the assembled desk top dry for a few days, I sanded it, stained it with two coats of dark walnut and sealed it with a few coats of satin finish polyurethane.  I also sanded down the edges to round off the corners a bit along the front face.  {I HATE SANDING!}  Finally, we cut the right side on an angle to fit in our odd-angled corner.  This wound up being a bit of a bear because the dimensions of the wood were slightly off and the other "90 degree" corner was not quite square, but I won't bore you with the details of how we fixed it.  It worked out in the end and that's all that matters! 

Dad attaching the top to the base units.
Then we put the doors and drawers back on and added some pretty hardware.  We used this for the drawers and this for cabinet doors.  I really love how the bronze contrasts with the white cabinets and complements the dark wood top.

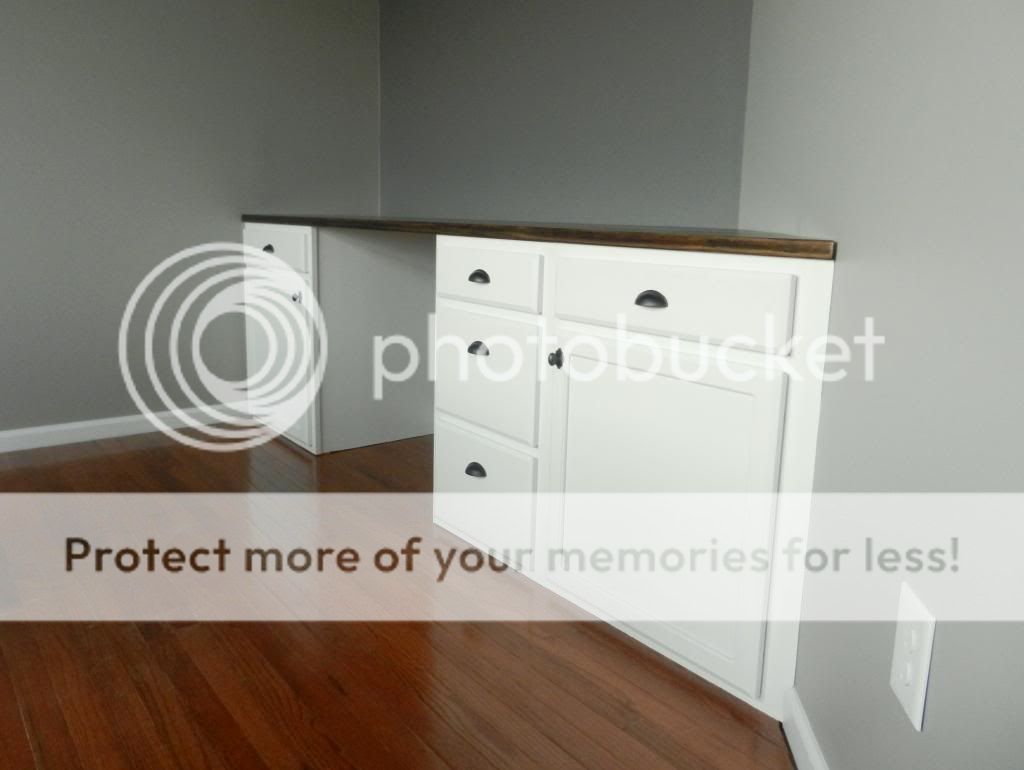
And finally, for the finished product!  Here is our shiny new built-in desk:
I'm in love!

Look how gorgeous that wood is!!  I can't stop looking at it!
Next up are the bookshelves that will go above the desk.  I'm thinking something like this or this, but I want to live with the desk for a little while first to see what kind of spaces we will need.

Linking up at these sweet link parties... go check them out!

This post contains affiliate links.