

In our Ryan Homes model, the Courtland, there is a large blank wall next to the refrigerator in the kitchen (in the modified Courtland Gate, this area is now a small counter, which I am quite jealous of because it would make a perfect coffee station). I have gone back and forth on what I wanted to put in this space. I was originally thinking oversized art or some sort of gallery wall, but I ultimately decided I wanted it to be something functional. I couldn't find a good way to incorporate a calendar into our "drop zone" area, and I've been itching to try my hand at a framed chalkboard, so I decided to put the two together and make a chalkboard calendar. I feel like the pictures don't do the size justice, but it is quite large (40" wide).

This was actually one of the easiest projects I have done. It didn't require any crazy tools or difficult measurements. Here's what you need for this project:
-1/4"-thick plywood
-4 pieces of 1" x 3" select pine
-Miter saw (or just have your frame pieces cut to size at the store)
-Stain (I used Minwax Special Walnut)
-3/4" screws
-Drill/Screwdriver
-2-Inch Flat Corner Braces (I spray-painted mine ORB)
-Sharpie Medium Paint Marker in White
-Chalkboard Paint
-Silhouette Craft Cutting Machine (optional)
-Chalk (Crate and Barrel sells this soapstone chalk that I love).
-Picture Hangers (Since my chalkboard is pretty big/heavy I wanted something a little more stable than normal picture hangers so I tried out this new French Cleat Picture Hanger and I'm really happy with how it worked out).
First I cut the select pine to size (at 45 degrees), stained it then assembled the frame using the L brackets. I had the plywood cut to size at Home Depot. I had them cut it about 1/2 inch smaller than the size of my frame to make sure it wouldn't overhang the frame. I painted the plywood with chalkboard paint using a roller and let it dry overnight. Then I placed the frame on top of the chalkboard and traced the inside of the frame onto the chalkboard with a pencil. Then I removed the frame and measured and marked my calendar lines using a yardstick and a pencil. (I conveniently made my chalkboard width a multiple of 7 (35") so that each of my squares is exactly 5" wide). I then traced the pencil lines and used my yardstick to draw the lines with my sharpie paint pen. (Tip: pencil erases pretty easily from chalkboard, so I highly suggest sketching your lines with pencil so you can easily correct any mistakes before using the paint pen).
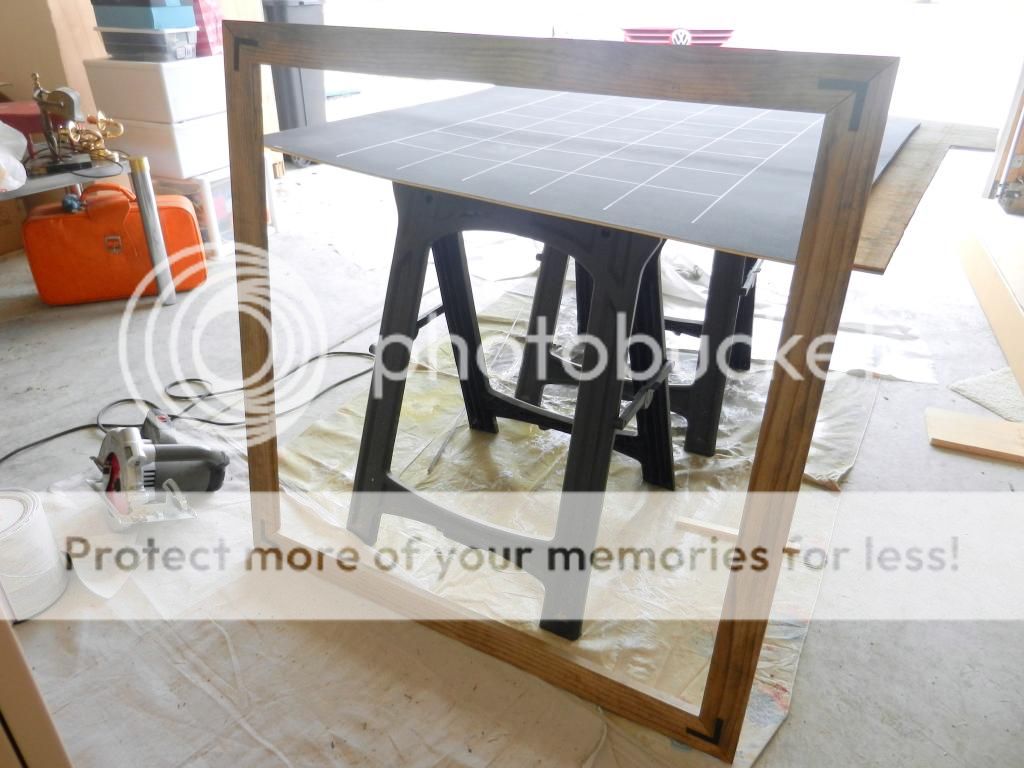
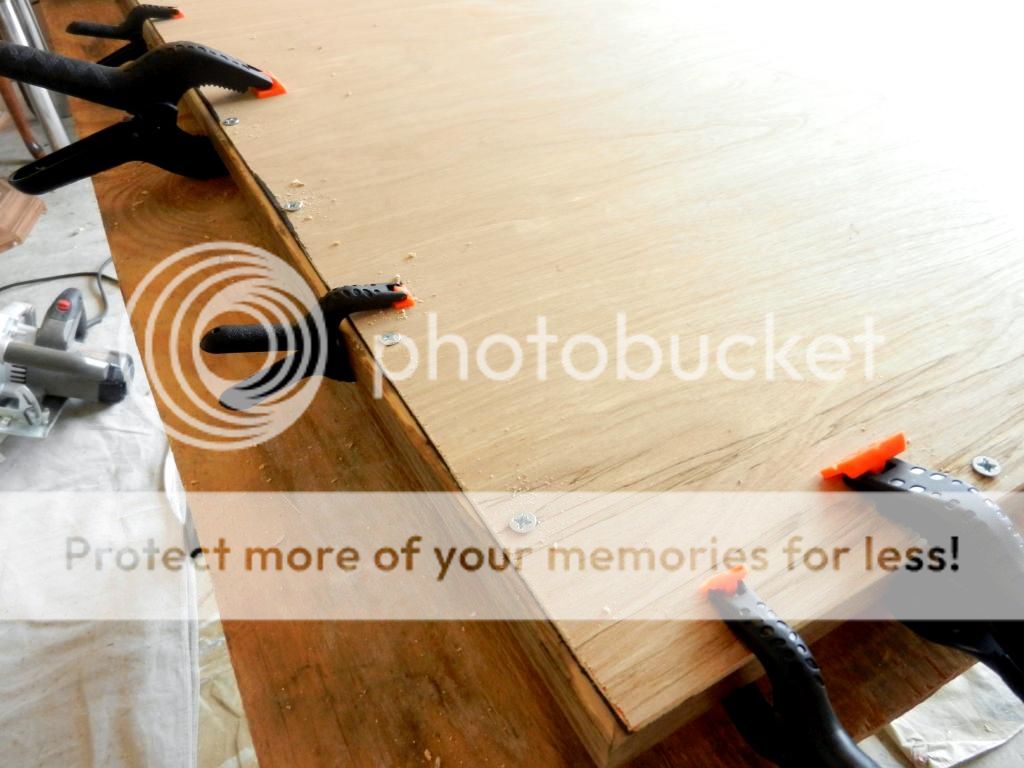
Once my calendar lines were drawn I squeezed some wood glue onto the area outside of the frame line I had traced with my pencil, then place my frame on top and clamped it, making sure the edges were lined up correctly as I went.


I then flipped the whole thing over, drilled pilot holes, and added 3/4" screws every 6-10". You could use nails for this step too, I'm just a bigger fan of screws for stability. By the way, don't worry if your plywood is not perfectly flat when you buy it... it will flatten out as your attach it to the frame.
I used my Silhouette Craft Cutting Machine to cut out stencils for my week letters, but you could just use regular stencils or just hand draw them with either chalk or your paint pen. Finally, I attached my French Cleat Picture Hanger (which I forgot to take a picture of) to the back of the chalkboard and to the wall and hug it! I really liked this type of hanger because it comes with an attached level for easy leveling, and you can slide your picture back and forth a few inches once it's hung in case you didn't hang it perfectly centered on the wall. It is also really stable and doesn't move around at all when I write on the chalkboard. (I added felt furniture pads to the back corners just in case too).
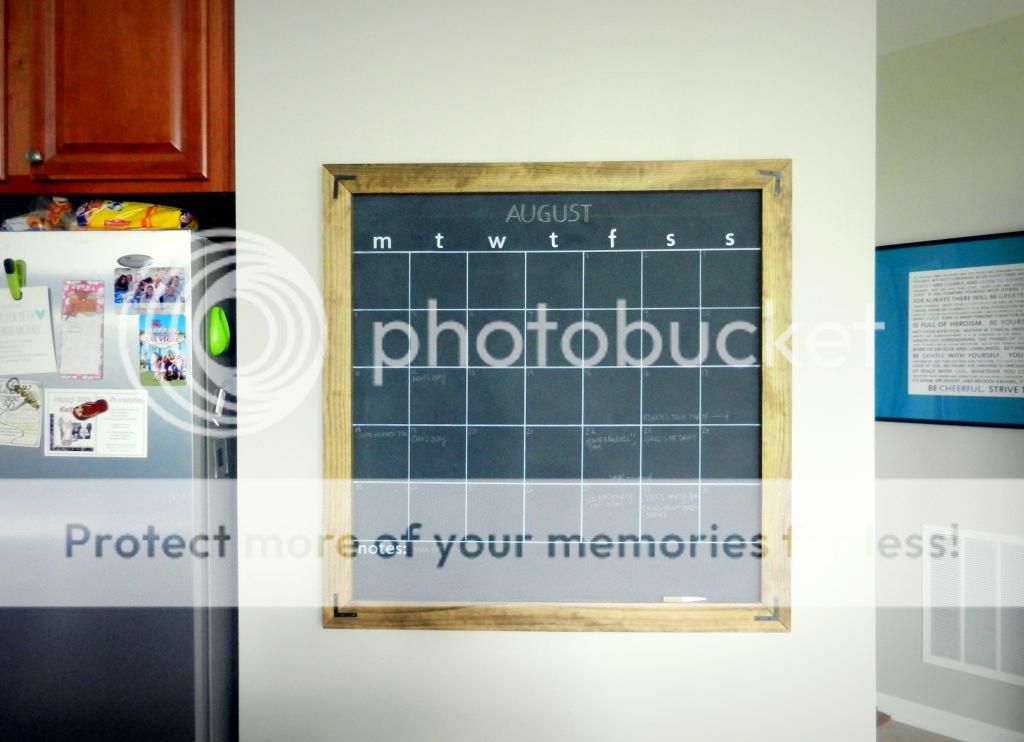
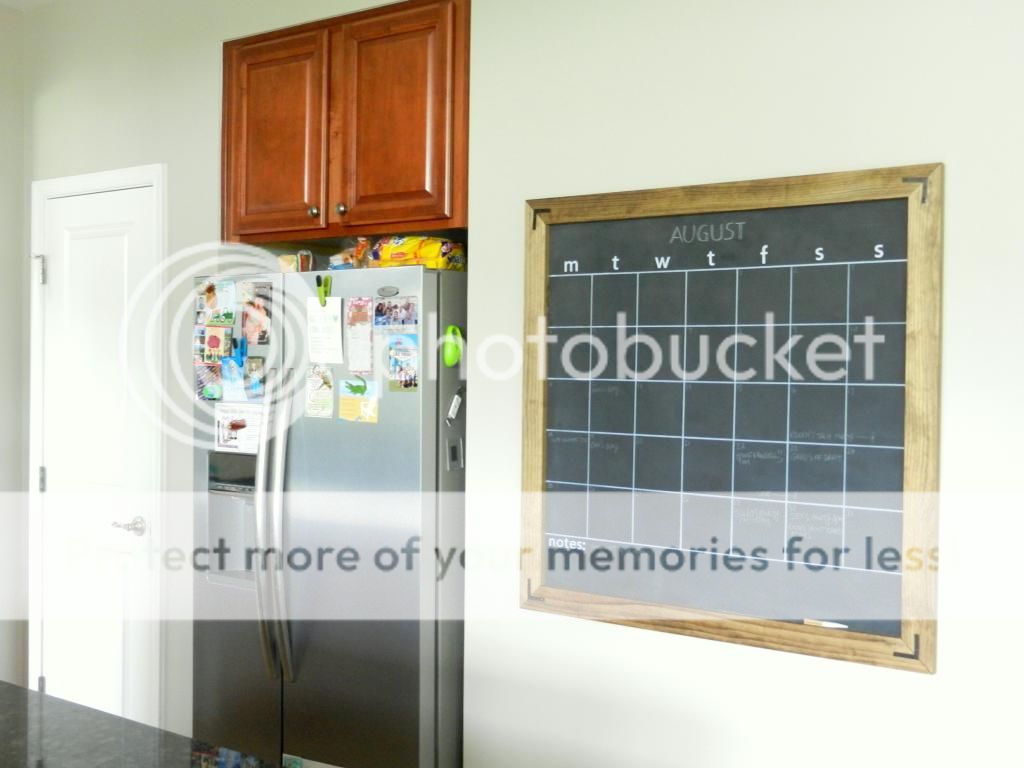
So now we have a central place to keep track of all of our events... and now Greg has no excuse for not knowing what we are doing all the time :).
I am considering opening an etsy shop to sell some of my DIY creations... what do you guys think? I don't know the slightest thing about sales so I'm a bit nervous, but I really love making this stuff and would love to share it with other people and make some extra money. Please let me know your thoughts, positive or negative... I really want to get realistic opinions!
As always, thanks for reading... you guys and your feedback always make me smile! This blog is my happy place :).
*This post contains affiliate links*
I am linking up at these great parties... go check them out!
On Display Thursday
Creativity Unleashed
"Inspire Me Please" Weekend Blog Hop
The Makers
Creativity Unleashed
"Inspire Me Please" Weekend Blog Hop
The Makers
This post was featured at Practically Functional's Creativity Unleashed Link Party!
I'd totally be interested in buying one of those chalkboards from u! Go for it!
ReplyDelete