Joss & Main Exclusive online private sales for the home
Showing posts with label decorate. Show all posts

Friday, April 11, 2014

DIY Friday {#4}

It's Friday again!  Woohoo!!  You know what that means... time for some more DIY eye candy.  If you follow me on Pinterest, you've probably noticed that my "Study" board has been getting a lot of action lately.  I have (contrary to my normal M.O.) been pretty good about focusing on the task at hand (finishing the study) and not getting distracted by other projects around the house.  Although now that the weather is getting nice, I'm really itching to do some projects outside, so this new-found focus may not last much longer. 
But in keeping with the home office theme, all of my DIY pinterest features this week are things I hope to make for the study:
Source: Menstyle
I love this quote.  I have been going through a bit of a 1/3 life crisis lately, and I've been reflecting on how work time can really creep into your personal time and, if you're not careful, completely take over your life.  I don't think I am quite there yet, but I'm definitely finding that the longer I work the harder it becomes to disconnect at 5:00 (both physically and mentally).  I am actually starting a new job soon and taking a few weeks off between jobs, so hopefully I will be able to get a few of these projects done during that time!

DIY Decorative Spheres
Source: Hill Country Homebody
I have been seeing all different kinds of decorative spheres lately (both DIY and store bought).  Hill Country's Homebody's DIY version using embroidery hoops is my favorite that I have seen so far.  I am so bad with shelf/table styling, but I feel like you can't go wrong with these guys.  I am picturing them on the free-standing desk in our study.  

 Fabric Covered Corkboard 
Source: Carolina Charm
This one is a must-do for the study.  I recently designed the built-in bookshelves for above our desk (see below) and I want to do a fabric-covered cork board for the middle space behind where our computer will be.  I don't happen to have a giant cork board laying around like the one in Carolina Charm's tutorial, and mine needs to be a specific size so I'll have to get a little creative, but I don't think it's anything I can't handle.


In study update news, I actually already have 2/3 of the bookshelves for our built-ins assembled.  Now I just need to prime and paint this weekend and then figure out how we're going to handle the angled wall.  We also have lots of landscaping plans ahead!!

What's everyone else working on now that the weather is getting nicer?

Saturday, February 15, 2014

Rug Dilemma {Study Update}

I don't know what my problem is, but I have the hardest time picking out area rugs!  Maybe it's because it takes up so much space that I'm worried if I choose the wrong one it will mess up the whole room.

I ordered these curtains and this rug from Crate and Barrel because they looked awesome next to each other in the catalog.  But when I got them home the green-ish/yellow-ish color in the rug doesn't quite match the curtains.  I also feel like the patterns don't look great together.  I love the curtains, but I'm thinking the rug will have to be returned.


What do you think?  No dice, right?

The problem is I have no idea what kind of rug to replace it with.  I'm thinking maybe a patterned one with only one color?  Or should I just do a solid color with no pattern?  Or a gray-ish one with a pattern?  Ahhh... I'm so confused!  (FYI there will be a desk in the center of the room on top of the rug.  The built ins will come out to the blue tape line on the floor to the right, and there will be a chair in the left corner near where the curtain is).

I made this inspiration board to kind of get my thoughts together.  You can't tell here, but I actually have about six rugs on top of each other in this file.  I'm a lost cause. :/


So what do you think?  Should I go patterned or solid?  Color or gray?  Do you think it should be a little big bigger than the one I have now?  

Thanks for your advice!

Tuesday, November 19, 2013

Family Room: Before and After

Greg's going to kill me for using this picture :). 
It's the only "before" shot I have showing the whole family room I swear!
 
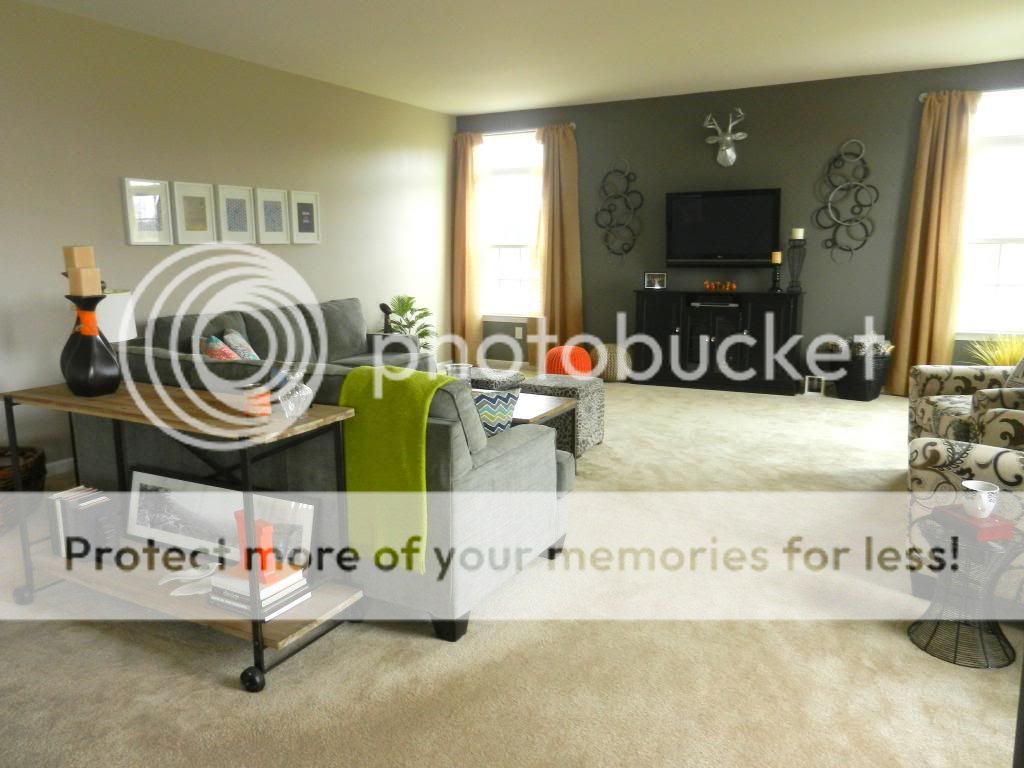
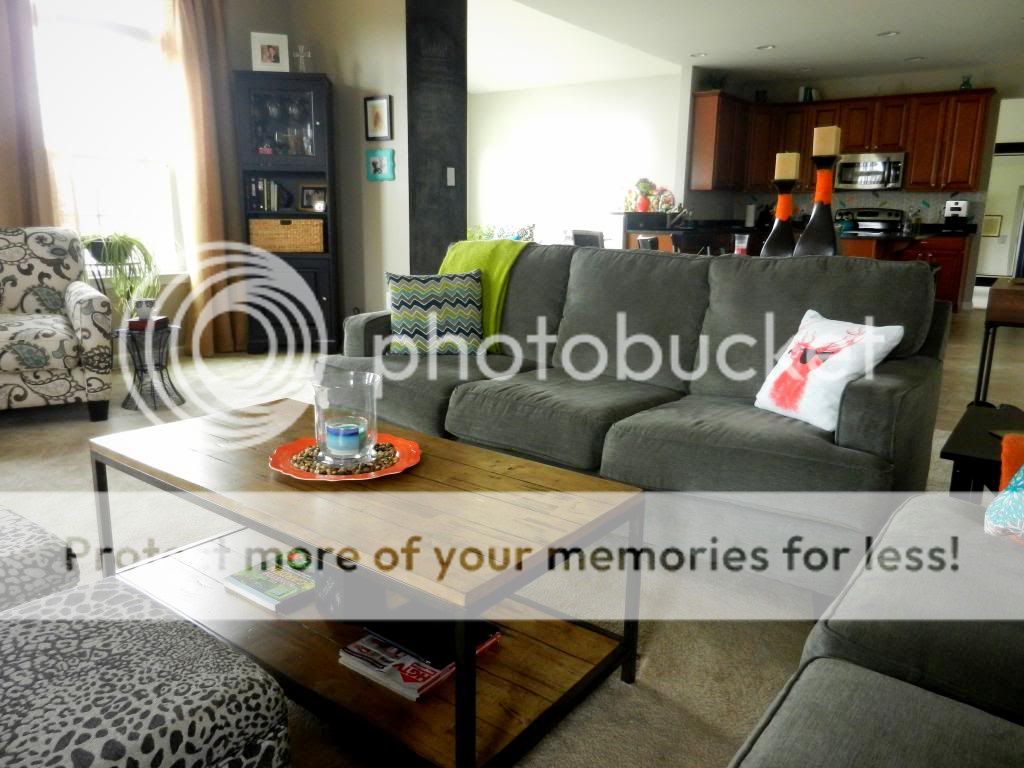
At last, 14 months later, the family room is finally finished (for now)!!  It took me over a year to finish ONE room in our house.  At this rate it's going to be a longggg time before the whole house is done.  But when I look at the before and after pictures, it really has come a long way.  And of course there have been other small and large (the deck!) projects during this time too.

I was going for a rustic/traditional style with this room.  I'm not really an "earthy-tones" type person; I favor cooler grays and I reallllly love distressed wood.  I have also been really into pops(!) of color lately and have been going mostly with orange, teal and lime green.  [I didn't purposefully copy Young House Love's color scheme, but maybe I subconsciously got my inspiration there.]  Knowing how often I change my mind I kept most of the "pops" to easily changeable accessories. 

Here's more photos of the finished product (there's some other photos on Part 1 of the Family Room Reveal)!


chalkboard-wall
My chalkboard wall between the morning room and family room, which displays my
"wishlist" and current projects with % complete for each.  Nerd alert!


DIY-burlap-curtains
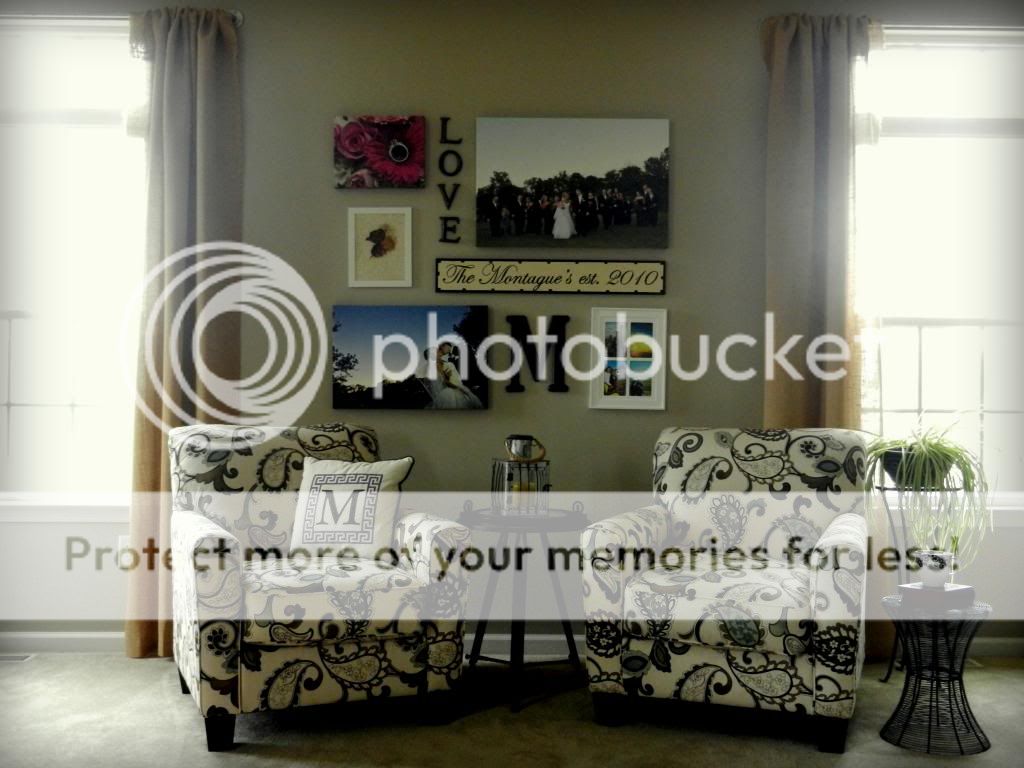
Are you tired of seeing these chairs yet?  I have been told by people who shall remain nameless that I might be going a little overboard with the chair sharing.  What can I say... I'm in love!

Another "before" angle

...and after
 

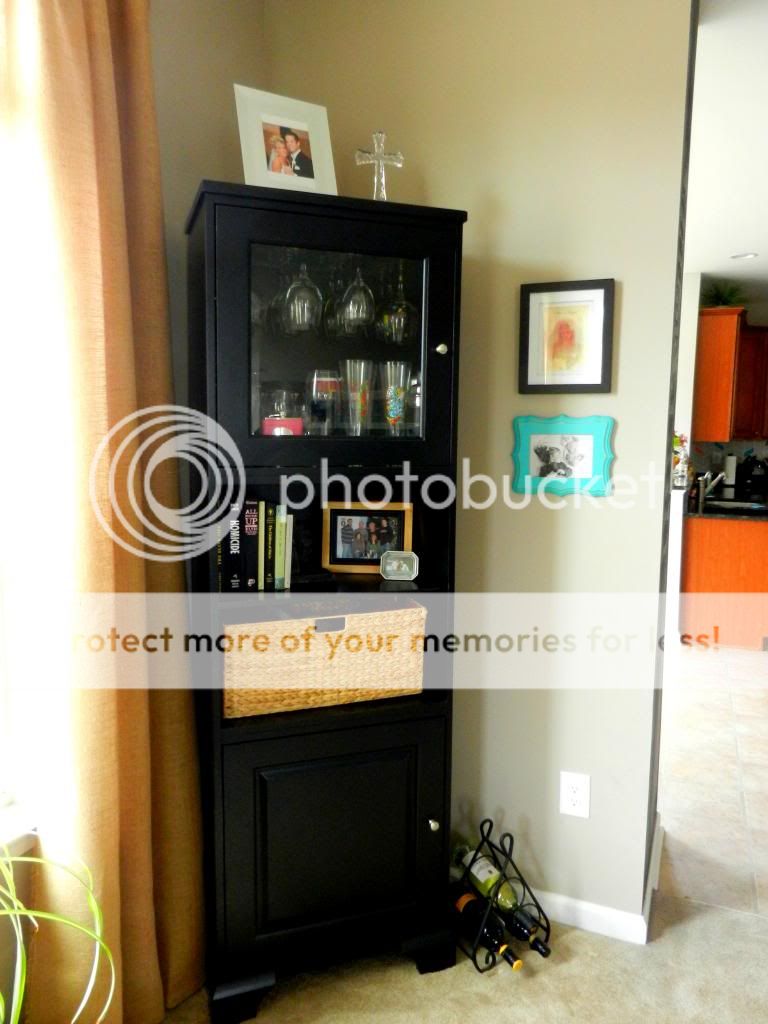
This is a semi-custom piece from Howard Miller furniture, which I've had
forever and get so much use out of.

Here are some photos of one final area that I'm still not sure what to do with.  I plan to do something like this in the space next to the couch.  I can't figure out what to do decoration-wise on the wall behind the couch.  I like the pictures I have there, but I don't think they take up enough vertical space and look kind of lost on this wall.  I can't decide whether to add another row, mount them on wood backing similar to this, or just scrap the frame idea and try something totally different.  Any ideas??


Source List:
Burlap Curtains and Galvanized Steel Rods- DIY
TV Console - Custom from Martin's Furniture in Lancaster, PA
Deer Head - West Elm
Metal Circle Wall Art - Kohls
Gray and Orange Poufs - Target
Black Basket with Rope Handles - Pier 1
Metal Stool - Joss & Main
Chairs and Couches - Ashley Furniture
2 End Tables with Chairs and Sofa Table - Joss & Main
Tall Black Wine/Misc Storage Unit - Howard Miller furniture
Coffee Table - Ballard Designs
Gray Leapord Ottomans and Table Lamp - American Signature Furniture
Pillows - Joss & Main
Clock - Joss & Main
Orange Throw - West Elm
Green Throw - Crate and Barrel 
 
 
I'm linking up at House of Rose, the Humble Brag, the Blissful Bee and The Golden Sycamore go check them out!

Monday, May 20, 2013

Family Room Progress

We have made lots of progress on the family room since the beginning of the year!  So far this is what we have accomplished from our original list:
 
...decided to do the gallery wall instead of the fake fireplace for now.
We got two of this gray couch from Ashley furniture (just a little over $800 for both couches!).  I also want to get two of the armchairs from that set.  I think that will be my next big furniture purchase.  We also bought this coffee table, which I am in love with 1. because I love the look and 2. because I don't worry about using coasters on it since it's already "distressed".  We also got a matching (cheaper) console table for behind the couch and an end table from a thrift store.

I have completed/am in the process of completing several DIY projects for the room.  The gallery wall was my first project.  I also made some art for behind the sofa, but I think I want to add something more to that, so I won't count it as complete just yet.  I am in the process of making curtains and curtain rods right now... that's almost finished so I'll be sharing pictures soon!  I also have plans to refinish an old dresser from my grandmother, which I started sanding about 4 months ago, realized how annoying sanding is, and haven't touched it since :).  It will really look nice in the room, so I need to get a move on, but sheesh, sanding furniture is a pain in the rear!

We have also gotten a lot of painting done!  Two of the walls in the family room we did in Martha Stewart Potters Clay and we did an accent wall in Martha Stewart Slate.  We painted our kitchen and hallway in Sharkey Gray and the morning room will be this color as well.  The only room I did not use Martha Stewart on so far was the powder room, which I just finished painting in Behr Harbor.  For all of the paint, we used the Glidden Duo (paint + primer) base in eggshell and I could not be happier with the quality of the paint.  We chose this because it ranked very high in Consumer Reports and it is one of the cheapest paints out there (about $27 per gallon).  Another painters tip... spend the extra few dollars on Frog Tape... it really is so much better than the regular blue stuff.  Oh and we did a small chalkboard wall between our kitchen and family room.  So much fun!
 
So the main things we have left for the family room are crown molding (which my dad informs me is a "winter-time project"), a mail/message center, and the dresser.  I will be honest, I did not expect myself to get nearly this much stuff done by now!  {...patting myself on the back...}.  And painting some more rooms and essentially finishing the deck are added bonuses. 
 
The next room I plan to finish is the powder room, which should be an easy one.  I'll be back with the plans on that and pictures of the completed family room shortly!

Friday, February 22, 2013

Empty Frame Gallery Wall

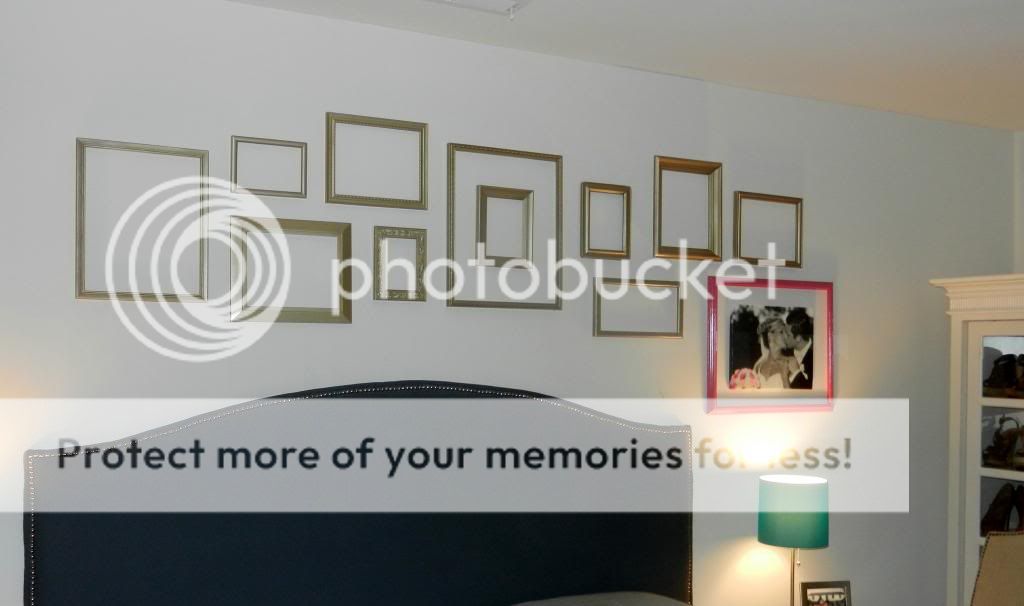
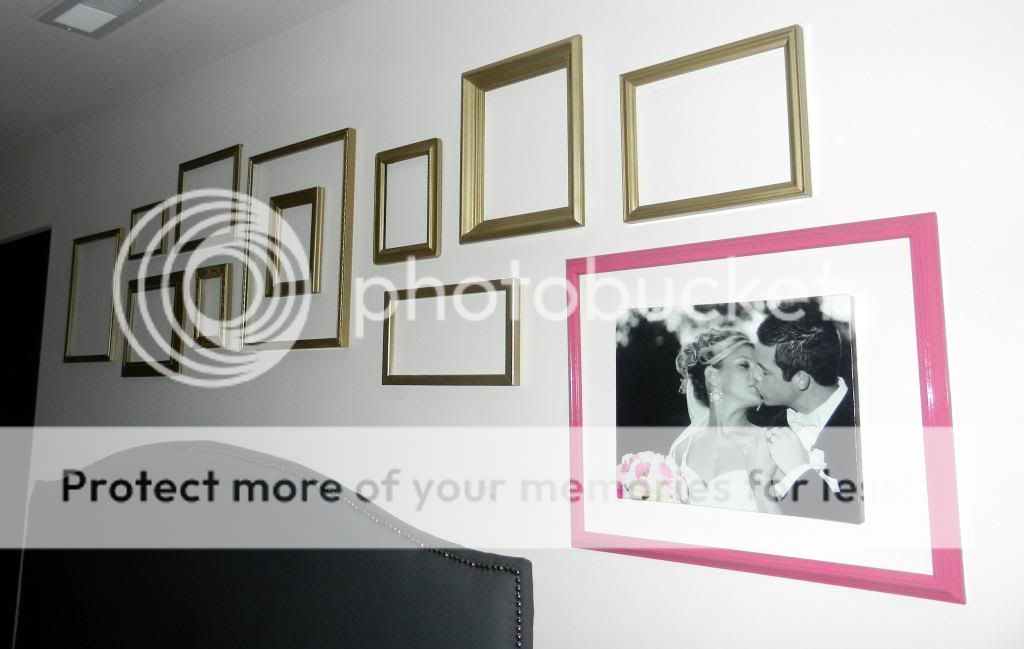
I've finally added a bit of decoration to our master bedroom walls:

Most of the frames I already had (isn't amazing how many random frames you collect over the years?). I wound up buying the 3 biggest ones at Goodwill for less than $10 total. I gave each a good priming (especially the wood ones, they were the hardest to cover) then sprayed all but the one with Rustoleum Metallic Champagne Mist spray paint (same stuff I used on my foot-of-the bed bench).


I used Rustoleum Berry Pink Spray Paint on the "accent" frame for some pop and to match the flowers in the canvas photo.

I laid the frames on the floor to get an idea of how I wanted them. Then I cut out paper templates of each frame and hung them with painters tape so I could see exactly what it would look like before I starting putting nails in my wall. I wound up trying a few different options before I found one I was satisfied with.  Then I just nailed right through the paper... no measuring involved!  I wish I had hung them a tad bit lower, but it will have to do as is!
 
 
Next up - some art for the wall behind our couch in the family room!
 
How are you all doing with decorating?  Any fun new ideas?  I love seeing pictures of rooms as they evolve so please share!


Monday, February 11, 2013

Family Room Gallery Wall

 
I finally finished the gallery wall that has been sitting on my living room floor for the past month waiting to be hung! I'm thrilled with how it turned out. I think it's the perfect space for that wall in our family room and will look even better once I hang some curtains on the flanking windows. Since we don't have kids, the theme is our wedding/honeymoon. It feels a bit narcissistic, but it will have to be that way until we have kids!

 
I did the old "draw the outline on paper and hang the paper on the wall" for getting the layout on the wall just right.  I took pictures of the whole process, but unfortunately they didn't turn out that well so I'm not showing them.  Here's a step-by-step for a similar method from AKA Design.  It took me about an hour to get everything hung just right.  


Besides the canvas prints, the other things on our collage are:

1. Framed pressed flowers from my bridal bouquet... just taped them to some fun craft paper and framed... easy peasy.
2. "M" that I received for my wedding shower... it took me 2.5 years to find the perfect spot for it!
3. "Montague's est. 2010" sign... also a wedding gift that hasn't had a good home until now.  (I painted the outside part black so it matched better... it used to be dark red).
4. The frame in the bottom right displays 4 pictures from our amazing Hawaiian honeymoon.
5. 4" L O V E letters from Hobby Lobby (on sale for $2.39 each)

I already had everything for the wall except the frame for the flowers, which I got from ikea for $3, and the L O V E letters which were cheap, so the total cost for this project was only $13. (Big thanks to my sis-in-law for having those wedding photos professionally printed for me!)    


Our new couches are coming tomorrow... I'm so excited!!!

Monday, November 5, 2012

Design Suggestions Please!?!?

 
The wall that we have our TV on in the family room is very large and has windows at both ends. I already have a pretty nice media console which we are using there now, but it just looks so small on that giant wall and I don't know what to do with the area on either side of it. If the windows weren't there, I would have considered trying to do some built-in shelving/cabinets similar to the picture below, but I think the flanking windows might make that look funny.


Does anyone have any suggestions for a way I can make our wall less boring, while still using my existing media console? Or do you think I should just put the console somewhere else and start from scratch? I'd really like to find a decorating solution that covers up that outlet on the right too. It really bothers me that that's the closest outlet to the TV... I hate exposed wires!
 
Please offer any ideas you may have!  If you have pictures of your ideas, you can email them to movingtothecountryblog@hotmail.com.
 
Thanks in advance for your help!

Wednesday, August 15, 2012

More Interior Design Resources


We went to visit the house around 9:30 last night and the workers were still there!!!  We drove around for about 20 minutes hoping they were just finishing up, but they didn't show any signs of leaving.  It seems like we are already ahead of schedule so I'm surprised that they would be working so late.  Greg didn't want to go in while they were there so we just turned around and went home :(.  I'm going to go over again today after work.  Hopefully I can get some pictures of whatever they were doing in there.  
 
Since I have no house pictures to share with you today, I thought I'd share one of my new favorite interactive design websites: http://olioboard.com/  Once you register, you can create your own "ideaboards" for rooms.  They have a million different furniture and decor pieces to choose from, but my favorite part of this site is that you can upload your own pictures.  So if you want to see how something in the store will look with stuff you already have, you can take pictures of everything (or get pictures from the store website), upload them to your olioboard, and play around to see how they go together and what else you could use to pull everything together.
 
You can start from scratch with your own ideas or you can "love" someone else's board then use their items to make it your own.  You can download your boards to a .jpg file so you can print them out and take them shopping with you!  There's also a "shop it" feature so you can find out where to buy the things you add to your boards.  They even tell you when your selected items are on sale!
 
There are some other features that I haven't tried out yet and the best part is that it's free!  If you want something more advanced, you can pay to unlock additional features, but I'm not at that point yet.  I'm just having lots of fun planning my rooms as I wait for my house to be finished!
 
Here are some boards that I have made:

Guest bedroom idea.
I want to change this to include some furniture that I just inherited from my grandmother.  I plan to make a nightstand similar to the one shown from my late mother's old suitcase.

Possible Formal Living Room Idea

Possible Family Room Idea 
(if I stick with the red couch I already have)

Master Bedroom Idea
(I'm going to work on this one to try to make it a little less "girly", but we are using my white bedroom set so I think it may be a little on the feminine side regardless)

The "HE" and "SHE" pictures above the bed are things that Greg and I made and displayed at our wedding. They list all of the things we love about each other.  I think it would be so cute to hang these above our bed.  It will tell us which side of the bed is ours and also remind us why we fell in love :).
 
Here are some examples of boards I "loved" that other people have made:

I love these colors for a gender-neutral nursery (some day!!)


If I decide not to use my red couch in the family room I'd like to get a dark gray sectional and do this type of color scheme.
Happy designing!  If you decide to sign up for olioboard please follow me and I'll follow you back!  My username is colettefb.