Joss & Main Exclusive online private sales for the home
Showing posts with label bathroom. Show all posts

Friday, March 28, 2014

DIY Friday {#2} - Hanging Rope Shelves

I recently started my DIY Friday series to try to motivate myself to complete some of the hundreds of projects I have pinned.  My goal is to complete one pinterest project a month and I am happy to report that my first month has been a success.

If you follow me on Instagram you probably saw that I decided to try the hanging rope shelves I had pinned from Casa Cullen. I thought they would be perfect for the space above the toilet in our master bedroom water closet and the nautical vibe from the ropes is the perfect compliment to my beach theme. (I still need to share my finished master bathroom with you guys!)


The complete tutorial is on Casa Cullen's site, so I won't give a detailed how-to, but here's the general idea:  I cut a 1"x10" board to my desired shelf width, then drilled big holes near each corner for the rope to go through.  Then I lightly sanded, primed and painted the shelves.  I mounted a regular old hook to the wall with small plastic anchors.  Then I threaded the manila rope through the holes in my shelves, hung it on the hook, and messed with the height/angle of the shelves until it looked just right.  I cut down a hardwood floor tongue piece that we had left over from the study to slide through the rope below the top shelf to hold it in place.  I just tied knots below the bottom shelf, trimmed the excess and then frayed the edges.  I recommend making sure you are happy with how your shelves are hanging before you trim your excess rope though as it is would be very difficult to re-tie your knot with not enough rope to work with.   

The only things I needed to buy were the wood and rope, so this project only cost me about $20!


Linking up here:

Tuesday, January 28, 2014

House Painting - Tips and Tricks

My trip to NYC was cancelled this weekend (huge bummer :(), but having a whole weekend of unexpected free time made me extremely productive.  I painted our master bathroom, bought the cabinets for our built-in base and started painting the study.  The master bathroom took FOR-EVER to paint because there were so many obstacles to cut around.  As I was painting I got to thinking about how much I have learned since the first room we painted, and I figured I'd share some of the mistakes I've made and things I've learned with you all.  A coat of paint can make such a difference... especially in brand new homes like ours that are completely white.  A little bit of color on the walls is a cheap and easy way to make your house "home-ier".

My step-by-step process for painting:

1. Remove all light switch covers, decorations and other removable fixtures.  In the bathroom, this includes the towel and TP bars.  The builder grade ones come off easily... you just need a tiny screwdriver.  Look under each side piece and you'll see a tiny black "button".  Just push that button in with your tiny screwdriver and pull the piece off.  Some of the nicer fixtures require an allen wrench, but it's basically the same idea.

2.  Examine your walls for any holes or dents and fill them in with spackle.  This is the stuff I like to use because it's sand-able/paint-able within minutes. 

3. Dust off then tape your baseboards.  The first room we painted I taped off everything... the windows, ceiling, adjacent walls.  I quickly found that that was totally not necessary and a waste of time.  I practiced cutting on a few taped areas to get the hang of it and realized it was much quicker to cut in rather than tape everything.  And now I love cutting!  I'm probably a wacko, but it's really therapeutic for me.  It requires just enough concentration that I can't think (worry) about other things, but not so much that it's stressful.

4. Sand your walls.  I found that we have lots of little bumps and imperfections on our new walls, particularly around seams in the drywall and near corners.  Just a light sanding makes a big difference in the quality of your painted surface.  After sanding, use a dustbuster or swiffer to dust off your taped baseboards so you don't get dust particles in your paint.  I like to tape before the sanding step, because the tape doesn't hold as well with even a little fine dust on the baseboards.

5. (Optional).  Some people recommend washing your walls with a damp sponge after sanding, but I have found this not to be necessary.

6. Cover your floors with plastic or canvas drop cloths.

7/8.  Roll/Cut.  The order I do these in depends on the room.  I think it's more efficient to roll first.  This way you can cover as much area as possible, then only cut in where needed.  If you cut first, you'll often cut more than you need to, which wastes time and energy... or you'll cut less than you need to, and then you have to go back with the brush after you roll anyway.  Cutting second also allows you to get up close to the wall to find any areas that might need a little touch up.  My only exception to this suggestion is in complex or small rooms that require you to contort yourself and lean on walls to reach all of your corners (like bathrooms). 

I like to use an extender (i.e. a metal broomstick screwed into a paint roller) and roll all the way from the top of the wall to close to the baseboards as I can so I don't have any lines in the middle of the wall.

9. Look over your room very carefully.  So far every room I have painted I have missed a spot that I didn't notice until I was all cleaned up.  So frustrating!

10.  I typically wait about 24 hours to remove my tape and replace my fixtures and outlet covers.

Tips and tricks:
 
1. My dad bought me this brush with a really short handle that is awesome for getting in ceiling corners and other tight spaces.  I highly recommend investing $5 and saving yourself some aggravation.  
2. If I need to step away for any length of time, I just wrap my brush, roller and pan in saran wrap.  This will keep it fresh for a couple of hours.
3. In the RH bathroom, I found that I was able to easily cut around the mirror since it is not flush to the wall.  I also found that I could just loosen the two knobs on the light figures, pull it away from the wall a little bit and cut around/under it. 
4. Frog tape is the best.
5. Expensive paint doesn't always = better quality.  My absolute favorite is Glidden Duo (Paint and primer in one) in eggshell finish.  In my opinion this covers better than any of the other name brands I have tried.  I have never had to do more than one coat and the finish is great.  It is sold at Home Depot (for only $27 a gallon) where they can match any color, so you can get a color from another brand if you have the swatch.  They also advertise that it has mildew-resistant properties, which make it a good choice for bathrooms.  
6. Going along with #5, I prefer an eggshell finish for most wall applications because it looks almost like flat, but cleans up much better.
7. I don't paint the inside of window wells... it saves a lot of time and I don't think anyone can tell the difference. 
8. Don't cheap out on your rollers.  The cheap kind leave fuzzies on your walls (I'm dealing with this in the study now :()
  
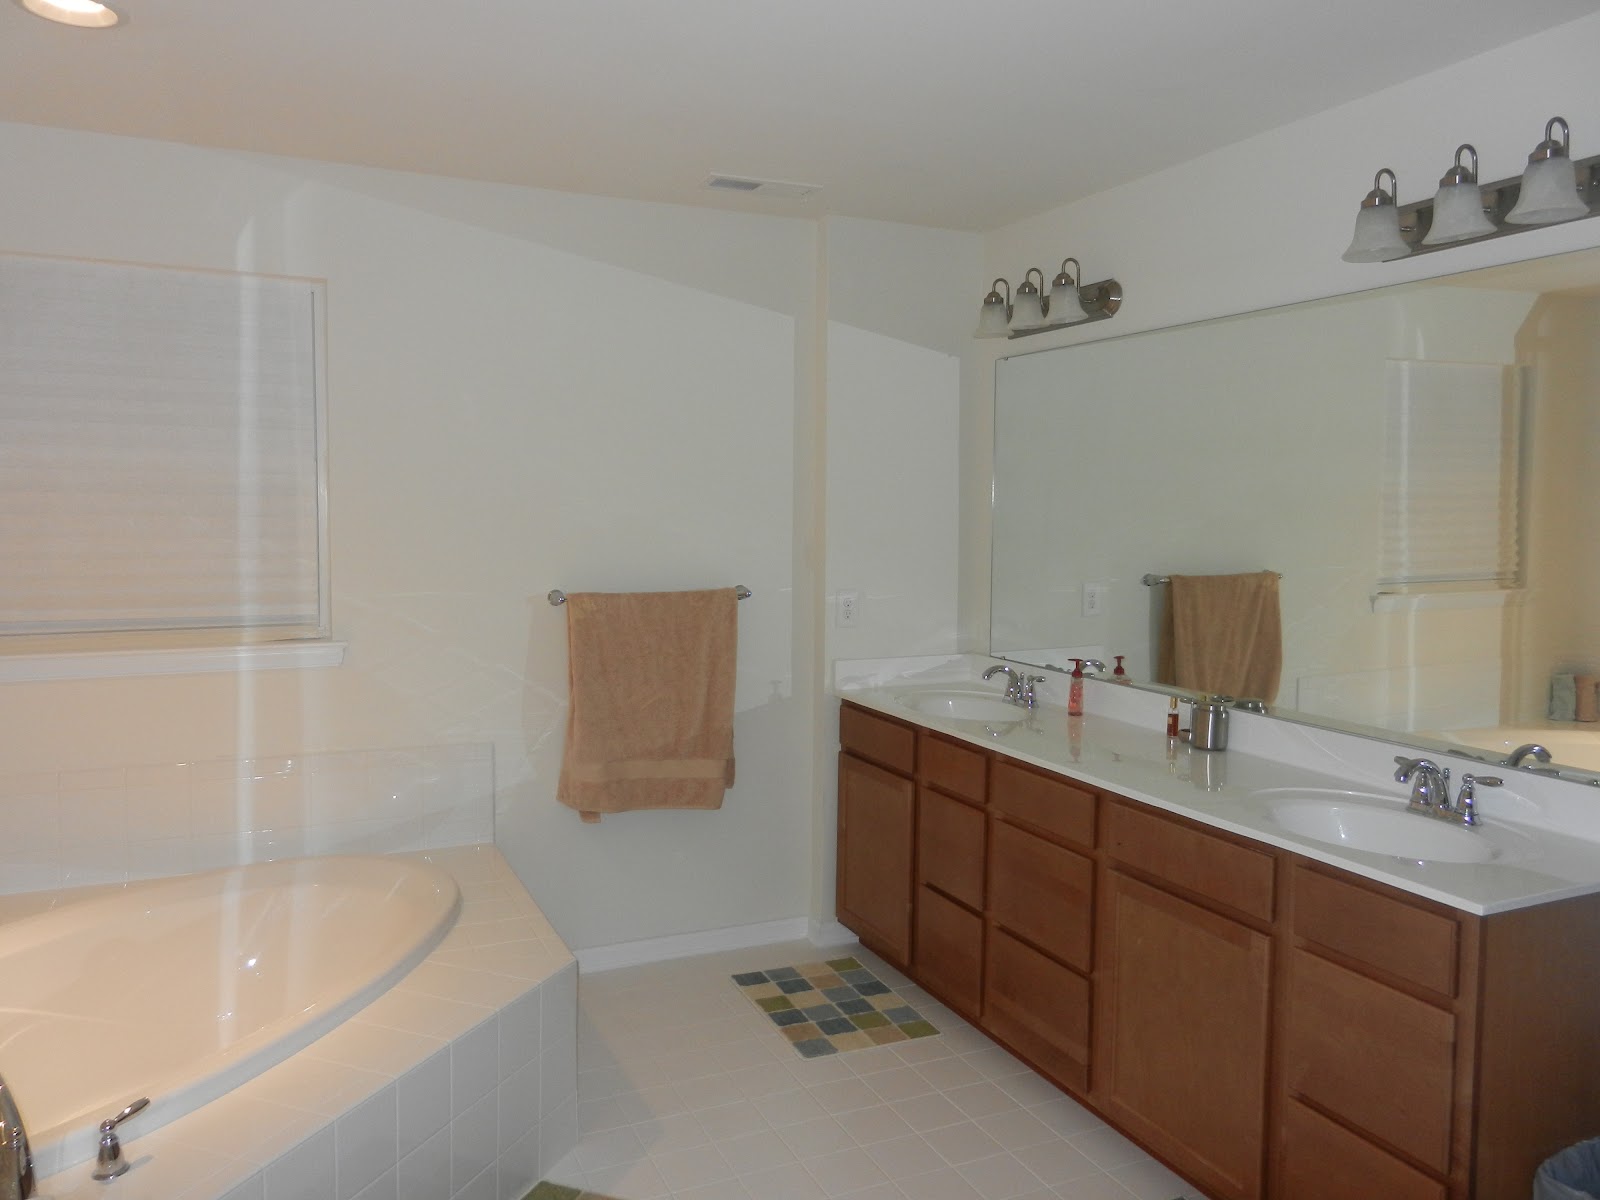
And now for a picture of our newly painted master bathroom.  I am so in love with this color... it's Spring Stream in (Glidden Duo Eggshell, of course)  It makes me feel like I am at the beach!  Soooo much better than the all white "before" shot.  Now I don't hate our plain white tiles quite as much!  I still have quite a bit of decorating to do in here, but I'm so happy with the difference a coat of paint has made.
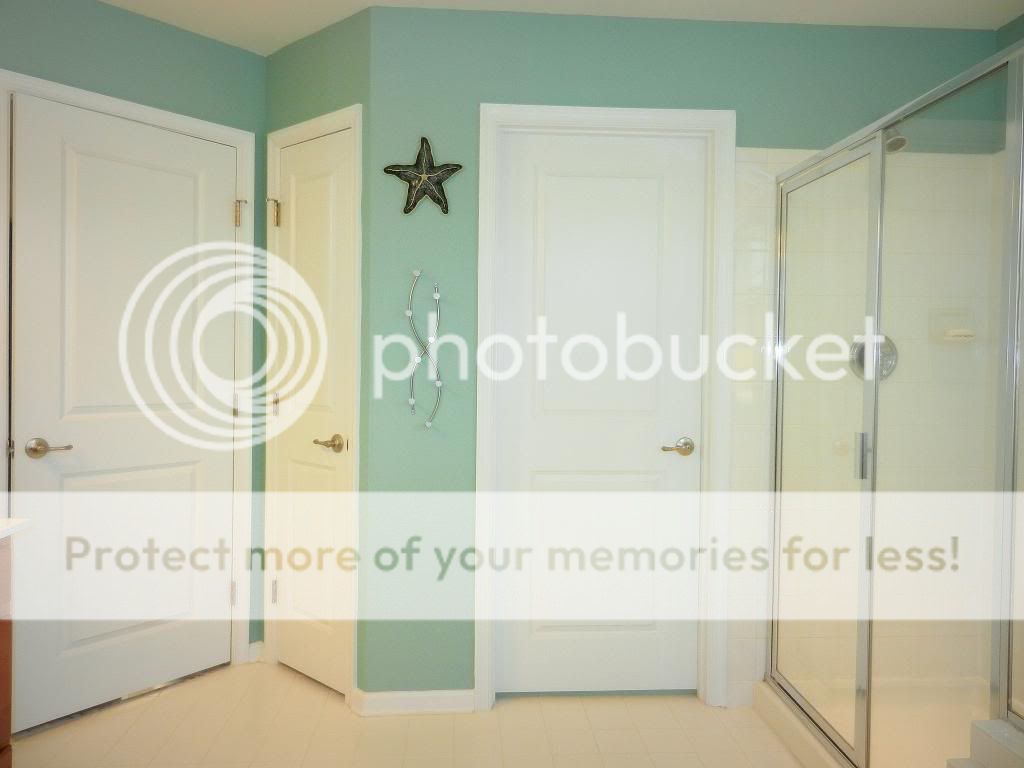
After
Before

Do you have any tips for painting?  Please leave a comment and share your knowledge!

Tuesday, November 20, 2012

Post-Move-in Issues

Good morning blogger friends! I tried so hard to stay up on my blogging after we moved in but that has proved harder than I expected, and sadly it's been quite some time since I've posted. We have made some progress, the most exciting of which is that we started our deck!! I will dedicate my next post to our deck design, permitting process and progress so far, but for now I just wanted to give a little update about some issues that have popped up since our two-week punchlist.

Heater
Our furnace has been leaking onto the basement floor. Luckily our basement is not finished yet so it hasn't caused any damage, but obviously this should not be happening. We submitted a service request and someone came to fix it a few days later. Unfortunately, their fix did not work. It is still leaking AND the vent in the upstairs bathroom is leaking as well. I suspect that it's just condensation, but it should not be happening. The heater guys are coming again tomorrow.
 
Grading around the House
We got some seepage into our basement during Hurricane Sandy. Nothing major, but again... should not happen. From the outside, the problem was clear. The mulch bed at the front of our house was sloping toward the house so we had standing water all along our foundation in the front. There's a crack in the foundation in the area it leaked in. They came and added some fill along the house, but I'm still not sure if it will be enough. I'm hoping we get some heavy rain again soon so we can test it.
 
Shower bench
The tile on our shower bench was one of the items on our two-week punchlist. The tiles on the front of the bench were not properly attached so they were separating from each other. They originally just added more caulk and grout, but two days later it was cracking again. We submitted another service request and they came last week and took down our whole shower and replaced all of the tile on the bench. The bad news is we only have one shower for the next few weeks. The good news is we probably would not have noticed the leaking vent if we weren't forced to use the other shower for a while.
 
Water
The water coming out of our upstairs faucets was smelling like rotten eggs. I don't know how we didn't notice it when we first moved in. Apparently this is a common problem in our community because there is a lot of sulfur in the soil (we have well water). There is a different kind of filtration system which easily addresses this, and RH has had to replace the systems for almost all of the homes in our community. Why, you may ask, do they not just install the correct filtration system to begin with? Good question!  Of course, because it costs more money. I have to imagine though that installing then replacing the systems has to wind up being more expensive in the long run. I guess they are just hoping people won't complain and will just deal with stinky water forever. Anyway, we got our water system replaced and now our water is fine.
 
I hope I can report at our one-year inspection that these were the last of our problems, but have a feeling that will not be the case. I'll keep you updated!

Wednesday, October 3, 2012

Bathroom Pictures (for Julie S)

Julie S had asked how I liked the standard 6" white tile in our bathrooms so I figured I would share some pictures.  I would have preferred something fancier (but I didn't want to pay for it :)), but I'm totally ok with the way it turned out.  We haven't done much decorating or any painting yet, but here are some pictures of both of our upstairs bathrooms:

Master bath


Hall bath


As I mentioned, the tile is the 6" white that was standard in our community.  It is matte on the floor and glossy in the shower and around the tubs.  We upgraded the cabinets one level to Fairfield Maple Spice, which was $90 for the hall bath and $190 for the master bath (master would have also been $90 if we hadn't gotten the upgraded master suite).  We got the standard white cultured marble vanity tops in both bathrooms and upgraded to add the second sink in the hall bath for $695.  I just thought it looked silly with only one sink in there.  Plus having two sinks probably avoided a lot of morning fights between my brother and I when we were growing up. :)

I hope this helps those of you who are debating whether or not to spring for the better tile!

Saturday, September 1, 2012

Shower Troubles


We found out why our closing date is so far away (as I mentioned before, our house is pretty much done, but we are not closing until September 21st).  Apparently he needs to order a completely new shower for our master bedroom because ours is cracked.  He is not sure how long it will take for that to come in so he's holding off on settlement to be safe.  It's a bummer because I'm getting anxious to get settled and unpack all of our stuff (we are living with my dad now and have kept most of our boxes packed).  On the other hand, I'm glad they are replacing it, not just trying to patch it up.  On the other hand, it's annoying because the crack was clearly caused by a careless worker dropping something so if not for him we could probably be closing next week.  On the OTHER hand (uh oh, I'm out of hands), were are still on schedule even with the September 21st closing date so I guess I really can't complain because this is what they told us from the beginning.

Our pre-settlement demonstration is scheduled for the same week as settlement right now, but I'm trying to get that changed because Greg and I both have important work things that week so we don't want to take two days off.  I'm hoping they will be accommodating.  Considering our house is basically done, I can't see why it should be a problem.

Friday, August 17, 2012

Bathrooms Tiled

Both of our upstairs bathrooms are tiled!  We were very cheap responsible in the flooring department (we only upgraded the carpet pad in some areas), so we went with the white 6"x6" tile that is standard in our community.  While it's not my favorite thing about our house, my thought process was that I can totally live with the plain tile for a while (I definitely don't hate it), and I'm sure 5-10 years down the road I'll be itching for a project to do, so we can re-tile and spruce up the bathrooms then if we decide to.  Until then, I plan on painting the bathrooms a brighter color than I normally would and sprucing it up with some decor and window treatments.  Please share if you have any ideas!

Master Bathroom (the floor was covered and I was afraid it wasn't dry yet, so I didn't go in to get a close-up)

Hall bath.

Close-up of the floor in the hall bath.  I like the marble transition piece.

They have also done the staking for our driveway and walkway:

Walkway from driveway to front door.

Driveway staking (it looks like it's booby-trapped!)