Joss & Main Exclusive online private sales for the home

Saturday, September 27, 2014

How to get Rid of Fruit Flies

I don't know about you, but this time of year the fruit flies are out in full force at our house.  To me they are one of the most annoying bugs, and they seem to multiply like bunnies!  Apparently female fruit flies can lay up to 500 eggs at a time and their life spans are 40-50 days, during which time they can lay several 500-egg batches.  No wonder they are so hard to get rid of!  


But there is hope to control them!!

Try to prevent them from coming in the first place and/or eff up their homes once they arrive using these simple tips for getting rid of fruit flies:

1. Keep your sink clean.  Fruit flies like to procreate in drains, so make sure to keep all food out of your sink and drains.

2. Rinse out your recyclables before throwing them away and take our your trash often.  It also helps to have a trashcan with a lid and keep it closed at all times.

3. Periodically pour boiling water down the drain.  You can easily kill budding fruit flies by clearing out the drains with boiling water.

4. Set homemade traps. We have tried all different kinds of traps, but we have found the wine and saran wrap option to be the most successful. Just pour a little bit of wine into a glass, cover tightly with saran wrap, then use a toothpick to poke a few holes in it.  Apparently the flies can get in through the holes, but then can't figure out how to get out.  I put one near our sink and one near our trashcan and they really work!!

So gross, but so effective!!

It was seriously grossing me out to write this post, but I felt it was my civic duty to share these super easy tips for getting rid of fruit flies! Hopefully this helps someone else who is dealing with a fruit fly infestation... good luck!

Thursday, September 25, 2014

10 Things I am Thankful For

With all of the challenges, stresses and hardships of life, sometimes we really need to take time to reflect on all of the wonderful things we have been blessed with in our lives. My family has gone through some very difficult events in the past several years, and I sometimes find myself throwing a pity party and wondering why I am faced with so much heartache. I need to stop dwelling on my problems, stop comparing myself and my life to others, and focus on all of the incredibly wonderful things I have to be thankful for.


The SITS Girls’ are providing writing prompts for the week as part of their “Back to Blogging” series, and today’s prompt of “10 Things You are Thankful For” seemed like a perfect way to start my journey of positivity.

Here goes…

10 Things I am Thankful for:

1. My life partner. Greg is my best friend, my biggest supporter, my personal comedian, my therapist, my PIC. When I was single I never imagined that marriage could be so wonderful and so easy. I don’t think this is typical, though. I think I hit the husband lottery and landed myself a kind, helpful, ambitious, sympathetic, loyal, funny, handsome, easy-going man who makes my heart jump every time he walks in the door or wakes me up with a cup of coffee and a kiss. Everyone who know Greg knows he is an awesome person, but not many get to experience the “real” Greg… the goofy, hilarious and sensitive man that brings happiness to even the worst of my days.


2. My parents. I am so very lucky to have grown up with two parents who cared about me and my brother more than anything in the world; who worked hard every day to provide for us; who taught us by example to be kind, honest, hard-working, compassionate, generous people; who instilled in us a strong faith in God to help us through the difficult times and give purpose to our lives. Even though I lost my mom way too soon, I firmly believe that we packed more love and memories into our 24 years together than some mothers/daughters experience in a full lifetime. I still miss her every minute of every day, but I am so thankful for the times we shared and her unconditional love. My dad has a heart of gold. He is one of the most generous and loving men there are and he continues to support me, my brother, and our new families. I couldn’t have asked for better parents, and I am so thankful for the way they raised me and the love they always gave me (isn’t that a 2-Pac song?).


3. My brother and his family. When I am sad, I just watch a video of my 4-year-old niece Cara or my 2-year-old nephew Cavan. They are the cutest, sweetest little kids. I love them both so much and I am so thankful to be part of their lives. Even though Cavan can barely say my name (but he’s getting there!) and Cara thinks Uncle Greg is cooler than me, they are still my favorite people to hang out with (besides Greg, of course). My brother is an amazing dad to them and has always been a great big brother to me. I am also thankful for his kind and loving wife who happily supports him and all of his crazy projects, outfits and craigslist purchases; and who loves our family like her own.

4. Our unborn baby, Gregory. Just about a month ago, Greg and I lost our first and only child after just a few short months of pregnancy. We have struggled with infertility, and we had waited and prayed and hoped so long for this tiny little miracle that we were finally blessed with this past summer. Losing our precious baby was absolutely devastating for both of us, but he gave us so much joy during his short little life, brought us even closer to each other, strengthened our faith, and gave us hope.


5. My in-laws. They are crazy (the good kind of crazy), they can be loud and sometimes their stories are hard to follow, but they are awesome, loving and supportive people who have welcomed me into their family with open arms. My MIL has been there for me through everything. Me, her and my kick-ass soon-to-be sister-in-law always stick together in a family dominated by men and sports. (My FIL and two BILs are pretty awesome too though).


6. My health. Sure, like most people in America, I could stand to lose a few pounds… but I am in generally good health and am able to do all of the things I want to do. I am thankful to have never known true physical suffering.

7. My brain. While I never considered myself to be super-smart, I realize now that my mind has served me well throughout my life. I can now appreciate what an accomplishment it was to complete an engineering program at a great school and receive multiple job offers right out of college. I always worked hard and tried my best, but I know that everything I have been able to achieve would not be possible without the gift of a (pretty much) sound mind that God has given me.

8. My extended family. I am very fortunate to have a lot of close cousins and aunts and uncles on both sides of my family. Most of my best memories involve the “Cousins Club” from my mom’s side or the crazy McGovern cousins on my dad’s side. They are the kind of family that doesn’t care if you say or do something stupid or insensitive; they will tell you you’re being an idiot, and then forget about it and continue to love you. They have been there for all of the most important moments of my life and I love each and every one of them.

9. Greg’s ambition. I am very lucky that Greg has worked so hard to maintain a great job at a stable and reputable company. His success gives us the financial stability to live the way we want to, and to allow me explore different career options and take professional risks. I am so thankful that I will never be stuck in a job I hate just because I can’t afford to leave.

10. YOU! My tiny corner of the blogesphere is my happy place. It gives me a sense of creativity and satisfaction to share what is going on in our house and all of the projects attempt. I still can’t believe that people want to read what I have to write, and I get so excited about every comment, email, and page view. Thank you for visiting my humble little blog… it makes me so very happy to have you here.  :)

Thursday, September 4, 2014

Fabric-Covered Nailhead Trim Cork Board

It was so nice having a few days off from work to get some crafting done last weekend!  I showed you the easy “instagram photo frames” I made the other day.  I also made a “built-in” fabric-covered, nailhead trim, cork board for our built-in bookshelves in the office.  I struggle with using different patterns in my decorating and I thought this would be a good way to introduce a fun pattern in a somewhat non-committal way, since I can fairly easily change out the fabric if I want to down the road.


This was a very quick, easy and cheap project.  It took me about an hour from start to finish, only cost about $35 and doesn’t require any power tools.  Here’s what you need:

Piece of thin plywood underlayment cut to your desired size
1” x 2” wood cut to fit the 4 sides of your underlayment
Screws or nails + a drill or hammer
Fabric
Nailhead Trim
Staple gun and staples
Cork Tiles
Spray glue
Box cutter or scissors

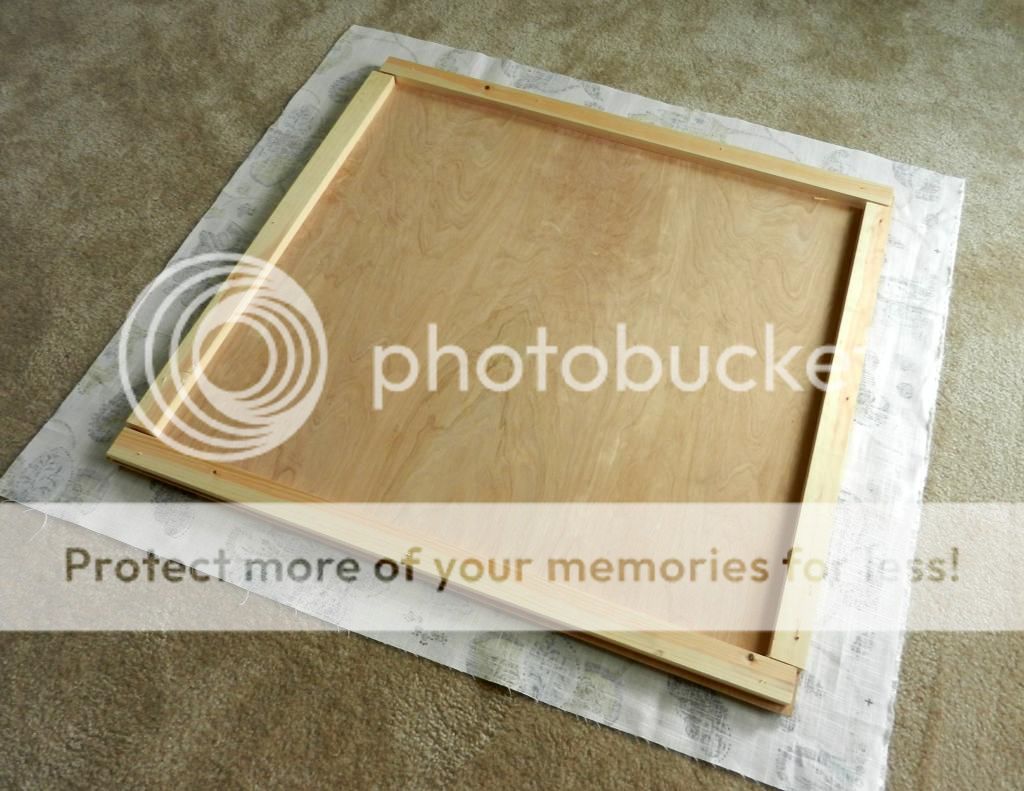
You can get all of your wood cut to size at Home Depot or Lowes.  I had my underlayment cut to fit the center section of our built-in bookshelves, where my computer will go.  Then I cut my 1x2 pieces and screwed them to the underlayment.  I added these mostly for stability and to give me a little thicker surface to staple into, but you really don’t absolutely need those pieces.


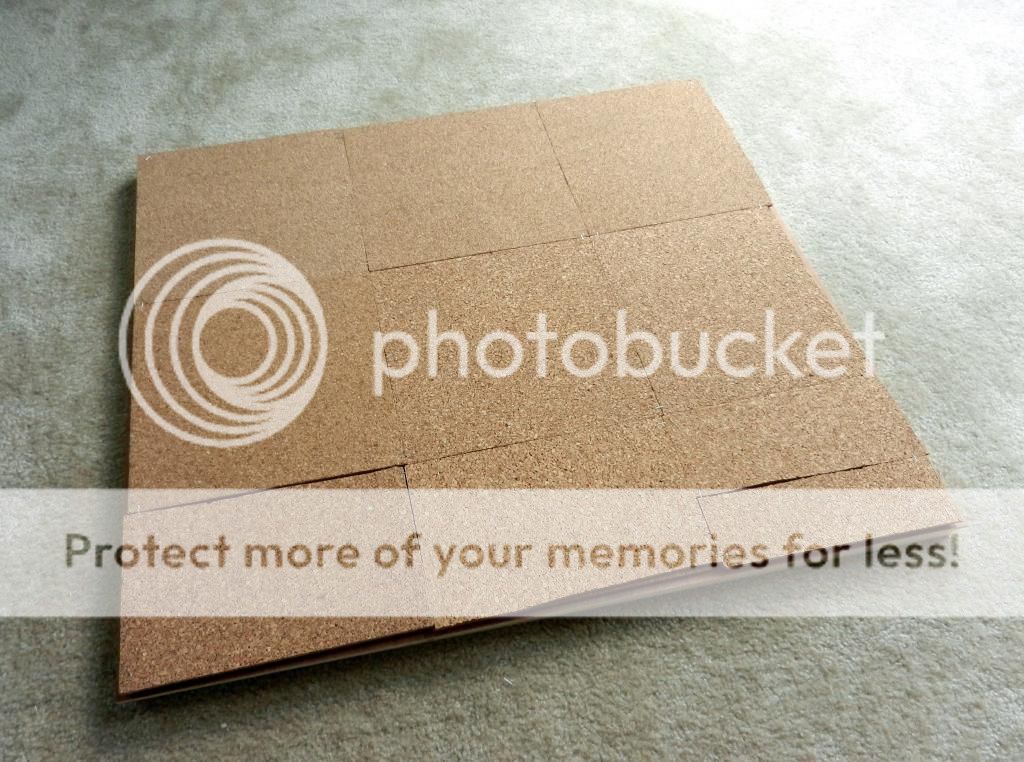
Once you have your base the way you want it, glue the cork tiles on, cutting them as needed.  My tiles were very thin so I did two layers so my thumbtacks would hold better.  I also added some staples in the corners of each square for extra adhesive power.  Again, probably not necessary, but I love reinforcement.


Next, iron your fabric then lay it pattern side down and flip your cork board over on top of it (see photo above).  I used this fabric from Tonicliving.com.  They are not cheap, but have an amazing selection.  Pull the fabric tight and staple it around the back edges of the board.

Then flip it back over and add your nailhead trim.  I like to use the kits that are just a long string instead of using individual nails… saves a lot of time and aggravation!  Measure from the edge of the cork board as you go to make sure you are staying straight.  I kept mine 1 inch from the edges.  

And there you go…  Four easy steps to a super cute new cork board!


Note: Mine fit snuggly in my space so I didn’t need to attach it to the wall at all (I was planning on using command velcro strips if it didn't wind up fitting so nicely.  But if you plan on hanging it on a wall I recommend using a hanging system like this so it doesn’t get crooked every time you pin something.


This project brings me one step closer to finishing the office!  It’s all annoying work that we have left like caulking the crown molding, touching up the painted desk, putting a protective coat on my file cabinet makeover (more on that to come), and cleaning (yuck!).  I always drag my feet with these last “finishing touches” because they always take longer than you expect and you don’t see much difference when they are done.  I like instant gratification!!

This post was featured @ Designs by Miss Mandie and the Lovely Wren!

Create and Share
Lovely Wren


Linking up at these great parties.  Go check them out!


*This post contains affiliate links*

Monday, September 1, 2014

Easy Chevron "Instagram" Frames

Hello there!  We are recovering from a long Labor Day weekend, filled with the beach and 30th birthday parties.  I was so glad I finished this project (and another which I will share shortly) before the weekend so I could just relax the rest of the weekend.  


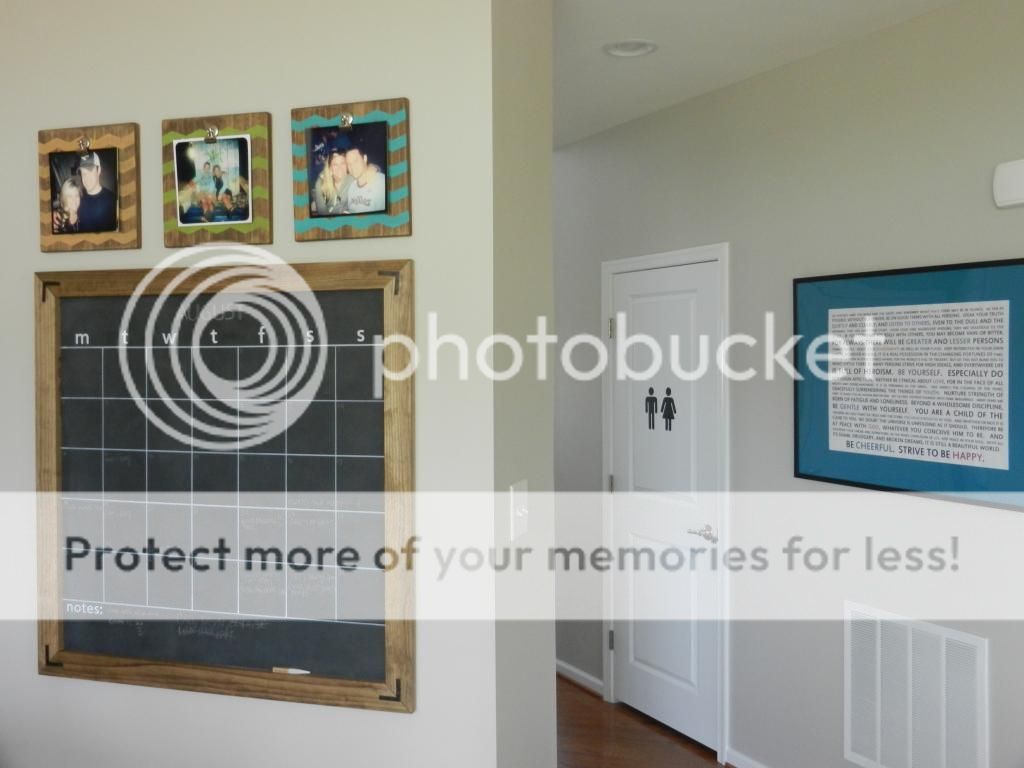
The last thing I showed you was my DIY chalkboard calendar, which I hung on the giant blank wall in the Courtland kitchen.  I think it was the perfect “wall art” for that space, but there was still a lot of blank space above the chalkboard (I had to hang it somewhat low since I’m a shorty).  And I have been itching to do something with all of my instagram pictures, so I made these super-easy frames to display them. 


First off, it took me about two weeks to figure out how to get my instagram pictures printed.  I’m sure a lot of you have been printing from instagram for years, but I am totally not tech-savy and had no idea what I was doing.  After asking around, I found this app called Printicular, where I could just upload my photos right from my phone and either get them delivered to my door for an additional fee or pick them up at Walgreens for free.  (Of course since I’m a cheap-o I choose to pick them up at Walgreens).  I have to say, the pictures themselves were not cheap though.  The 4”x4” ones were only 39 cents each, but the 8”x8” ones that I wanted were $3.99 each.  But I could not find a place that did the square prints for cheaper.  If you know of something please share!! 


I am probably a weirdo (scratch that, I know I’m a weirdo), but I was soooo excited to pick up my pictures!  It’s been so long since I actually went to the store to pick up photos, that I forgot how exciting it is!  Remember before the digital camera age, when you didn’t even remember everything that was on your camera when you took it to get developed?  That was so exciting!  I remember walking to the CVS near my house when I was younger to pick up photos, then sitting on the curb outside the store to look at them because I couldn’t wait until I got home.  Ah, those were the days… life was so much simpler back then.  Ok, I’m done with my trip down memory lane… thanks for indulging me.


Back to the frames...  these guys are so easy to make.  Here’s what you need:

-1”x12” wood of your choice (I used select pine)
-Bulldog clip like this    
-Stain
-Paint (I used samples I had leftover from my painted back splash project)
-Paint brush
-Picture Hanger (I used one like this)
-¾” screws
-Sander (optional)
-Drill
-Saw

And here's how to make them:

Step 1.      Cut.
Cut your wood to the desired size.  I made mine 12”x12” for my 8”x8” pictures so that I had a 2-inch “frame” on all sides.  12”x14” would work for an 8”x10” photo.

Step 2.      Sand (optional).
Sand your wood pieces and round off the edges/corners.  I did this because I think the stain takes better on sanded surfaces, but sometimes when I really don’t feel like sanding I just leave it raw and 9 times out of 10 it still turns out fine.
The one on the left is sanded and the one in the middle is not.  See the difference?

Step 3.      Stain.
Stain the wood pieces and let dry overnight.  I used miniwax “special walnut” to match my chalkboard, but I think these would look awesome with a dark walnut stain.

Step 4.      Paint:
Apply your chevron frog tape and paint with the color of your choice!  Since these are going in my kitchen I used colors to match my painted back splash (check out the tutorial for that project here).  Remove the tape right away, and let the paint dry for an hour or two.
TIP: After applying the tape, smooth out with a plastic trowel for cleaner lines.
I only did one very light coat so that the wood grain kind of showed through.

Step 5.      Sand (optional).
Sand again for a “distressed” look if you want.  I was originally planning on doing this, but then I loved how they looked after I painted them so I decided not to mess with it!

Step 6.      Attach hardware.
Flip the frame over, mark the center of the frame toward the top and attach your hanger.
Then place a photo in your bulldog clip, arrange on the frame where you want it, and mark the hole in your clip on the frame.  Finally, drill a pilot hole and attach your clip with a ¾” screw.


Step 7.      Add pictures, hang and admire your masterpiece!


This project was very quick and easy to make, and I especially love it because it is so easy to change out the pictures.  You don’t even have to take them off of the wall to change them, just squeeze the clip!

Do you have another clever way you like to display your photos?  Please share!!


I am linking up at these great parties... go check them out!

*This post contains affiliate links*