We made some great progress on the deck this weekend! We got all of the posts for the railings up, installed our drainage system for the upper level (since we will be storing stuff under it), and laid all of the deck boards (except one...haha) for the upper level!!! My dad also cut the stringers for both sets of stairs.
I am
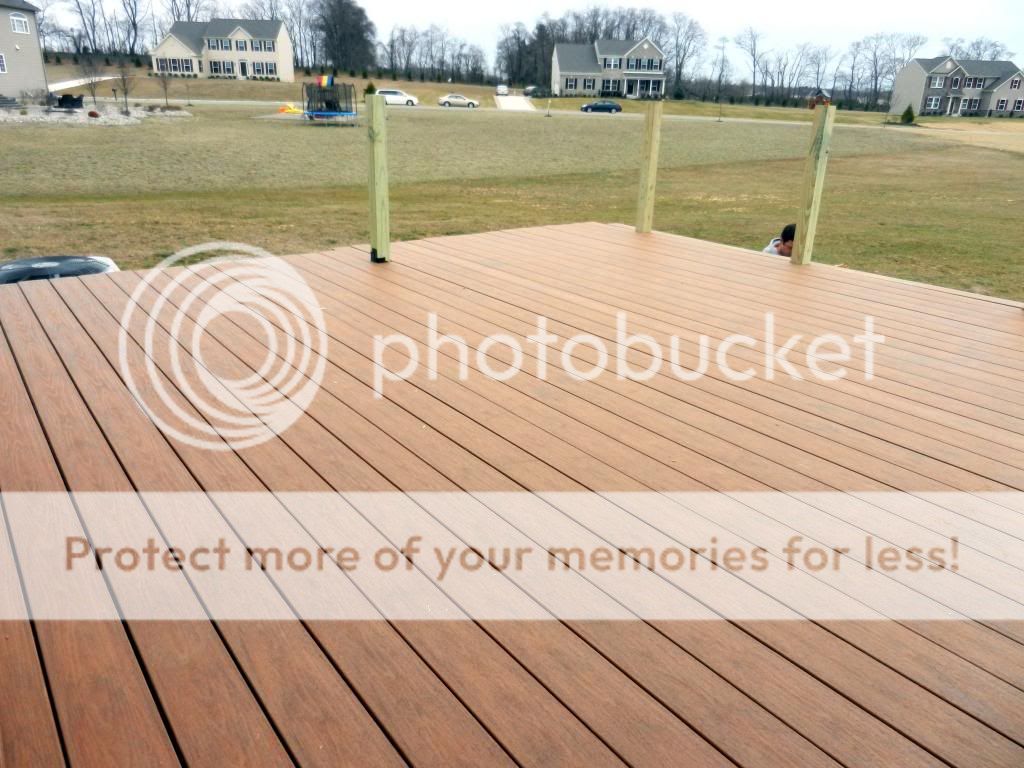
in love with the decking we choose. It is Harvest Bronze from
Timbertech's XML Tropical Collection. The "pattern" in the planks looks so natural and it really does look tropical. I couldn't be happier with how it looks so far. We ordered it and our railings from
Delaware County Supply Company in Boothwyn, PA. If you live in the southeastern PA or southern NJ area, I highly recommend their services. Everyone there is very knowledgeable and super nice and helpful. With so much crappy customer service around these days, it was refreshing to deal with people who take pride in their trade and actually want to help you. We will be giving them our service over Home Depot whenever possible!!
We went with the concealed fasteners for the decking in lieu of regular visible screws and it really does make such a difference. Unfortunately installation is not quite as easy as the advertisements/directions lead you to believe. We wound up having to use a sledge hammer to bang each board into place, which was pretty tiring and time-consuming. Greg and I are hurting after two full days (4 days for Greg and my dad) of hard manual labor, but it is totally worth it. We're getting so close to being finished!!!
Enough talk... here's some progress pictures:
 |
| Tell me that's not the most beautiful decking you've ever seen! :) |
 |
| Upper level decking complete! |
 |
| Safety railing is gone! We can finally walk out our back door! |
 |
| Removing the safety railing! |
 |
| Progress photo showing the DekDrain drainage system under the decking. |
 |
| Another shot of the drainage before the deck boards went down. |
 |
| The runoff flows down the troughs in the previous photo (placed between each joist) into this gutter which is attached to the beam at the end of the deck. Those "bibs" at the ends of the troughs are just to prevent the water from overshooting the gutter. We still need to add a downspout at the end of the gutter. Voila! A dry underdeck! |


It looks great! I cannot wait to say goodbye to our safety rail! I want to build the deck ourselves, but my husband wants to hire a company! I am going to show him your post to try to persuade him otherwise. Keep us posted.
ReplyDeleteIt's a lot of work, but it's so rewarding! I'm so glad we decided to do it ourselves!
Deletethis looks awesome. i received a couple of quotes for my 1 level deck idea and was flabbergasted by the prices (10k-14k). needless to say i'm still looking for a small company perhaps i don't know. we just aren't handy enuff to DIY. can't wait to see the final!
ReplyDeleteI know... unfortunately it's not cheap especially if you do composite decking (which is the way to go in my opinion!). Once we finish, I'm going to do a breakdown of all of the material costs so you can get a general idea of the price per square foot.
DeleteHow does it feel to walk on the boards with the concealed fasteners? Did you go with Timbertech's ConcealLoc? I walked on a few decks with the concealed fasteners and the boards seemed to squeak. I'm debating getting ungrooved and doing surface screws. Thanks - deck looks awesome! Like that color a lot.
ReplyDeleteYes, we used the timbertech concealed fasteners and I think they are great (aside from being a little more difficult to install). They definitely don't squeak now and they are attached to the joists pretty tight, so I don't think we'll be having any squeakage in the future either.
DeleteWow, it looks amazing. We are having RH build ours so we didn't have to wait and they were offering a great price. My only complaint about RH was that they only had two colors.
ReplyDeleteHow much do you save diy'ing it? We keep going back and forth on deck/patio but I keep thinking diy of either might be the way to go.
ReplyDeleteI'm actually not sure what the price difference would be if we had had someone build it for us. I'm keeping track of all of our material costs and once we finish I'll do a post on how much it cost us in all.
DeleteIn my area RH offers a plain wood 14x16 deck for $3,995. I found the plans online with the materials list and priced it out. Material cost was $1,400ish. That's not shopping around. Just walking into HD and writing down prices. That deck is too small for our house and I think I want more choices. Composite, two tone railings, multiple levels and cascading stairs, etc. (Read gunna cost more than I want to spend in the first year.). So a simple set of stairs it will be. Also note the cost above didn't include permits, tool rentals and concrete for footings (as they very based on location).
ReplyDeleteWow that is cheap! We spent about $1,000 just for our framing lumber. Ours is about twice the size of the one you mentioned though... we have one one 15x16 level and one 20x12 level. Our footings cost about $1700, so it would probably be about 1/2 of that for the deck you referred to above. You're right, unfortunately composite is significantly more expensive than real wood, but hopefully the durability will make up for it! And keep in mind that with composite or PVC decking they recommend doing your joists 12' O.C. instead of 16'.
DeleteWow - what caused the footings to be so expensive?
DeleteWell, we had a contractor do them (forgot to mention that) and we wound up with 15 12"-diameter footings since our lower level is freestanding.
DeleteImpressive…you have made a TON of progress. I can't wait to see pics of you and the hubs chillin out on the deck with some vino!
ReplyDeleteI couldn’t help but laugh when you ended up using all the boards except for one. Oh well, better have an extra rather than be short. ;) Anyway, great idea with the bibs as you called them. That drainage system should help heaps when it comes to maintenance and cleaning. You guys have done an amazing job so far. I can’t wait to see the finished deck!
ReplyDelete-Kylee
The deck is almost finished. The decking looks amazing. Installing a drainage system under the deck was pretty smart. That will ensure the good condition of the deck’s foundation. Can’t wait for the final photos! Please keep us updated about the deck! ->Keaton Oakes
ReplyDelete