The desk portion of our home office built-in unit is complete! I am thrilled with how it turned out. I will warn you that this post is a long one! If you have no interest in how we built it, feel free to skip to the pretty pictures at the end :).
For the base units we used
unfinished wood kitchen base cabinets from Lowes. First, we cut the bottom "toe kicks" off of the cabinets using a circular
saw to make them "desk height". A typical desk is about 30" high and our
cabinets wound up being a little less than 31"... close enough. Then I applied three coats of Kiltz Primer and two coats of white semi-gloss paint. We
removed the baseboard in the areas where the built-ins
will go so they sit flush to the wall. Then we screwed them into the studs
in the wall. The one wall corner has a 135 degree angle, so we decided to cut one of
the cabinets diagonally to make a right triangle-shaped cabinet so we can
make use of the entire length of the space. We basically just cut the back and
right sides off, removed the shelf and then cut the bottom diagonally. Obviously we couldn't get the drawer back in then, so I removed the front face and attached it using
tip out hinges and attached a plastic
plastic tray to the back of the drawer front for some extra storage. Leave no space un-storable... that's my motto!
 |
| Base units installed! (Sorry about the photo quality... this was a nighttime phone shot). |
For the desk top, we used 4 6"x5/4" boards plus one 4"x5/4" board of select
pine. I choose 5/4" wood because I wanted it a little thicker than the standard 1". The select pine was a compromise between butcher block (which looks really good, but
is very expensive) and regular pine or other wood (which is cheap, but doesn't
look as good). I
love how the select pine turned out after we stained
it... very "multi-dimensional". (You'll have to wait until the end of the post to see it).
To attach the boards together we cut holes in the
sides of each board (the end boards only got holes in one side) using a biscuit
cutter. Then we used wood glue and biscuits to bind the boards together. We put
the glue in each hole and along one side of each board. Then we used several
clamps to squeeze them together.
 |
| This is what we started with for the desk top. |
 |
| That's me cutting my biscuits! |
 |
| Preparing to glue them together using wood glue and biscuits. |
AND THEN, since my dad and brother were helping and are both
super-perfectionists, they decided that the 0.0001 cm gap between two of the boards was too big so they used a
Kreg Pocket Hole Jig
to drill pocket holes and screw the boards together.
 |
| Dad and brother reinforcing with their new Kreg Jig |
 |
| And a shot of my brother's workshop/barn just for fun. |
After we let the assembled desk top dry for a few days, I sanded it, stained it with two coats of dark walnut and
sealed it with a few coats of satin finish polyurethane. I also sanded
down the edges to round off the corners a bit along the front face. {I HATE
SANDING!} Finally, we cut the right side on an angle to fit in our odd-angled corner. This wound up being a bit of a bear because the dimensions of the wood were slightly off and the other "90 degree" corner was not quite square, but I won't bore you with the details of how we fixed it. It worked out in the end and that's all that matters!
 |
| Dad attaching the top to the base units. |
Then we put the doors and drawers back on and added some pretty hardware. We used
this for the drawers and
this for cabinet doors. I really love how the bronze contrasts with the white cabinets and complements the dark wood top.
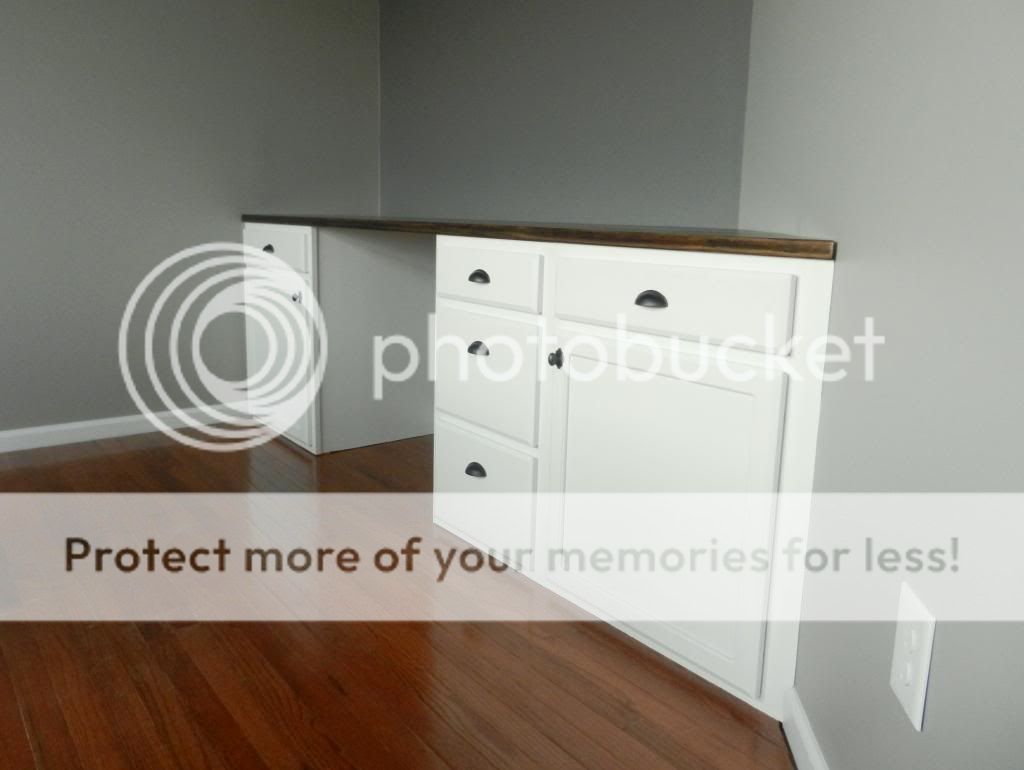
And finally, for the finished product! Here is our shiny new built-in desk:
 |
| I'm in love! |
 |
| Look how gorgeous that wood is!! I can't stop looking at it! |
Next up are the bookshelves that will go above the desk. I'm thinking something like
this or
this, but I want to live with the desk for a little while first to see what kind of spaces we will need.
Linking up at these sweet link parties... go check them out!
This post contains affiliate links.


Your desk looks great, Colette! And I love that you took it along the slanted wall too to use up all the space. Can't wait to see more :)
ReplyDelete- Lora
Thanks Lora! My husband makes fun of me for my obsession with eliminating wasted space :).
DeleteI love this desk! Thanks for sharing at The Makers.
ReplyDeleteCorey @ TinySidekick.com
Thanks Corey... thanks for stopping by!
DeleteGorgeous! You guys did a fabulous job, were taking a similar approach with the basement media area...more to come. Thanks for the inspiration :)
ReplyDeleteI can't wait to see what you come up with for your basement!
DeleteThis is gorgeous! The wood desk top is just dreamy, turned out perfect!!
ReplyDeleteYou've done it again! It looks so professional and perfect!
ReplyDeleteLove it! Looks brilliant. Way to think outside the box for those angle cuts. Congrats!!
ReplyDeleteWOW!
ReplyDelete