Joss & Main Exclusive online private sales for the home
Showing posts with label home office. Show all posts

Wednesday, October 29, 2014

Built-In Desk and Bookshelves {How-to and Source List}

If you missed my big home office reveal, you can check it out here.  I am pretty psyched at how it turned out!  The biggest project and my favorite part of this room makeover was the built-in desk and bookshelves.  I don't have every step chronicled with photos, but I will try to give you the general idea of how we did it.  


I wasn't quite ready to build my own cabinets yet like John from Our Home From Scratch, so we cheated and used unfinished base cabinets from Lowes.  I used two 24” cabinets and one 18” cabinet with drawers, leaving 30” of space in the middle.  First we cut the toe-kicks off the bottom of the cabinets to bring them down to “desk height”.  The finished desk is actually a little higher than a standard desk, but it’s within a few inches and that was fine for me. Then, since our one wall is at a ~135 degree angle, we cut the back and right side off of our right-most cabinet. So the right cabinet is really only half a cabinet on the inside (see second picture below).  I actually got this idea from the TV show "The Millers". I was watching one night and noticed that their kitchen had a weird angled wall like ours and it looked like their cabinets were just trimmed so they were narrower in the back.
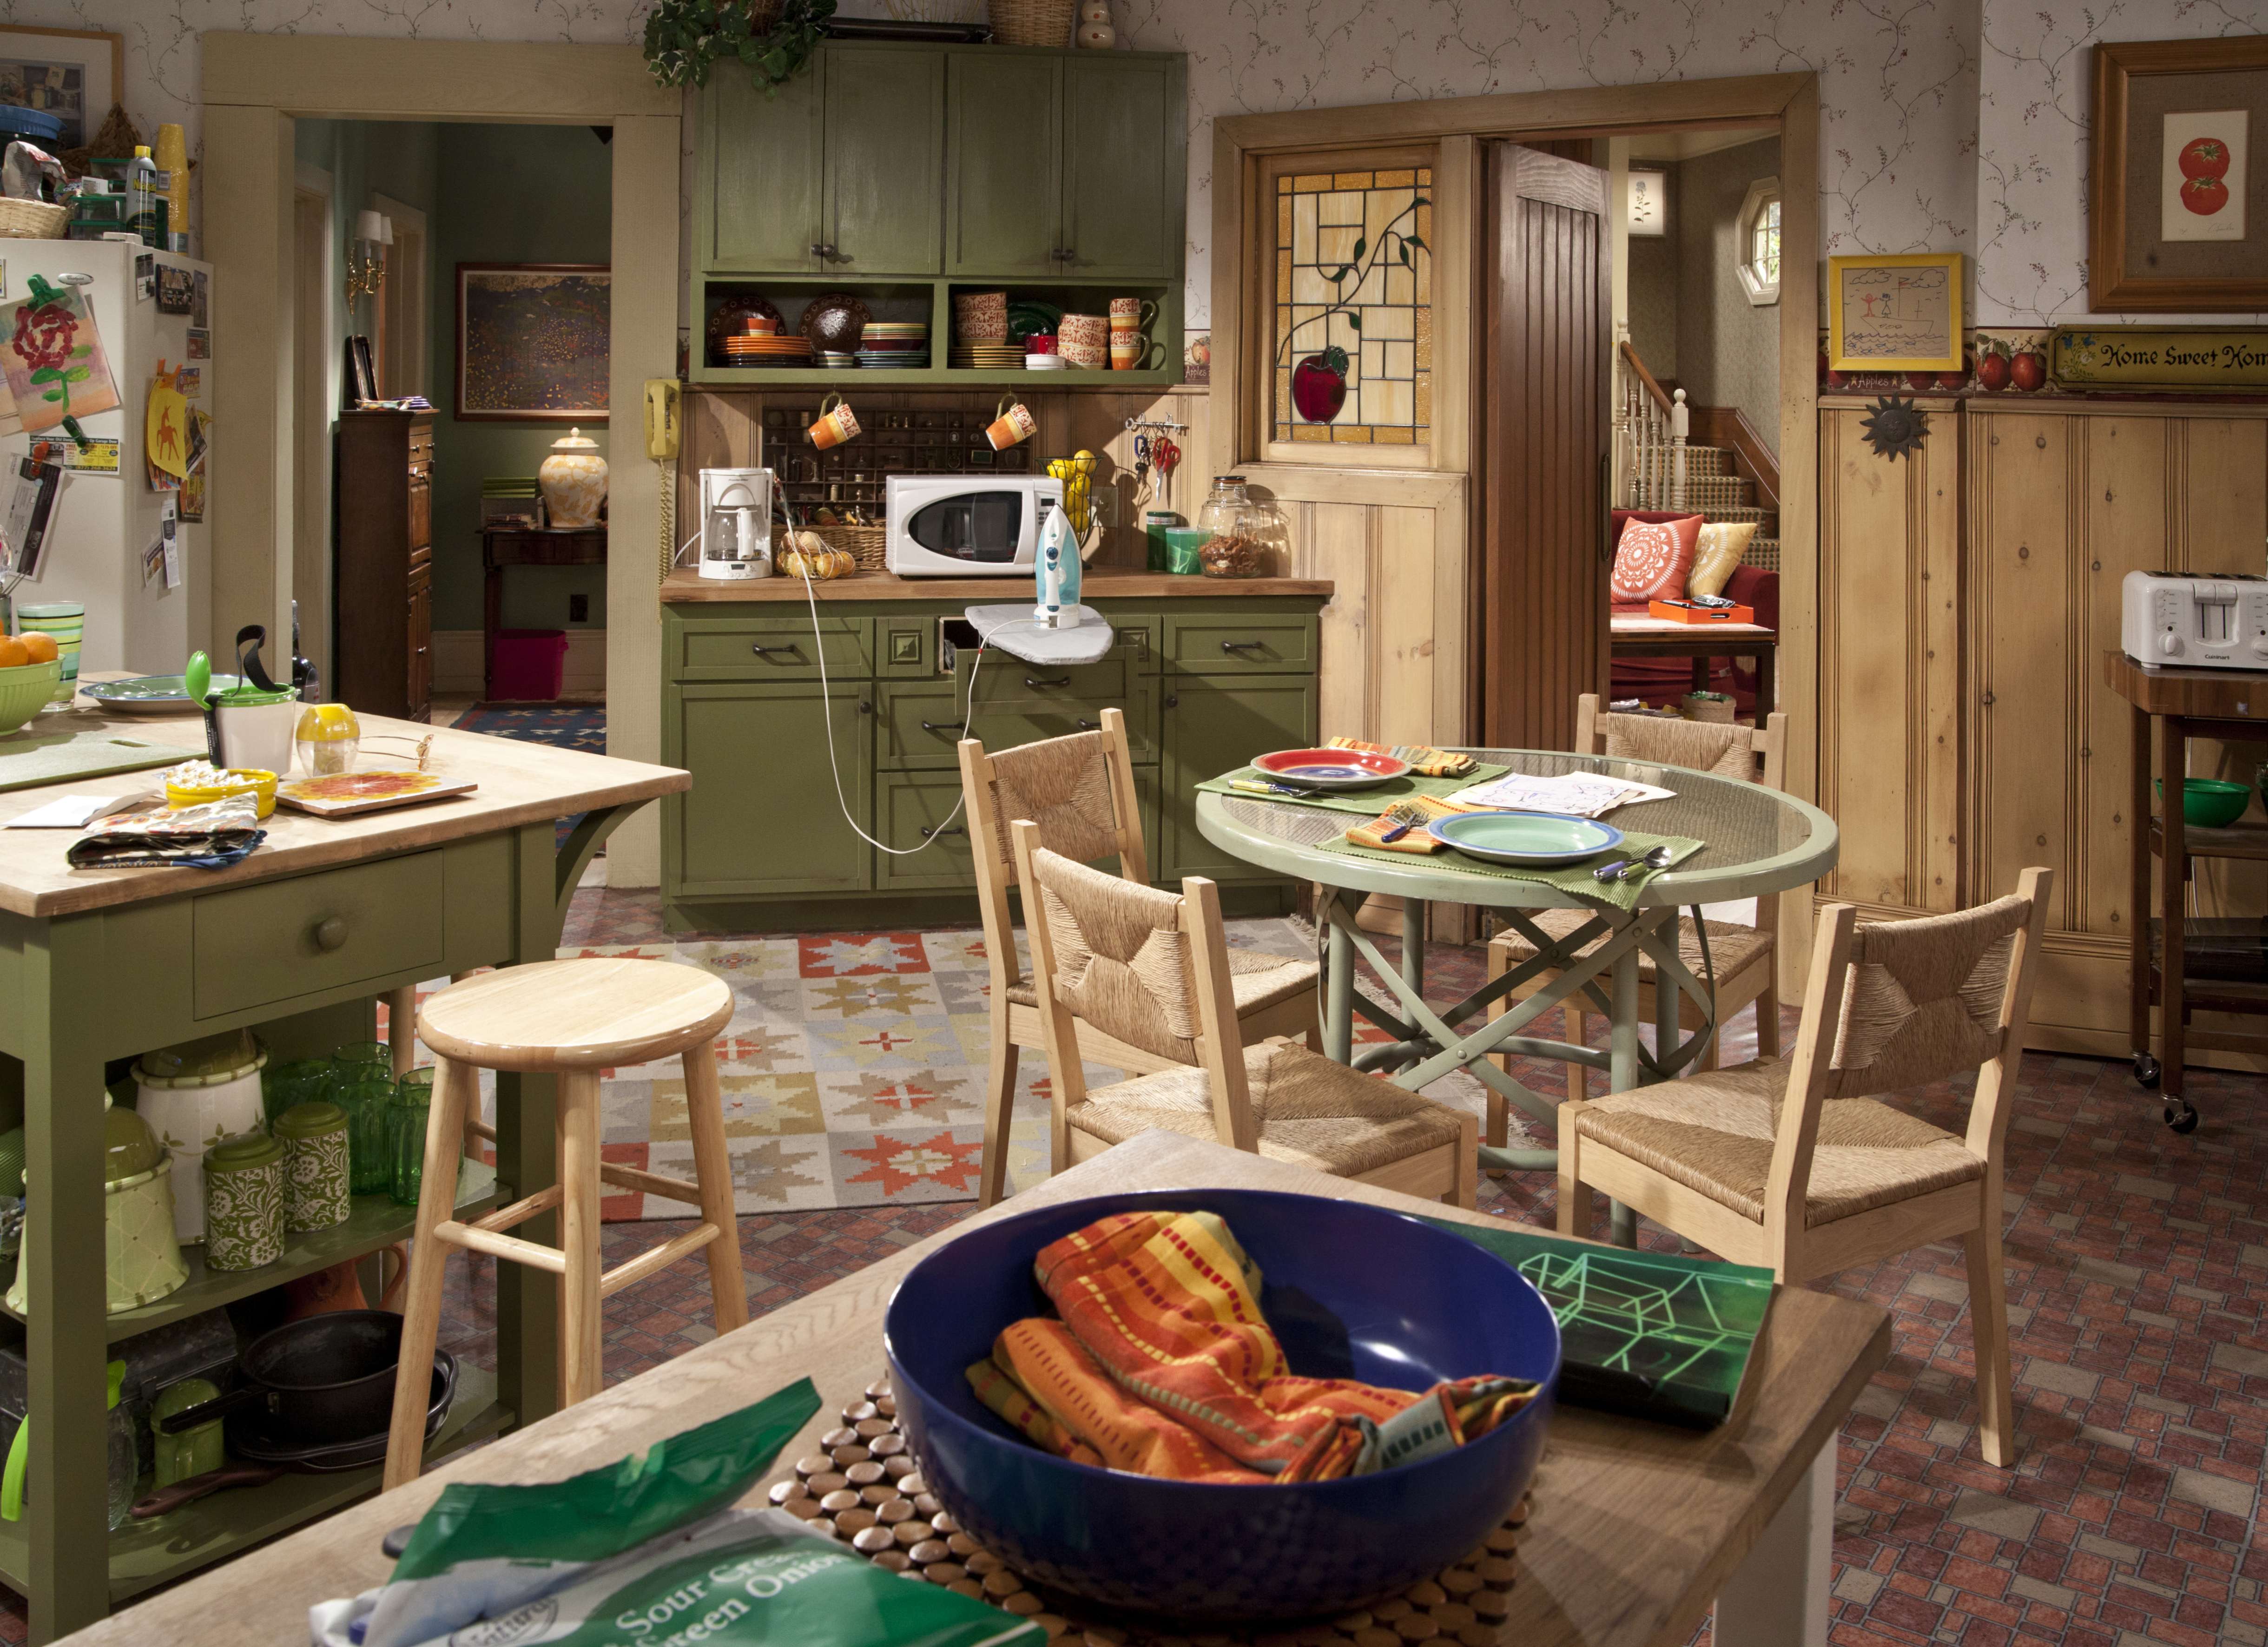
Inspiration from the strangest places!
I removed the doors and drawers from the cabinets and gave them all two coats of primer (my favorite is *KILZ two coats of white paint (I used Glidden's Swan White).  Lesson learned: Regular old Glidden latex paint is my go-to for painting walls, but it is not as wonderful for painting cabinets.  Even after letting the cabinets dry for a whole week, the doors and drawers were still sticking like crazy.  I remedied this by just adding those little rubber dots to the inside of all of the doors and drawers, but next time I paint furniture or cabinets I will definitely do my research first!

For installation, we first removed the baseboard in the areas where the desk would go (you can see how I removed the baseboard here).  We screwed the cabinets into the studs on the back and side walls for stability and also bolted the inner right cabinet to the right-most one. Then I added some baseboard to the wall under the middle part of the desk and shoe molding around the wall and desk to finish it off.

For the desk top, we used 4 - 6"x5/4" boards plus one 4"x5/4" board of select pine, which we clamped together using my brother's *Kreg Pocket Hole Jig System, then I sanded it, cut the angle on the right side, applied two coats of dark walnut stain and about 5 coats of polyurethane.  You can read the full tutorial for the desktop here.
Desktop after assembly and first coat of stain.

The cabinets are actually made with these little brackets at the top for attaching a counter top, so we my dad just screwed the desktop into those from inside the cabinets.

He is the best!!
Then I just re-attached the doors and drawers and added some pretty hardware using the same *template I used for our kitchen cabinets.
Desk finished!
Once we had the desk in place, we measured for the bookshelves.  Since we were pre-assembling them, we had to make them a little shorter than the distance between the top of the desk and the ceiling to make sure we could get them in there easily. This worked out anyway because I wanted to add some chunky crown molding to the top so it would fit seamlessly with the rest of the room, so we left about 5 inches between the top of the bookshelves and the ceiling.

Bookshelves before painting.
We used 1x12 select pine for the bookshelves. We made the left and middle units first since the width of the right-most one would need to be measured after the other two were installed to make sure we got it exactly correct for that weird angled wall. First we cut all of the vertical/side pieces to the right length, then stacked and clamped them together. Then we used my dad’s drill press to drill straight through all of the boards so that all of the holes were even on each piece. Then we cut all of the shelves to the right length, set two of the shelves inside the side pieces, clamped it together, drilled pilot holes, then secured the shelves with screws. I chose to one have one stationary shelf (plus the top), and the rest of the shelves are set with those *cabinet shelf support things so they are adjustable. We made three possible positions for each adjustable shelf. If I had to do it again, I would probably just make them all fixed because it gives more stability and honestly, I don’t ever see myself changing up the position of the shelves anyway.

Once we had the bookcase units assembled, I gave them and the extra shelves two coats of primer and two coats of the same paint I used on the desk. Once we set them in place on top of the desk, we screwed the sides into the wall studs in a few places and bolted the abutting units together in inconspicuous places.
My dad did most of the measuring/finagling for the right-most unit against the odd-angled wall and I honestly have no idea how to explain what he did so I’m going to skip that part! If you have a similar situation and have questions, feel free to email me and I’ll get answers from the boss for you :).

Once the bookshelves were in place we added crown molding in the whole room and just tied it right into the bookshelves.

And there you have it!  A DIY built-in desk and bookshelf unit that even a beginner woodworker like me can do!


As I mentioned before, the bookshelves are still not 100% complete. I need to add some trim where the vertical pieces are attached to hide the seam, and also figure out how to hide my computer cords and stuff, but I have been so busy getting my etsy shop up and running and preparing for my first craft fair this weekend (and working at my full-time job), that I put the house projects on hold temporarily. Not to worry though, I plan to be back at it with the house work next week!

Below is a list of where all of my bookshelf decor is from (not including the books).  Items are listed from left to right, top to bottom based on the photo above:
Gear Decor - Joss & Main
RELAX Metal Letters - Joss & Main
M - Joanns ($2 cardboard letter that I spraypainted ORB)
Teal Jug - Joss & Main
Glass Cross - Wedding gift
Teal Box - Joanns
Gear Bookend - Joss & Main
Hello Sign - Groopdealz (*affiliate link)
Faux Succulent - Joss & Main
Jax Decor and small faux succulent - Joss & Main
Magnifying Glass - HomeGoods on sale for $7!
Agate Bookend - West Elm
@ Decor - HomeGoods on sale for $10!
Fabric-covered Corkboard - DIY by Me!
Task Lamp - HomeGoods
Hourglass - Taken from my parents' house

Can you tell where I like to shop?? Lol.  Joss & Main and HomeGoods are definitely my go-to stores for “knickknack” items and wall décor.  Joss & Main’s furniture can be expensive, and I don’t like to spend on ton on something without seeing it in person first, but I always find great deals with them for unique home décor items. If you aren’t familiar with Joss & Main, it’s an online home décor store where they have different “flash sales” each day that usually last a couple of days. You have to register in order to shop and you get free shipping for the first 30 days after you register and for 30 days after every purchase you make! If you click on the Joss & Main  banner below to sign up, I will get $15 store credit when you make your first purchase.  No pressure, but I won’t hate it if you help me get some free stuff :).  They have some great fall and Christmas sales going on right now!!

Joss and Main

I like Joss & Main's sales because all of the items are organized/curated  well, so I save time by only shopping the sales that fit with my décor style. And they always have on-trend pieces at reasonable prices.  I like to keep pretty neutral room designs and then just add some inexpensive “trendy”  items that I can switch out when the trends change.  They are actually having a giveaway right now for a gray storage unit (a $250 value!).  Just click on the banner and sign in to your Joss & Main account to enter.  (Note that you must have or create a Joss & Main account in order to enter the giveaway). A random winner will be chosen on November 1st. This would be great for the kitchen or hiding toys away in a kid’s playroom!

*Affiliate link

*Note: This post contains affiliate links, which means I may receive compensation if you click on/purchase the items in these links. Rest assured that all opinions are my own and I will only ever share links with you for items/brands I use and love myself!*

Friday, October 17, 2014

Home Office Reveal!

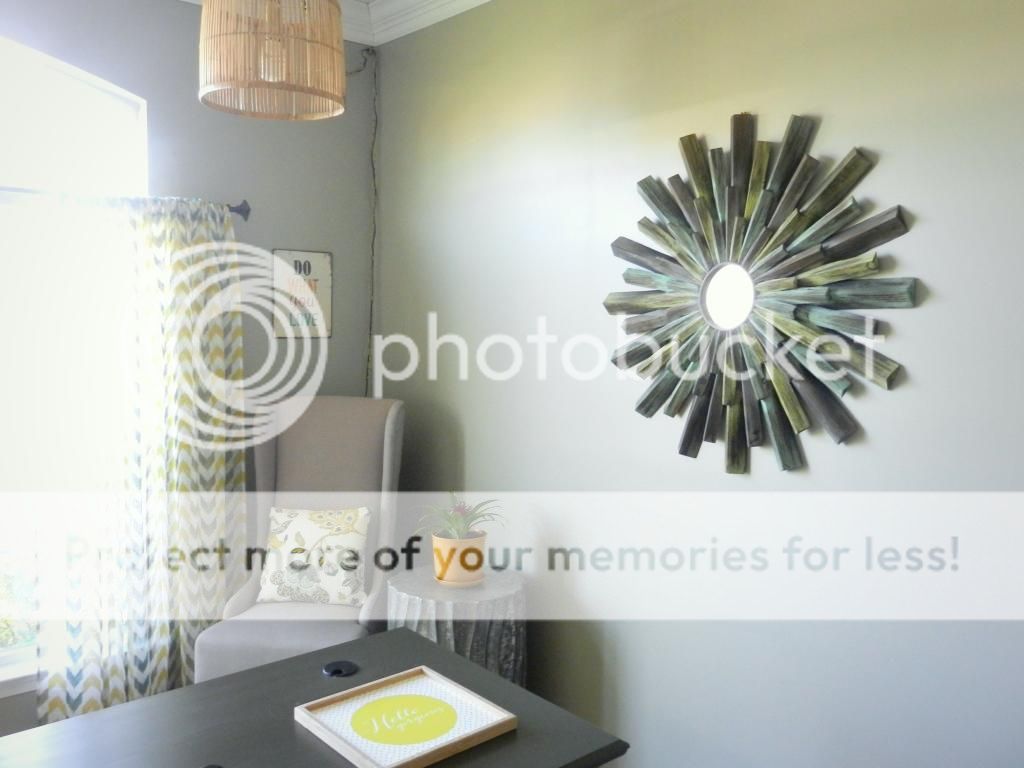
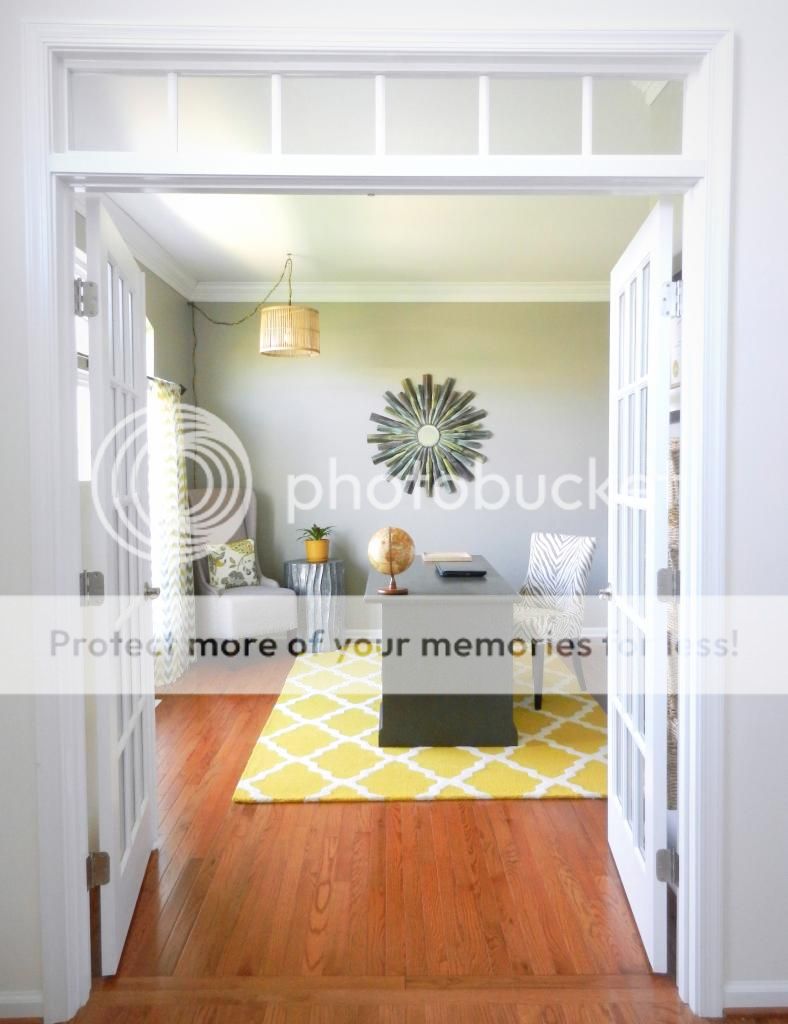
Our home office is finished! Get ready for a ton of photos... I was so super-excited about how this room turned out, so I was a little trigger-happy with the camera :). So this makes 3 rooms in the house that are finished... at this rate, our whole house will be done by about 2020.  Slow and steady wins the race, right?? Haha.


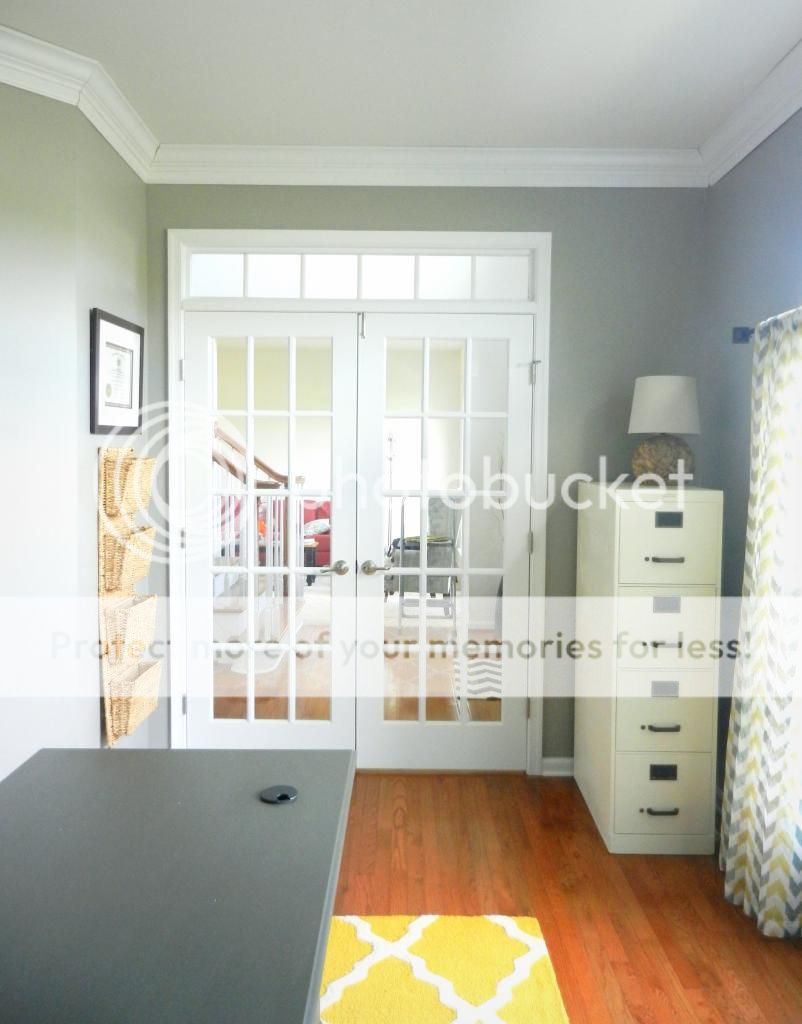
I didn't realize how much I would appreciate the french doors until I needed to get work done while Greg was watching footfall in the family room.... close those babies up and I couldn't hear a thing!

Please, come right in!!


This pillow was my first sewing project. But my 12-year-old cousin walked me through it, so I'm not sure if that counts! Learning to sew that's going to be one of my goals for 2015. Make sure you guys remind me when I list my goals at the beginning of next year! 

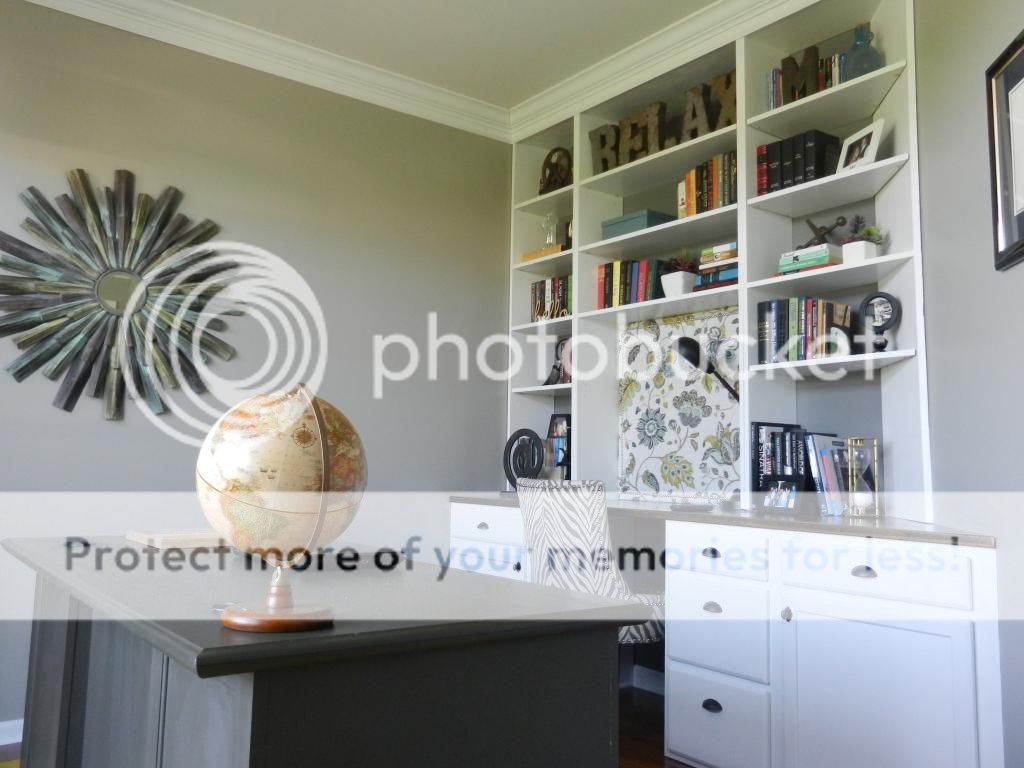
These built-ins are my FAVORITE!!! The built-in desk and bookshelves are my biggest DIY accomplishment to date I think. They are actually easier than they look to build. You can read about how I made the desk base here, and I'll be posting a tutorial on the bookshelves shortly! You can also see how I made the fabric-covered nailhead trim corkboard in the center of the bookshelves here.

The gray freestanding desk is from Craigslist, which I made over with homemade chalkpaint. You can check out the desk makeover and how to make your own chalk paint here.


I have to give Greg credit for filling up the bookshelves with nice, hardcover books.  Most of my books are chintzy, paperback fantasy/vampire novels.  Greg reads pretty much all non-fiction... he is the cultured on in our family. ;)    

Here is a look at the other side of the room. The space to the right of the doors was exactly the perfect size for a file cabinet. In many of the Courtland (now Courtland Gate) elevations, you don't have that extra space, but our elevation included a two-foot bump out in the study. We didn't even think about it when we were choosing our elevation, but it's definitely something to keep in mind. You can read more about how your elevation choice might affect your home's square footage here.


This was an old file cabinet from my dad's house that I made over with spray paint. I will be doing a post on the make-over shorty. Spoiler-alert... it was a bit of a DIY fail!!

This cute little tray is a friendly reminder to myself that I am quite lovely, even those times when I am feeling anything but! :)

And just for fun, here are some before and after photos.  It blows my mind how much bigger the room looks now that it is finished.  I think the hardwoods make a huge difference in making the room look bigger.


As per my usual M.O., this room is actually not 100% complete.  I still need to caulk the crown molding and add some decorative trim to the front of the bookshelves. Once the room gets to the point that it looks pretty, I have so much trouble completing those final finishing touches! 

Let's look at everything it took to get this room looking like it does now (if you're interested in how I began the design process for this room, you can check out this post):

Home Office To-Do List
1. Install hardwood floors. 100% Complete!
2. Build built-in desk/bookshelves. 97% complete (still need to add some trim).
3. Install crown molding. 95% complete (still need to caulk).
4. Paint. 100% complete!
5. Install window treatments. 100% Complete!
6. Makeover freestanding desk. 100% Complete!
7. Re-finish file cabinet. 100% Complete!
8. Make corkboard for built-ins. 100% Complete!
9. Decorate. 100% Complete! (for now :))


Here is a list of all of the DIY projects I did for this room, with links to each post:

4. File Cabinet Makeover (post still to come!).
5. Home-made pillow.

Source list:
Curtains - Crate and Barrel
Rug - Rugs USA
Starburst Mirror - Joss & Main
Wingback Chair - Joss & Main
Tree Stump Side Table - Joss & Main
Pillow - Homemade, fabric from Tonic Living
Yellow Pot - Joann's
Bamboo Light Pendant - Lamps Plus (no longer available)
Gray Desk - Craigslist Makeover
Zebra Chair - Wayfair
Hello Gorgeous Tray - Joss & Main
Globe - Urban Engineers' 5-year service gift
File Cabinet - Hand-me-down madeover
Rattan Lamp - Walmart
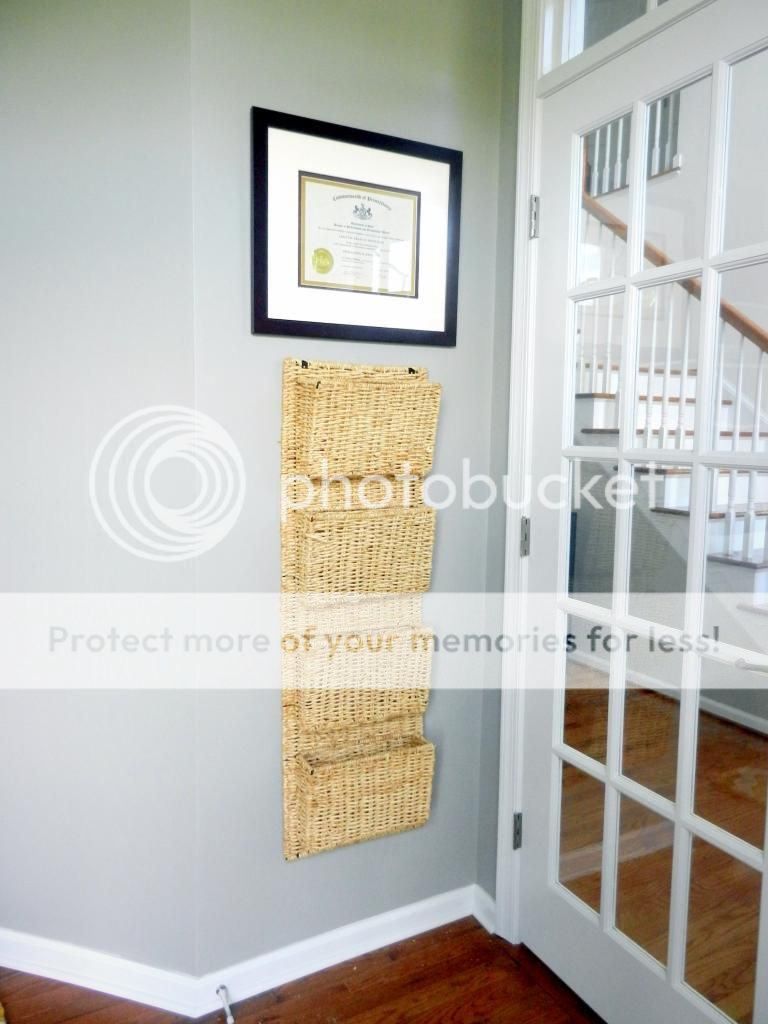
Woven Wall Pockets - Ballard Designs
Diplomas - University of Delaware & Bloomsburg University (these were very expensive :))
All of my bookshelf decor will be featured in another post!

This post was featured at the Work it Wednesday link party. Make sure to go check out all of the other great features!

I am linking up at these sweet parties... go check them out!

Monday, July 21, 2014

Home Office Built-In Bookshelves

We installed all of the crown molding in the study this weekend, and the built-in bookshelves are about 97% complete!  For the crown molding, we used an upside down piece of baseboard combined with a pretty thick piece of crown molding to give it a little bit chunkier look.  I don't have any great photos, but I couldn't wait to share it with you so here’s what we have so far:


All we have left to do is pick out and put up the vertical trim pieces and fill up the shelves of course.  I also bought a light fixture, which was on sale for $60 at Lamps Plus!  I was looking for a couple of natural material pieces to balance out all of the painted finishes in this room and I love how the bamboo fixture looks.  And since the only switched outlet in the room was located inside the built-in desk, on the opposite wall of where I wanted my switched light fixture (of course), we had to do some electrical work to make the other outlet switched.  My awesome dad was able to do this by switching out some wires in the basement.  I’m still not exactly sure how he did it, but the outlet I wanted switched is now switched, so I am a happy camper.


We have a couple of projects left in this room and then we will be finished with one more room.  (If you're counting, that's four rooms out of thirteen that will be done... and we've been in the house for almost two years.  Slow and steady wins the race??  I'll go with that :)).  Anywho, here’s the updated to-do list for the study:

  • Install hardwood floors
  • Build built-in desk and bookshelves
  • Install crown molding
  • Buy area rug
  • Buy/hang light fixture
  • Install outlet in built-in - 0% complete
  • Paint free-standing desk
  • Paint file cabinet - 1% complete
  • Reupholster wingback chair - 0% complete
  • Decorate - 50% complete

Friday, April 11, 2014

DIY Friday {#4}

It's Friday again!  Woohoo!!  You know what that means... time for some more DIY eye candy.  If you follow me on Pinterest, you've probably noticed that my "Study" board has been getting a lot of action lately.  I have (contrary to my normal M.O.) been pretty good about focusing on the task at hand (finishing the study) and not getting distracted by other projects around the house.  Although now that the weather is getting nice, I'm really itching to do some projects outside, so this new-found focus may not last much longer. 
But in keeping with the home office theme, all of my DIY pinterest features this week are things I hope to make for the study:
Source: Menstyle
I love this quote.  I have been going through a bit of a 1/3 life crisis lately, and I've been reflecting on how work time can really creep into your personal time and, if you're not careful, completely take over your life.  I don't think I am quite there yet, but I'm definitely finding that the longer I work the harder it becomes to disconnect at 5:00 (both physically and mentally).  I am actually starting a new job soon and taking a few weeks off between jobs, so hopefully I will be able to get a few of these projects done during that time!

DIY Decorative Spheres
Source: Hill Country Homebody
I have been seeing all different kinds of decorative spheres lately (both DIY and store bought).  Hill Country's Homebody's DIY version using embroidery hoops is my favorite that I have seen so far.  I am so bad with shelf/table styling, but I feel like you can't go wrong with these guys.  I am picturing them on the free-standing desk in our study.  

 Fabric Covered Corkboard 
Source: Carolina Charm
This one is a must-do for the study.  I recently designed the built-in bookshelves for above our desk (see below) and I want to do a fabric-covered cork board for the middle space behind where our computer will be.  I don't happen to have a giant cork board laying around like the one in Carolina Charm's tutorial, and mine needs to be a specific size so I'll have to get a little creative, but I don't think it's anything I can't handle.


In study update news, I actually already have 2/3 of the bookshelves for our built-ins assembled.  Now I just need to prime and paint this weekend and then figure out how we're going to handle the angled wall.  We also have lots of landscaping plans ahead!!

What's everyone else working on now that the weather is getting nicer?

Thursday, April 3, 2014

The Pros and Cons of Chalk Paint {and my desk makeover}

I finally jumped on the chalk paint bandwagon.  I bought a desk off of Craigslist a few months ago.  It's fake wood with that plastic-y coating and it was in pretty bad shape, but it is the exact size and shape that we were looking for. 


Since it was so cheap, I figured if my chalk paint experiment failed, I could just scrap it and look for a new desk.  So far I am pleased with the results, but there are a few caveats to my satisfaction, which are outlined in my "pros" and "cons" list below and explained in more detail in the rest of the post.


What is chalk paint?  It's basically a thick, matte paint that can cover just about anything with very minimal prep work.  Ann Sloane sells the most famous line of chalk paint and has some pretty good information on her website.  Her paint is quite expensive though.  The color options are also somewhat limited, so I decided to make my own.  There are a whole bunch of different "recipes" out there, but I went with the plaster of paris option.

I simply poured about 4 tablespoons of plaster of paris (which can be found at any home improvement store) into a solo cup then slowly mixed water in until it reached my desired consistency.  (The thicker (less water) it is, the more coverage it will provide, but it will also be a bit harder to work with).  Then I added regular old latex paint until the cup was about 3/4 full.  It doesn't matter what finish your base paint is, it will turn out matte when mixed with the plaster of paris.  It also lightens a bit when you add the plaster, so you may want to go a shade darker with your base paint.

Application of the chalk paint was so easy.  All I did was wipe down my desk with some soap and water (since it was used), fill in some dents and divits with wood filler, and then I got to painting.  After the first coat, it was pretty streaky and the coverage wasn't great.  After the second coat, it looked much better, but I applied a third coat just in case.  It dries very quickly so I basically started my second coat as soon as I finished the first.  You do get some little lumps from the plaster so I lightly spot-sanded between coats.  If you want a really smooth finish, you should probably sand the whole thing between coats, but I was ok with seeing some brush strokes.

After first coat

After 3 coats

Application of the paint was easy.  The wax finish coat was not. 

It took me about an hour to do all three coats of paint and then about another 3 hours to apply the wax.  I'm normally a big fan of plain old polyurethane, but I had read in several places that polyurethane doesn't work well with chalk paint so I went with the wax as most people suggest.

The wax (I used Miniwax Finishing Wax) is pretty hard in the can, so it was difficult to get any onto my rag at first.  After a while it became easier, but it was just very time-consuming and tedious.  And it smells!  I applied one coat to the whole desk, and then an extra two coats to the top.  I already nicked a spot on the front of the desk, so I think I may add another coat to the whole thing.  You definitely need to apply the wax, because the chalk paint chips very easily without it.

I really like how the chalk paint turned out visually, but I'm not sure that it's going to hold up to wear and tear in the long run.  We shall wait and see.


Will I use chalk paint again?  Definitely!  But I will first do some research on easier ways to apply the wax finish.

Have you bought into the chalk paint craze yet?  If so, what's your opinion?

Wednesday, March 19, 2014

Study Wall Art {Opinions Please!}

Hey guys and gals!  I am in need of your opinion!  I know that I want to hang an oversized map on the large wall in our study, but I can't decide on which one.  I have three options below and a poll at the bottom.  If you would be so kind as to vote for your favorite (and leave a comment as to why it's your favorite if you can!), I would appreciate it sooo much!  Keep in mind that the rug in the photos below may not be staying... the curtains are a sure thing though!  Click on the link in the caption for each picture if you want to see the actual map.  And click here for a reminder of the idea board I put together for this room.

Option 1
Option 2
Option 3
Thanks so much for your opinion!


Which map option do you like best?

Wednesday, March 12, 2014

DIY Built-in Desk

The desk portion of our home office built-in unit is complete!  I am thrilled with how it turned out.  I will warn you that this post is a long one!  If you have no interest in how we built it, feel free to skip to the pretty pictures at the end :).

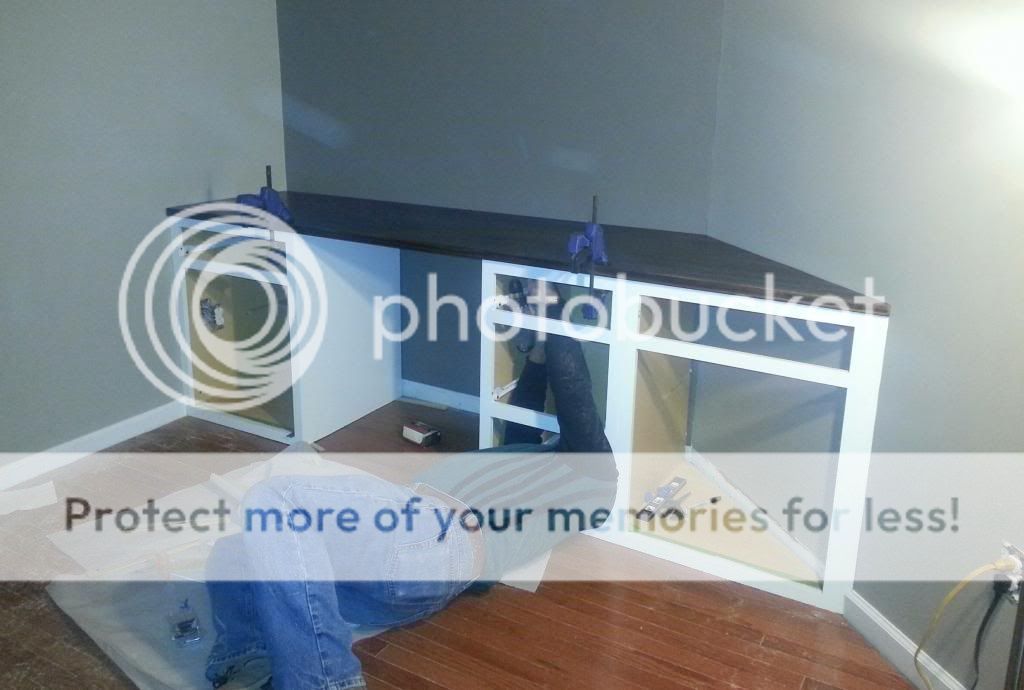
For the base units we used unfinished wood kitchen base cabinets from Lowes.  First, we cut the bottom "toe kicks" off of the cabinets using a circular saw to make them "desk height".  A typical desk is about 30" high and our cabinets wound up being a little less than 31"... close enough.  Then I applied three coats of Kiltz Primer and two coats of white semi-gloss paint.  We removed the baseboard in the areas where the built-ins will go so they sit flush to the wall.  Then we screwed them into the studs in the wall.  The one wall corner has a 135 degree angle, so we decided to cut one of the cabinets diagonally to make a right triangle-shaped cabinet so we can make use of the entire length of the space.  We basically just cut the back and right sides off, removed the shelf and then cut the bottom diagonally.  Obviously we couldn't get the drawer back in then, so I removed the front face and attached it using tip out hinges and attached a plastic plastic tray to the back of the drawer front for some extra storage.  Leave no space un-storable... that's my motto!

Base units installed! (Sorry about the photo quality... this was a nighttime phone shot).
For the desk top, we used 4 6"x5/4" boards plus one 4"x5/4" board of select pine.  I choose 5/4" wood because I wanted it a little thicker than the standard 1".  The select pine was a compromise between butcher block (which looks really good, but is very expensive) and regular pine or other wood (which is cheap, but doesn't look as good).  I love how the select pine turned out after we stained it... very "multi-dimensional".  (You'll have to wait until the end of the post to see it).

To attach the boards together we cut holes in the sides of each board (the end boards only got holes in one side) using a biscuit cutter.  Then we used wood glue and biscuits to bind the boards together. We put the glue in each hole and along one side of each board.  Then we used several clamps to squeeze them together.

This is what we started with for the desk top.
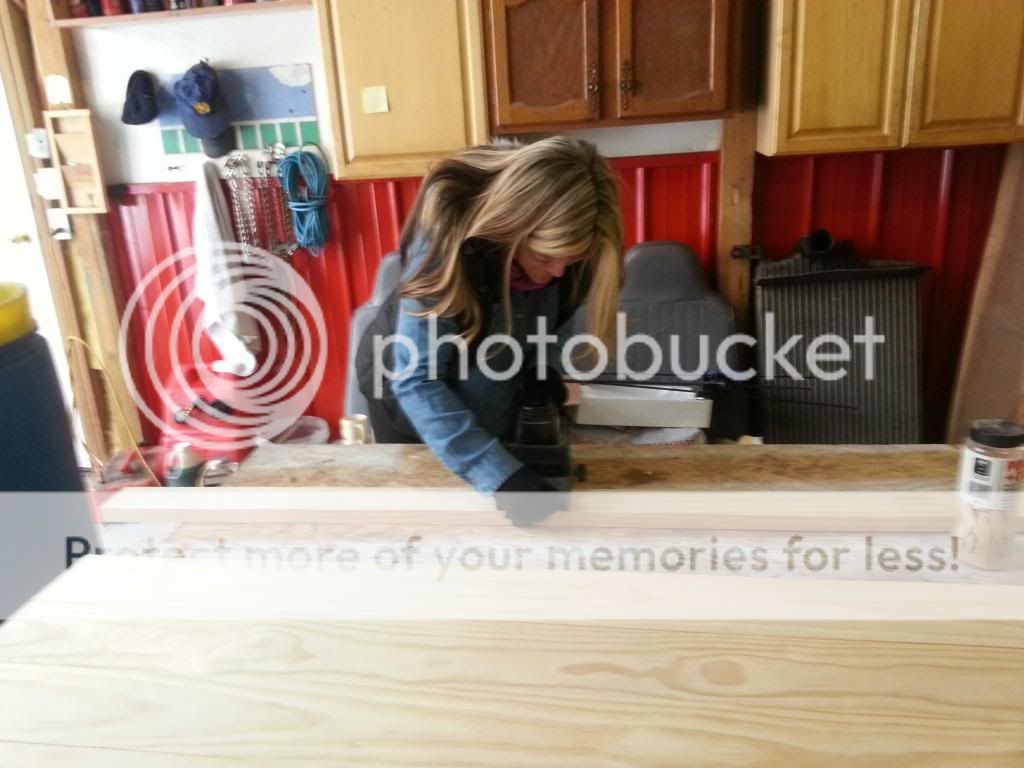
That's me cutting my biscuits!
Preparing to glue them together using wood glue and biscuits.
AND THEN, since my dad and brother were helping and are both super-perfectionists, they decided that the 0.0001 cm gap between two of the boards was too big so they used a Kreg Pocket Hole Jig to drill pocket holes and screw the boards together.

Dad and brother reinforcing with their new Kreg Jig
And a shot of my brother's workshop/barn just for fun.  
After we let the assembled desk top dry for a few days, I sanded it, stained it with two coats of dark walnut and sealed it with a few coats of satin finish polyurethane.  I also sanded down the edges to round off the corners a bit along the front face.  {I HATE SANDING!}  Finally, we cut the right side on an angle to fit in our odd-angled corner.  This wound up being a bit of a bear because the dimensions of the wood were slightly off and the other "90 degree" corner was not quite square, but I won't bore you with the details of how we fixed it.  It worked out in the end and that's all that matters! 

Dad attaching the top to the base units.
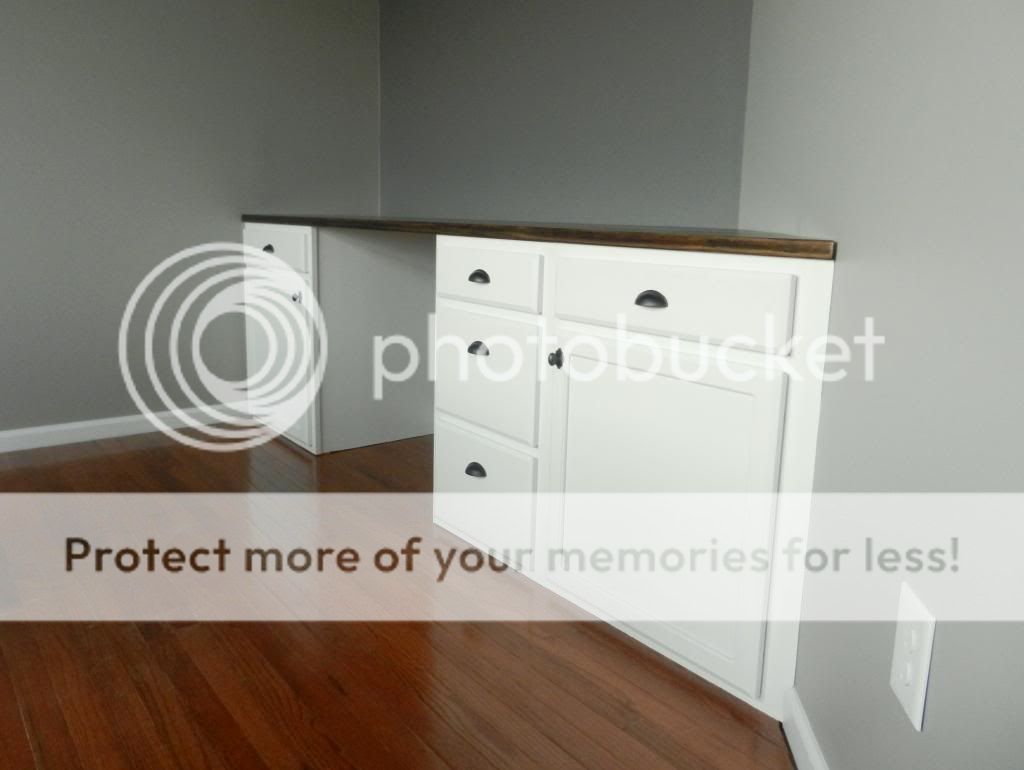
Then we put the doors and drawers back on and added some pretty hardware.  We used this for the drawers and this for cabinet doors.  I really love how the bronze contrasts with the white cabinets and complements the dark wood top.

And finally, for the finished product!  Here is our shiny new built-in desk:
I'm in love!

Look how gorgeous that wood is!!  I can't stop looking at it!
Next up are the bookshelves that will go above the desk.  I'm thinking something like this or this, but I want to live with the desk for a little while first to see what kind of spaces we will need.

Linking up at these sweet link parties... go check them out!


This post contains affiliate links.