Joss & Main Exclusive online private sales for the home
Showing posts with label family room. Show all posts

Tuesday, November 19, 2013

Family Room: Before and After

Greg's going to kill me for using this picture :). 
It's the only "before" shot I have showing the whole family room I swear!
 
At last, 14 months later, the family room is finally finished (for now)!!  It took me over a year to finish ONE room in our house.  At this rate it's going to be a longggg time before the whole house is done.  But when I look at the before and after pictures, it really has come a long way.  And of course there have been other small and large (the deck!) projects during this time too.

I was going for a rustic/traditional style with this room.  I'm not really an "earthy-tones" type person; I favor cooler grays and I reallllly love distressed wood.  I have also been really into pops(!) of color lately and have been going mostly with orange, teal and lime green.  [I didn't purposefully copy Young House Love's color scheme, but maybe I subconsciously got my inspiration there.]  Knowing how often I change my mind I kept most of the "pops" to easily changeable accessories. 

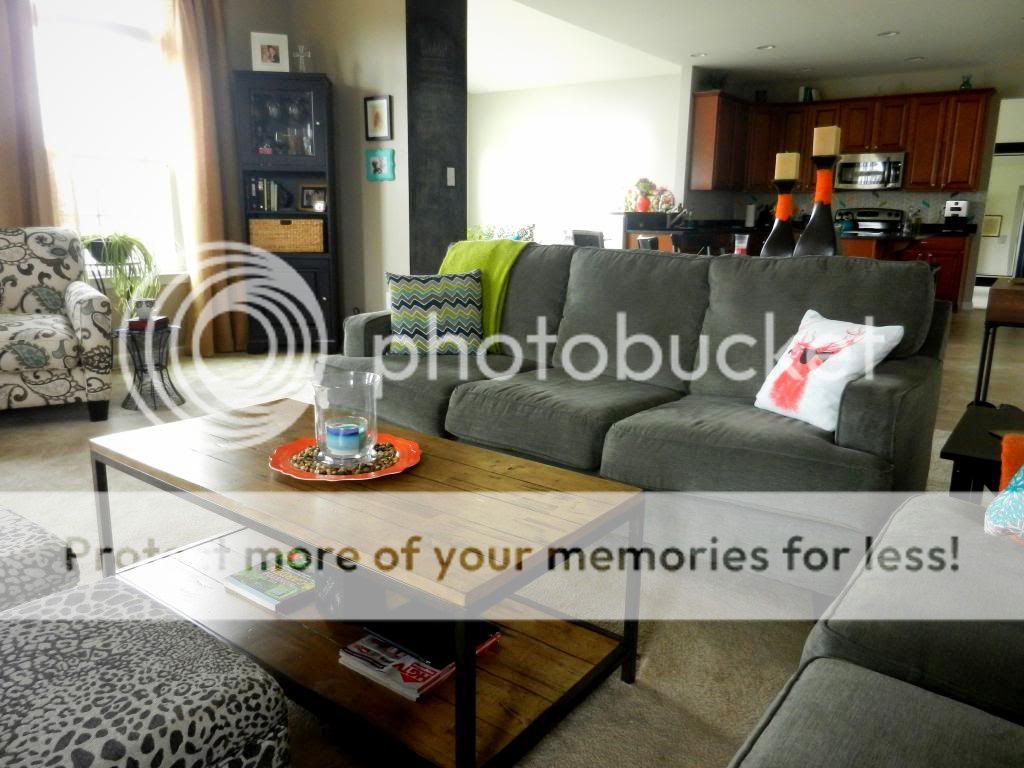
Here's more photos of the finished product (there's some other photos on Part 1 of the Family Room Reveal)!


chalkboard-wall
My chalkboard wall between the morning room and family room, which displays my
"wishlist" and current projects with % complete for each.  Nerd alert!


DIY-burlap-curtains
Are you tired of seeing these chairs yet?  I have been told by people who shall remain nameless that I might be going a little overboard with the chair sharing.  What can I say... I'm in love!

Another "before" angle

...and after
 

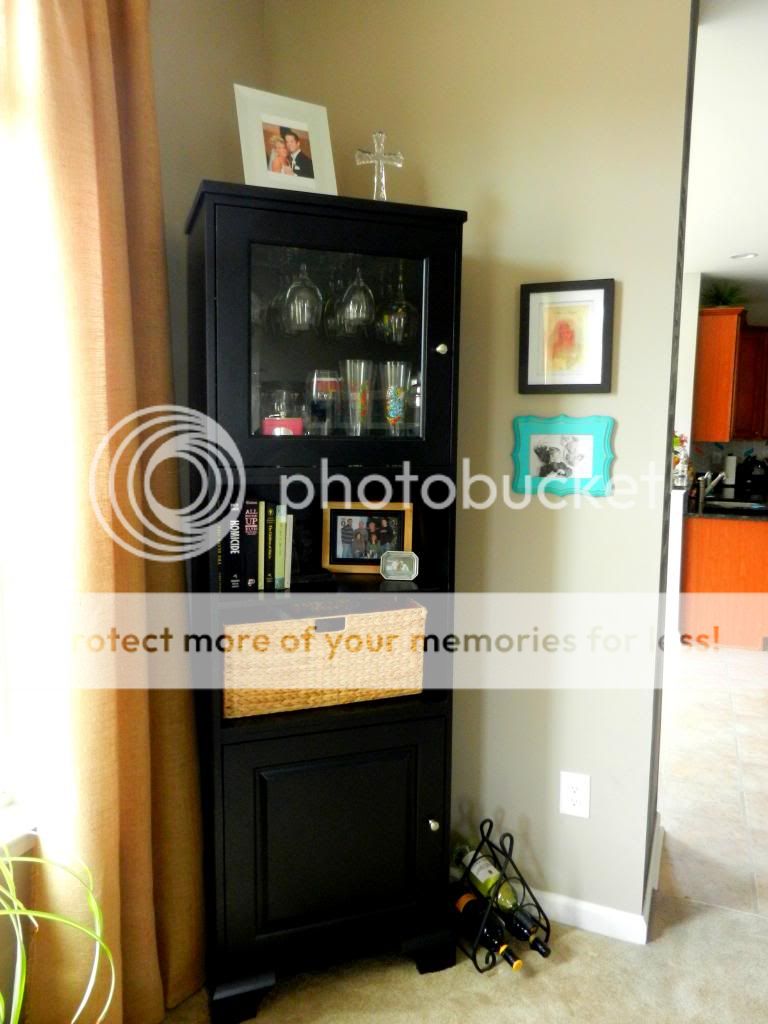
This is a semi-custom piece from Howard Miller furniture, which I've had
forever and get so much use out of.

Here are some photos of one final area that I'm still not sure what to do with.  I plan to do something like this in the space next to the couch.  I can't figure out what to do decoration-wise on the wall behind the couch.  I like the pictures I have there, but I don't think they take up enough vertical space and look kind of lost on this wall.  I can't decide whether to add another row, mount them on wood backing similar to this, or just scrap the frame idea and try something totally different.  Any ideas??


Source List:
Burlap Curtains and Galvanized Steel Rods- DIY
TV Console - Custom from Martin's Furniture in Lancaster, PA
Deer Head - West Elm
Metal Circle Wall Art - Kohls
Gray and Orange Poufs - Target
Black Basket with Rope Handles - Pier 1
Metal Stool - Joss & Main
Chairs and Couches - Ashley Furniture
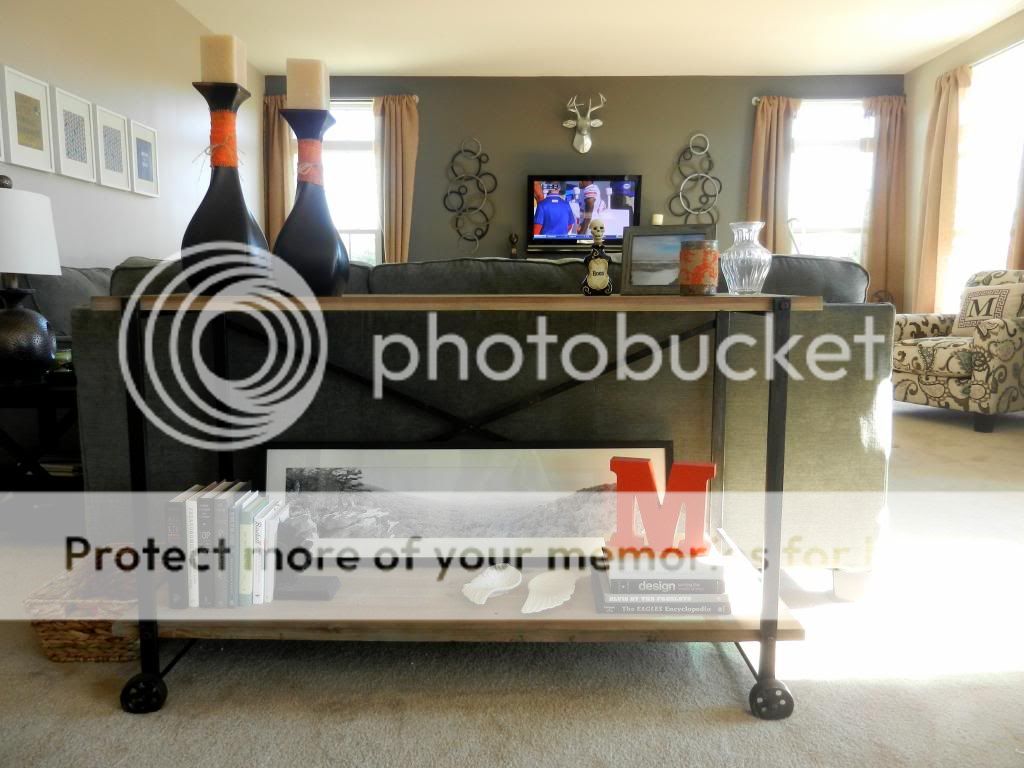
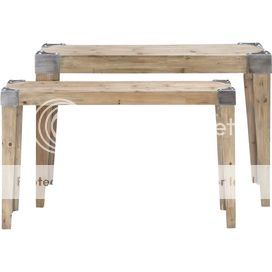
2 End Tables with Chairs and Sofa Table - Joss & Main
Tall Black Wine/Misc Storage Unit - Howard Miller furniture
Coffee Table - Ballard Designs
Gray Leapord Ottomans and Table Lamp - American Signature Furniture
Pillows - Joss & Main
Clock - Joss & Main
Orange Throw - West Elm
Green Throw - Crate and Barrel 
 
 
I'm linking up at House of Rose, the Humble Brag, the Blissful Bee and The Golden Sycamore go check them out!

Monday, November 4, 2013

Drop Zone Table Options

The blogosphere has spoken... console table with drawers for the "drop-zone" it is!  Thanks to everyone who weighed in on my dilemma of whether to do a shelf, a simple table or a table with drawers for our family room drop-zone area.  I totally agree with the general consensus that a table with drawers would be the most functional for this space.

I did some online browsing on my lunch break today and discovered these three tables from Target that I think could be contenders:  Option 1 (in black), Option 2, Option 3 (in black).  As a reminder, here is the space where this will go:


I think Option 2 is my favorite, but I'm concerned with how it will match the wood of the shelves above it and the sofa table (picture below), which it will be right next to.  But do wood tones need to match perfectly in a room as casual as this?  I don't know what the rules are!?!? :)  Or is it just too much natural wood in one room?

Let me know what you think... I'm anxious to finish this spot, so I'll probably order one of these tables this week.  Thank you for your opinions!

Tuesday, October 29, 2013

Family Drop Zone - Shelf vs. Table

One of my outstanding projects in the family room is a command center/drop zone.  This was my original inspiration, but that stuff is wayyyy too expensive).  We always come in the house through the garage and there's a small-ish wall just inside the door that I decided would be perfect for a drop area.  There are a few main things I want this space to accomplish:

-place for keys
-place for mail & magazines
-place to display invitations, cards, etc.
-place to store my purse and work bag each day

Right now most of this stuff ends up on the kitchen table or island.  Therefore, our kitchen always looks a mess.

Here's the area I am working with:


I'm pretty clear on what I want to do with the wall space.  This is a little drawing I came up with (to scale, of course ;)):


The shelves/hooks are already there (from Joss and Main), which take care of a "place to hang keys" and other miscellaneous things.  I also bought this bright green magazine pocket from three by three.  I plan to make or modify a cork board for above the magazine pocket to display invitations, etc.  And I already have the basket for my bags.  The one thing I can't decide on is what to do for a counter space.  I originally wanted just a shelf there, so that I would have a lot of room under it to store things.  But then I got to thinking that since I'm so indecisive about this, a movable table may be better.  I really liked something like this:


I was planning to start building something like that, but then I saw this, and thought "Hmmm, it would be nice to have drawers to store stamps and other mail-y things":


I'd be fine with the building the shelf or the first table, but I'm not particularly confident that I could build something with drawers.  (The reason I wanted to build it is because I have very specific dimensions and finishes in mind).  Maybe I can convince Greg to check out some stores with me this weekend :).

So what do you think?  Should I go with a shelf, a simple table, or a table with small drawers?  Is there anything I am missing for this space?

Thanks in advance for your help!

-C

Sunday, October 27, 2013

Family Room Reveal - Part 1

I have been away from blog-world for way too long!  Now that wedding/shower/party season is winding down, I hope be able to do more house stuff and blogging.  Although, the holidays are fast approaching, so I'm sure I'll get busy with holiday parties and planning soon too.  There's needs to be more days in the week... or maybe just less work days! 

The family room is really close to being completely furnished/decorated.  I am going to reveal it in two posts since the room wasn't what you would call "clean" today.  You can't see all of the stuff I have piled in front of the couch from the angles of these photos ;).  This room is still a work in progress, but I'm really happy with what we have done so far. 

Enjoy!

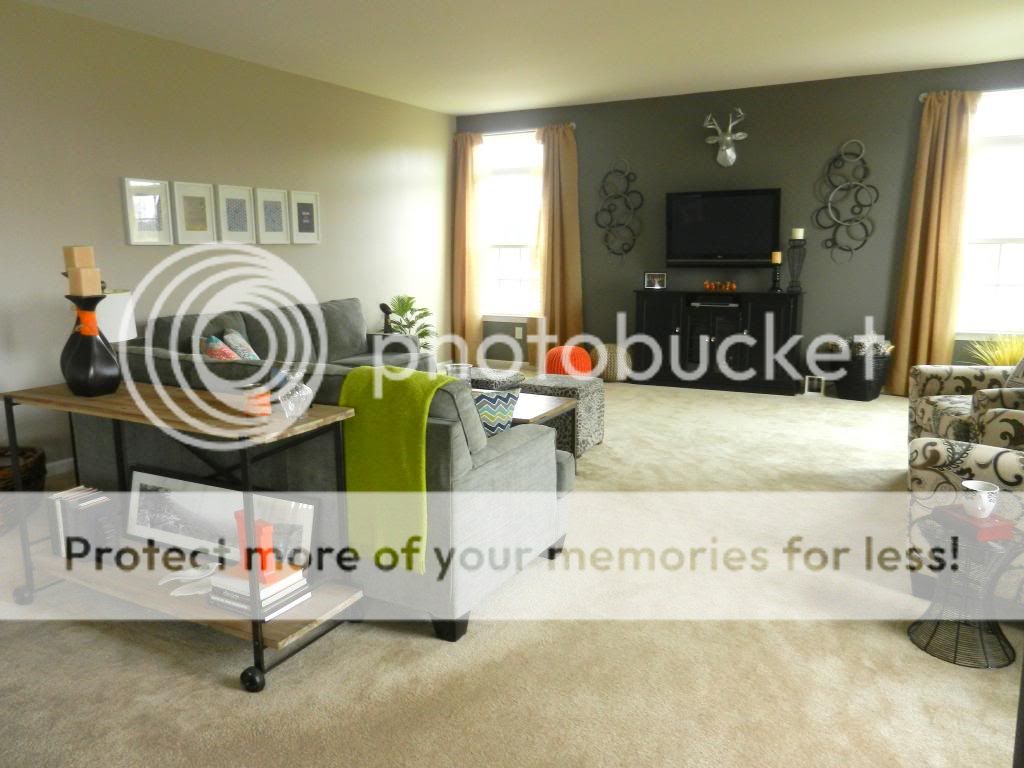
This is a shot of almost the whole room.  The pictures above the couch on the left need to be revised... I'll be asking for your opinions on that in an upcoming post.  The couches and chairs are from Ashley Furniture.  The paint colors are Martha Stewart's Potter's Clay on the side walls and Zinc on the back accent wall.

The console table, bookend and angel wing trays are from Joss and Main.  The candle sticks were my mom's (one is super-glued together because Greg dropped it.. haha).  The basket is from Joann's and usually holds phone chargers and errant shoes and socks.  The photo, "M", frame and vase were all gifts.  The photo is actually a picture of me and Greg (we're on a rock on the left) from a camping trip we took a few years back with my brother.

The TV console is a custom piece from Martin's Furniture in Lancaster.  The guys there do amazing work and can make pretty much anything you can imagine.  The paper mache deer head is from West Elm.  The metal circle-art things are from Kohl's.  The larger candle stick is from Joss and Main.  The basket is from Pier1 and the pillows inside came with two ottomans I got from American Signature Furniture (the ottomans will be shown in the next post).  The two poufs are from Target.  The smaller candle stick, frame, and lantern (it's actually a bird feeder) were gifts.  The burlap curtains are home-made.

 
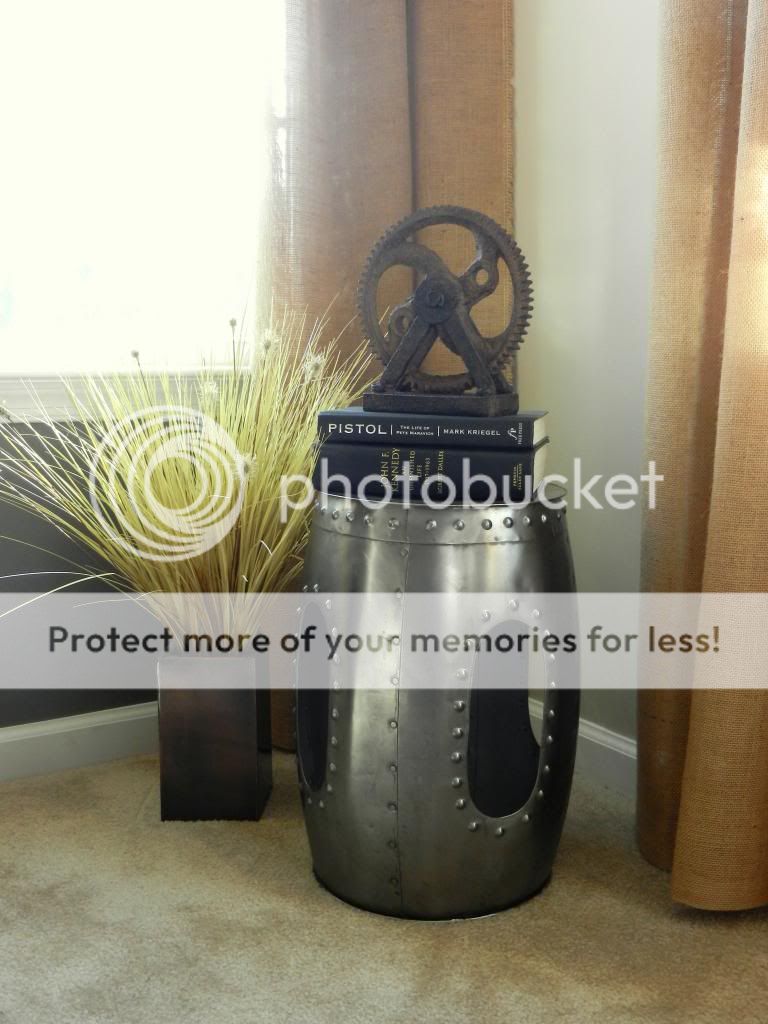
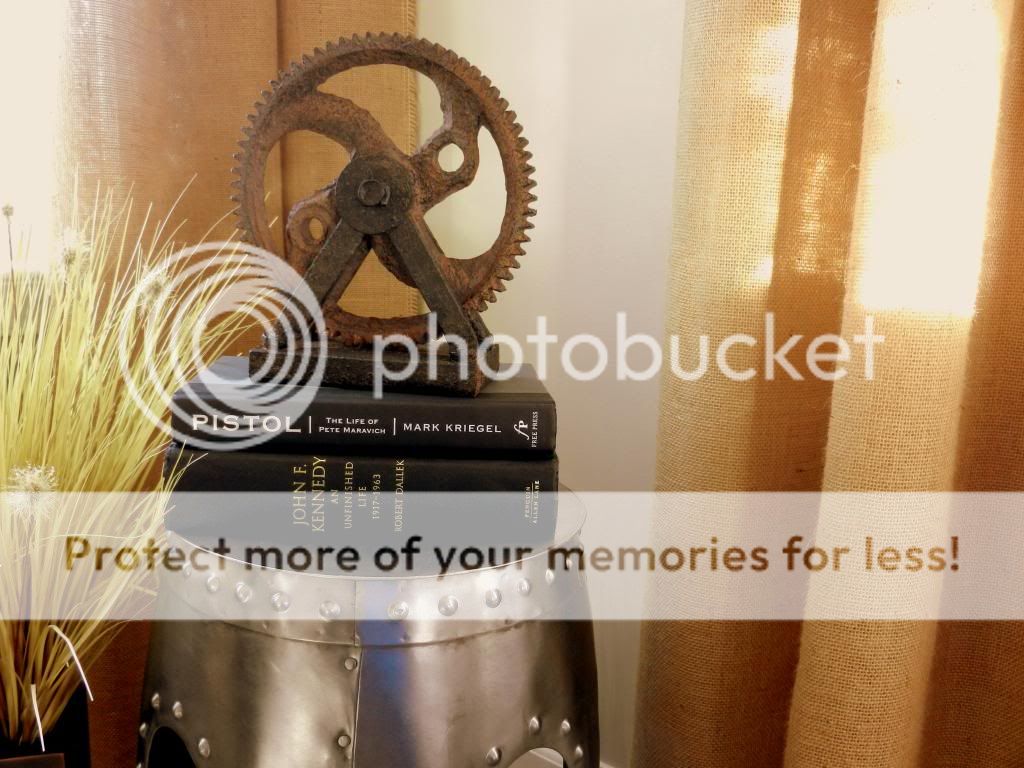
The stool and gear decor are from Joss and Main.  The books are Greg's... he loves biographies.  :)


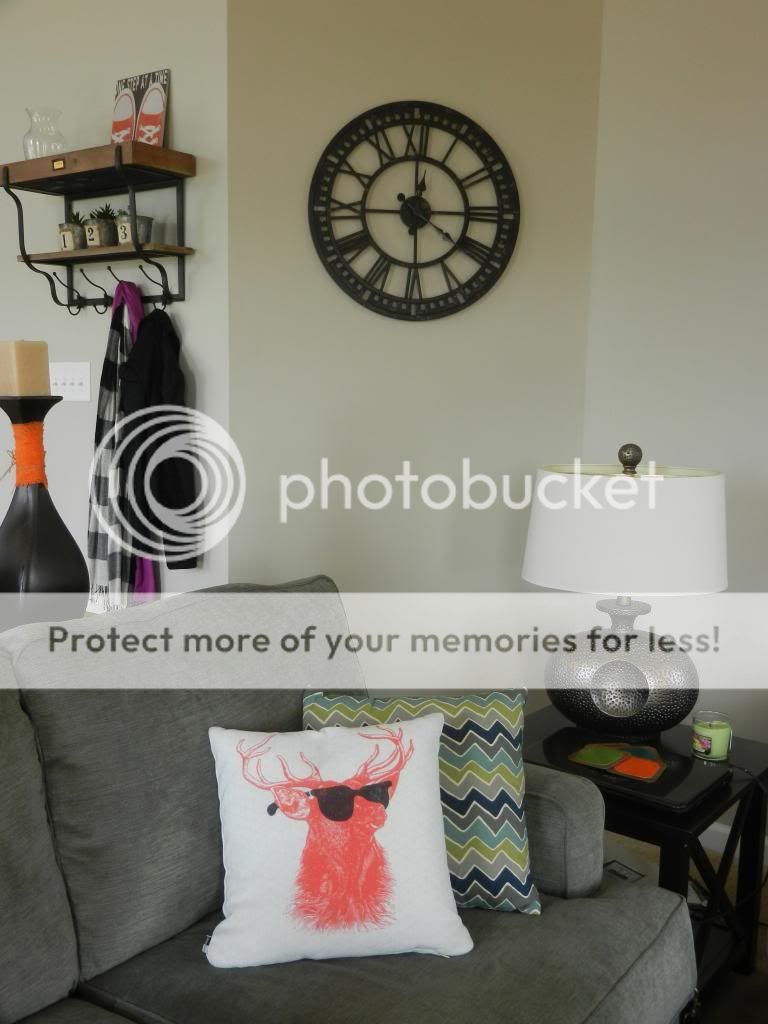
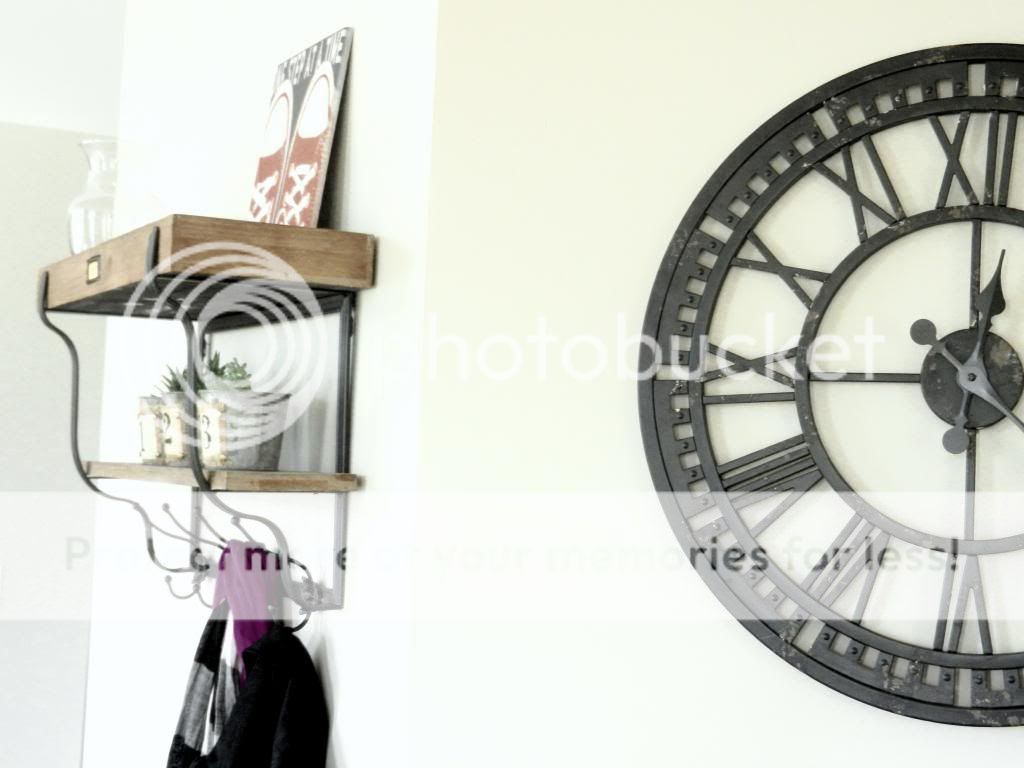
The shelf, pillows and clock are from Joss and Main.  The lamp was on sale for $15 at American Signature Furniture.  The end table is from a second hand store near my house called Wacker's Trading Post.  The coasters are home made.

Here's some close-ups of two of my favorite things in the room, the sunglassed buck pillow and the distressed clock.


The next post will show the rest of the room.  I have a mini-bar storage/bookshelf in one corner that's not shown.  And I'll also take some photos from other angles, which show the front of the couches and the coffee table (which I love) and ottomans.  I'll also share what I still have left to do in this room in an upcoming post.  Why does everything house-related take 10 times more time than you think it will??

How is everyone else's decorating going?  I'd love to see pictures of what you all have going on!

Thursday, September 26, 2013

The Family Room Chairs Have Arrived!

I was planning on waiting until I had finished a few more things to share photos of the family room (such as the last set of curtains, which are missing from the photo below), but our new chairs arrived yesterday and I'm just so thrilled with them that I couldn't wait to share! 

So.....

drumroll please..........

Tada!!!!!!!!!!!

The plan is to get the last set of curtains up this weekend then share the whole family room transformation with you next week.  I want to hurry up because I need some input from you guys on some finishing touches.  Let's hope I can stay on schedule :).

And here's a picture of some of the autumn decorating that has begun at our house.  I can't wait to do more; I love this time of year!

If you want to see a sneak peak of my latest project that's going on in the kitchen follow me on instagram @colettefb!

Thursday, September 5, 2013

Chairs for the Family Room

We took advantage of some Labor Day sales last weekend and did some house shopping!  Greg was feeling generous and offered me a whole day of shopping with no complaining!  (A whole day to him = 2-3 hours, but I'll take it!).  I have been pining over these chairs from Ashley Furniture for months and months, but the price was, in my opinion, too high for the quality of the chairs. 
 
 
Greg and I have been to 4 different Ashley stores over the past 6 months trying to negotiate the price down to what I deemed to be reasonable.  All four sales people (before this weekend) lost our (almost 1K) sale over less than $100!  Here's one of my many (many) pet peeves:  The first time we went to buy the chairs there were no "sales" going on, so we decided to wait and try again when they had a sale.  So the next 3 times we went they were having "Blowout Memorial Day, 4th of July, etc" sales, but the chairs were the SAME EXACT PRICE as when there were no sales going on!  Those "holiday sales events" are totally a deceptive sales pitch to get you in the store and spend just as much money as you would on a normal day.  {Tangent over... sorry about that!}

This weekend we had slightly more success.  After the sales guy told us that Ashley never ever ever negotiates prices, we were able to negotiate him down to within $20 of the price I was willing to pay.  I was not willing to forgo the chairs over $20 and I knew my chances of getting Greg to come back for another Ashley adventure were getting slimmer and slimmer by the second.  And the sales guy was pretty helpful and not annoying so I kind of wanted to give him the sale.  Customer service goes a long way in my book!

In four to six weeks we will be the proud owners of two of these babies, at which time our family room will be approximately 90% complete!  The chairs are actually part of the same set as our sofas, but I like that they are not too matchy matchy.  Did anyone else score any good deals over the holiday weekend?

Saturday, May 25, 2013

Burlap Curtains and Galvanized Steel Pipe Curtain Rods

This project is not quite complete... I still have two more sets to go, but I just couldn't wait to share it!  Plus I thought it would be nice to share a little preview of what's been going on in the family room.  I got the idea for the burlap curtains from Jessica's tutorial at Four Generations One Roof.  The project was so cheap so I figured I had nothing to lose trying it out.  It came out awesome and was so easy.  All I needed was three yards of burlap per curtain (with a 50% off coupon for Joanns it came out to $6 per panel!) plus some stitch-witchery and an iron.  I had never used stitch-witchery, but that stuff is awesome!  Here's how the first two sets turned out:


DIY-Burlap-Curtains
DIY Burlap Curtains

DIY-Burlap-Curtains

I really wanted these curtain rods from West Elm but at $100 per rod, I could not justify spending $400 on curtain rods for one room.  So of course I decided to try to make them!  I took my measurements and then brought my dad along to Home Depot since I had never been down the plumbing isle before.  (I'm glad I did because I got some flack from the pipe-cutting-guy and some other random guy... the two of them and my dad had a 10-minute conversation about how Martha Stewert is the devil.  lol).  They cut the pipes to size and thredded them right there.  I also needed some flanges and some street elbow joints:

The actual construction of the curtain rods was simple;


...it was the hanging part that got a little tricky.  The galvanized steel pipes are quite heavy, so we tried several different types of hardware before we got it right.  In the end these are the products that worked the best:


Some tips if you are interested in making these yourself:

1. Burlap kind of smells funny.  I cut the panels and left them outside for a day or two to air out.  Then I ironed each one on the steam setting.  It really helped lessen the smell.  Leaving it outside also helped get rid of some of the little dusty pieces that come with burlap.
2. Pay close attention to how they cut it at the store when you buy the burlap.  There's a technique to cutting it straight and making sure it doesn't fray.
3. You definitely need the steam setting for ironing on the stitch-witchery.  My iron setting wasn't working at first and it didn't work at all without the steam.
4. DO NOT try washing burlap!  I tried this with the first panel to try to get the smell out and I wound up with a piece completely frayed with wrinkles that would not budge (and it didn't help the smell).
5. I'm not sure how I'm going to wash the curtains when the time comes.  I guess I'll cross that bridge when I come to it :).

What do you think??

Monday, May 20, 2013

Family Room Progress

We have made lots of progress on the family room since the beginning of the year!  So far this is what we have accomplished from our original list:
 
...decided to do the gallery wall instead of the fake fireplace for now.
We got two of this gray couch from Ashley furniture (just a little over $800 for both couches!).  I also want to get two of the armchairs from that set.  I think that will be my next big furniture purchase.  We also bought this coffee table, which I am in love with 1. because I love the look and 2. because I don't worry about using coasters on it since it's already "distressed".  We also got a matching (cheaper) console table for behind the couch and an end table from a thrift store.

I have completed/am in the process of completing several DIY projects for the room.  The gallery wall was my first project.  I also made some art for behind the sofa, but I think I want to add something more to that, so I won't count it as complete just yet.  I am in the process of making curtains and curtain rods right now... that's almost finished so I'll be sharing pictures soon!  I also have plans to refinish an old dresser from my grandmother, which I started sanding about 4 months ago, realized how annoying sanding is, and haven't touched it since :).  It will really look nice in the room, so I need to get a move on, but sheesh, sanding furniture is a pain in the rear!

We have also gotten a lot of painting done!  Two of the walls in the family room we did in Martha Stewart Potters Clay and we did an accent wall in Martha Stewart Slate.  We painted our kitchen and hallway in Sharkey Gray and the morning room will be this color as well.  The only room I did not use Martha Stewart on so far was the powder room, which I just finished painting in Behr Harbor.  For all of the paint, we used the Glidden Duo (paint + primer) base in eggshell and I could not be happier with the quality of the paint.  We chose this because it ranked very high in Consumer Reports and it is one of the cheapest paints out there (about $27 per gallon).  Another painters tip... spend the extra few dollars on Frog Tape... it really is so much better than the regular blue stuff.  Oh and we did a small chalkboard wall between our kitchen and family room.  So much fun!
 
So the main things we have left for the family room are crown molding (which my dad informs me is a "winter-time project"), a mail/message center, and the dresser.  I will be honest, I did not expect myself to get nearly this much stuff done by now!  {...patting myself on the back...}.  And painting some more rooms and essentially finishing the deck are added bonuses. 
 
The next room I plan to finish is the powder room, which should be an easy one.  I'll be back with the plans on that and pictures of the completed family room shortly!

Monday, February 11, 2013

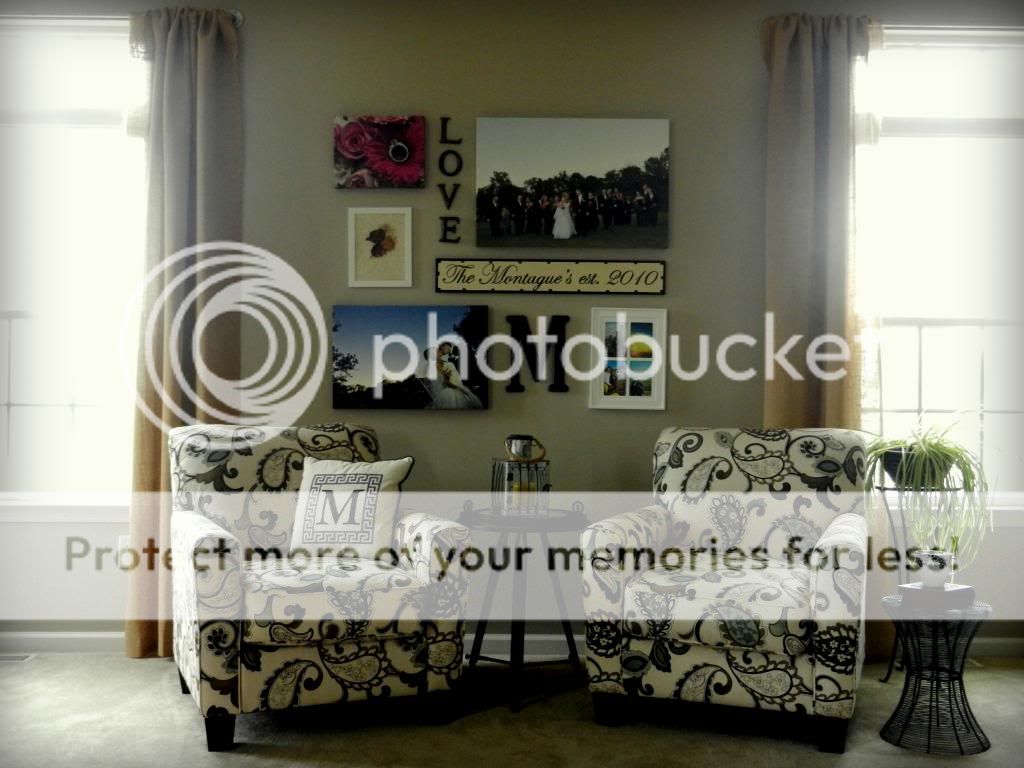
Family Room Gallery Wall

 
I finally finished the gallery wall that has been sitting on my living room floor for the past month waiting to be hung! I'm thrilled with how it turned out. I think it's the perfect space for that wall in our family room and will look even better once I hang some curtains on the flanking windows. Since we don't have kids, the theme is our wedding/honeymoon. It feels a bit narcissistic, but it will have to be that way until we have kids!

 
I did the old "draw the outline on paper and hang the paper on the wall" for getting the layout on the wall just right.  I took pictures of the whole process, but unfortunately they didn't turn out that well so I'm not showing them.  Here's a step-by-step for a similar method from AKA Design.  It took me about an hour to get everything hung just right.  


Besides the canvas prints, the other things on our collage are:

1. Framed pressed flowers from my bridal bouquet... just taped them to some fun craft paper and framed... easy peasy.
2. "M" that I received for my wedding shower... it took me 2.5 years to find the perfect spot for it!
3. "Montague's est. 2010" sign... also a wedding gift that hasn't had a good home until now.  (I painted the outside part black so it matched better... it used to be dark red).
4. The frame in the bottom right displays 4 pictures from our amazing Hawaiian honeymoon.
5. 4" L O V E letters from Hobby Lobby (on sale for $2.39 each)

I already had everything for the wall except the frame for the flowers, which I got from ikea for $3, and the L O V E letters which were cheap, so the total cost for this project was only $13. (Big thanks to my sis-in-law for having those wedding photos professionally printed for me!)    


Our new couches are coming tomorrow... I'm so excited!!!

Monday, February 4, 2013

Focus on the Family Room

Do you ever find it difficult to focus on one project at a time? We have so much empty space and random decor from previous houses in our home right now that I'm just jumping from room to room trying to update things. But I'm finding that I just wind up with several partially-finished rooms and no completely finished rooms. I am going to try to change that. 

I'm not delusional enough to think I'm actually going to succeed in channeling all of my efforts to one room, but I'm sure going to try!  My plan is to focus on the family room and only do projects in other rooms if they are essentially free.

Here's my "to-do/wishlist" for my family room:


We finally decided on and ordered couches last weekend. This is what we went with:

Don't pay attention to the pillows, I plan to get rid of them.
The furniture layout will be just about the same as a model of our house with two couches in an "L" shape opposite two accent chairs, like this:

I want to do my paint color scheme similar to this too.
Here are some of the things I want for the family room:
 
1. Coffee and console table something like this.

2. Two accent chairs... here are my options: Option 1, Option 2, Option 3, Option 4, Option 5 and Option 6.  I LOVE the target one, but I'm afraid the pattern won't work with some of the other patterns I already have in the room and/or won't be flexible in case I want to change something up in the future.  And as far as the gray options, I'm afraid it will wind up being too similar to the couches, but not exact, so it will look like a failed attempt at matching.  So I guess I'm leaning toward either the navy, peacock, black or really light gray one, but I can't decide!!  Any input is very much appreciated! 

3. Fake fireplace like this one on the wall opposite the couch (behind the two chairs):
 
http://www.buildingsimpleblog.com/2012/11/dining-room-makeover.html
I'm also working on a photo gallery which will go on that wall until we get around to building the "fireplace".  More on that to come!
 
Please share any thoughts... I'm totally open to suggestions!

Monday, November 5, 2012

Design Suggestions Please!?!?

 
The wall that we have our TV on in the family room is very large and has windows at both ends. I already have a pretty nice media console which we are using there now, but it just looks so small on that giant wall and I don't know what to do with the area on either side of it. If the windows weren't there, I would have considered trying to do some built-in shelving/cabinets similar to the picture below, but I think the flanking windows might make that look funny.


Does anyone have any suggestions for a way I can make our wall less boring, while still using my existing media console? Or do you think I should just put the console somewhere else and start from scratch? I'd really like to find a decorating solution that covers up that outlet on the right too. It really bothers me that that's the closest outlet to the TV... I hate exposed wires!
 
Please offer any ideas you may have!  If you have pictures of your ideas, you can email them to movingtothecountryblog@hotmail.com.
 
Thanks in advance for your help!

Tuesday, June 26, 2012

The Courtland Gate

Greg and I visited a decorated Courtland Gate model this weekend.  Our community's model is empty so it was hard to get a feel for how furniture would fit.  The Courtland Gate is the new "sister plan" to the Courtland (our home), which Ryan Homes is phasing out.  Ours will likely be one of the last Courtlands ever built!  The first floor of the CG is almost exactly the same as the Courtland so I got some great decorating/furnishing ideas.  Here are some pictures of the CG model:

Foyer

Living Room (looking from foyer)

Living Room

Living Room (I plan to put my piano where that display case is)

Dining room (looking from living room)

Dining Room

I like the little bar cart in the bay window area

Dining room looking into living room

Study

Family Room (looking from kitchen).  

Family room (note: this family room has the 4' extension)

Family room (I'm pretty sure this is how we will layout our furniture)

Family room (Greg waiting for me to finish taking pictures :))

Family room

Family room looking into kitchen

I love these chairs!  The color and fabric would go perfect with my couch.

Kitchen

Morning room

Morning room

Powder room

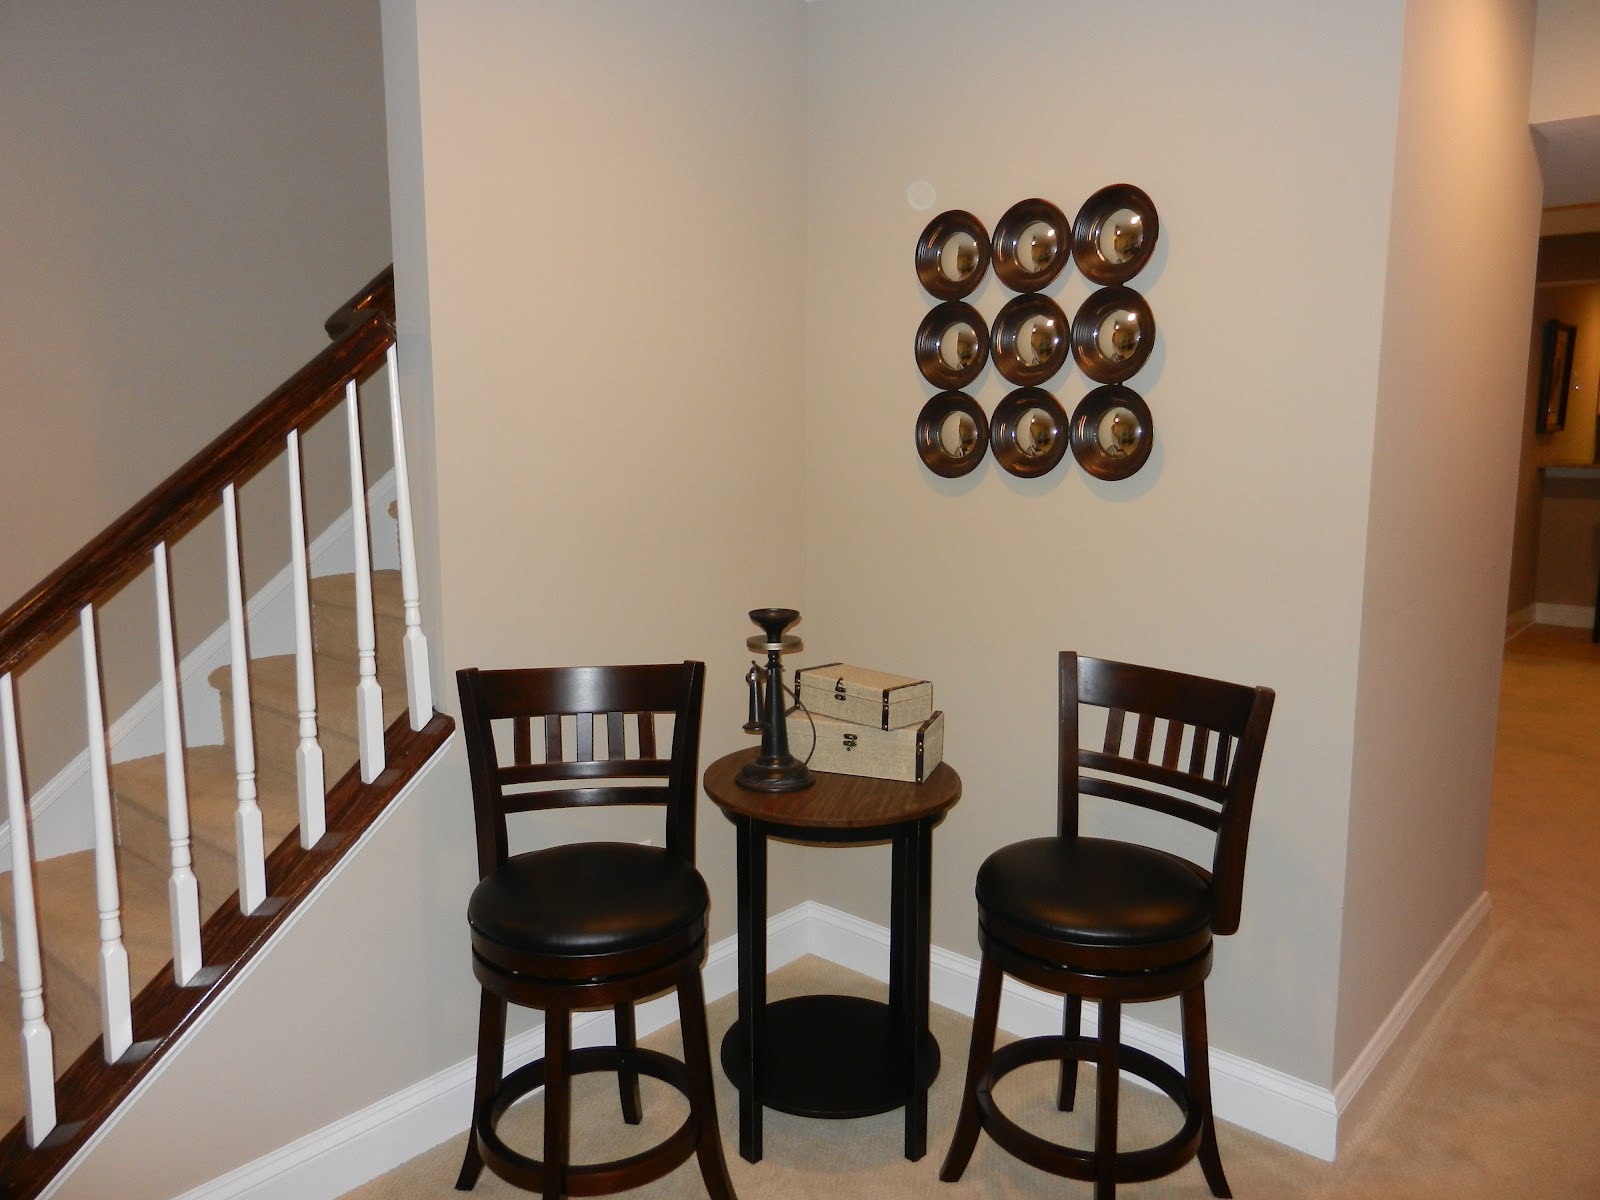
Heading to the basement (I liked those pictures)

Basement (the bar is under the morning room area)

Basement

Basement

Master Bedroom

Master Bedroom (that's the sitting area to the right)

Master bath

Master sitting area (door to the right is the bathroom)

Foyer from upstairs

Things I liked (decorating-wise) from this model:

-Trim in the upper walls of the foyer area.
-Furniture layout of living room and family room.
-I love the chairs and coffee/side tables in the family room.  (I was pleased to see that you can apparently mix wood with black furniture.  I have some black furniture already, but I didn't want to have EVERYTHING black.  I wasn't sure how it would look, but they had a mix of black and dark wood and it looked great).
-Living room curtains (for family room).
-Wall paint colors.  I love the gray accent wall in the family room with the neutral walls running into the kitchen and a slightly darker version of the neutral in the morning room.
-I love the idea of a colorful paint in the master bath.  I will probably do blue instead of the green they had.
-Bar cart in the bay window area in the dining room.
-Study layout.


Note to Anj:  Apparently I didn't get many pictures of the upstairs.  I will probably be back there sometime over the summer so let me know if you want more pictures of anything specific!